


Why Create a Direct Download Link in Webflow?
Direct download links let users access files instantly, making the process easier. These links are useful for:
- Downloadable PDFs (guides, eBooks, whitepapers)
- Resource files (templates, datasets, images)
- Direct access to documents without extra steps
Using direct download links in Webflow keeps things simple and efficient.
Step-by-Step Guide to Creating a Direct Download Link in Webflow
In this article, we aim to show how to create a download link for any file type including the ones that are unsupported by Webflow such as JSON, RAW and ZIP.
Step 1: Upload Your File to Webflow
You can add a supported file for download in the following way:
- Open Webflow’s Designer.
- Go to the Assets panel.
- Click Upload > choose your file (PDF, ZIP, image, or other.).
- Copy the file's url. There are two methods to do that:
- First one is by selecting the URL and pressing "Command" + "C" on mac, "CTRL" + "C" on windows.
- Second method is to right-click your mouse and select "Copy URL" option.
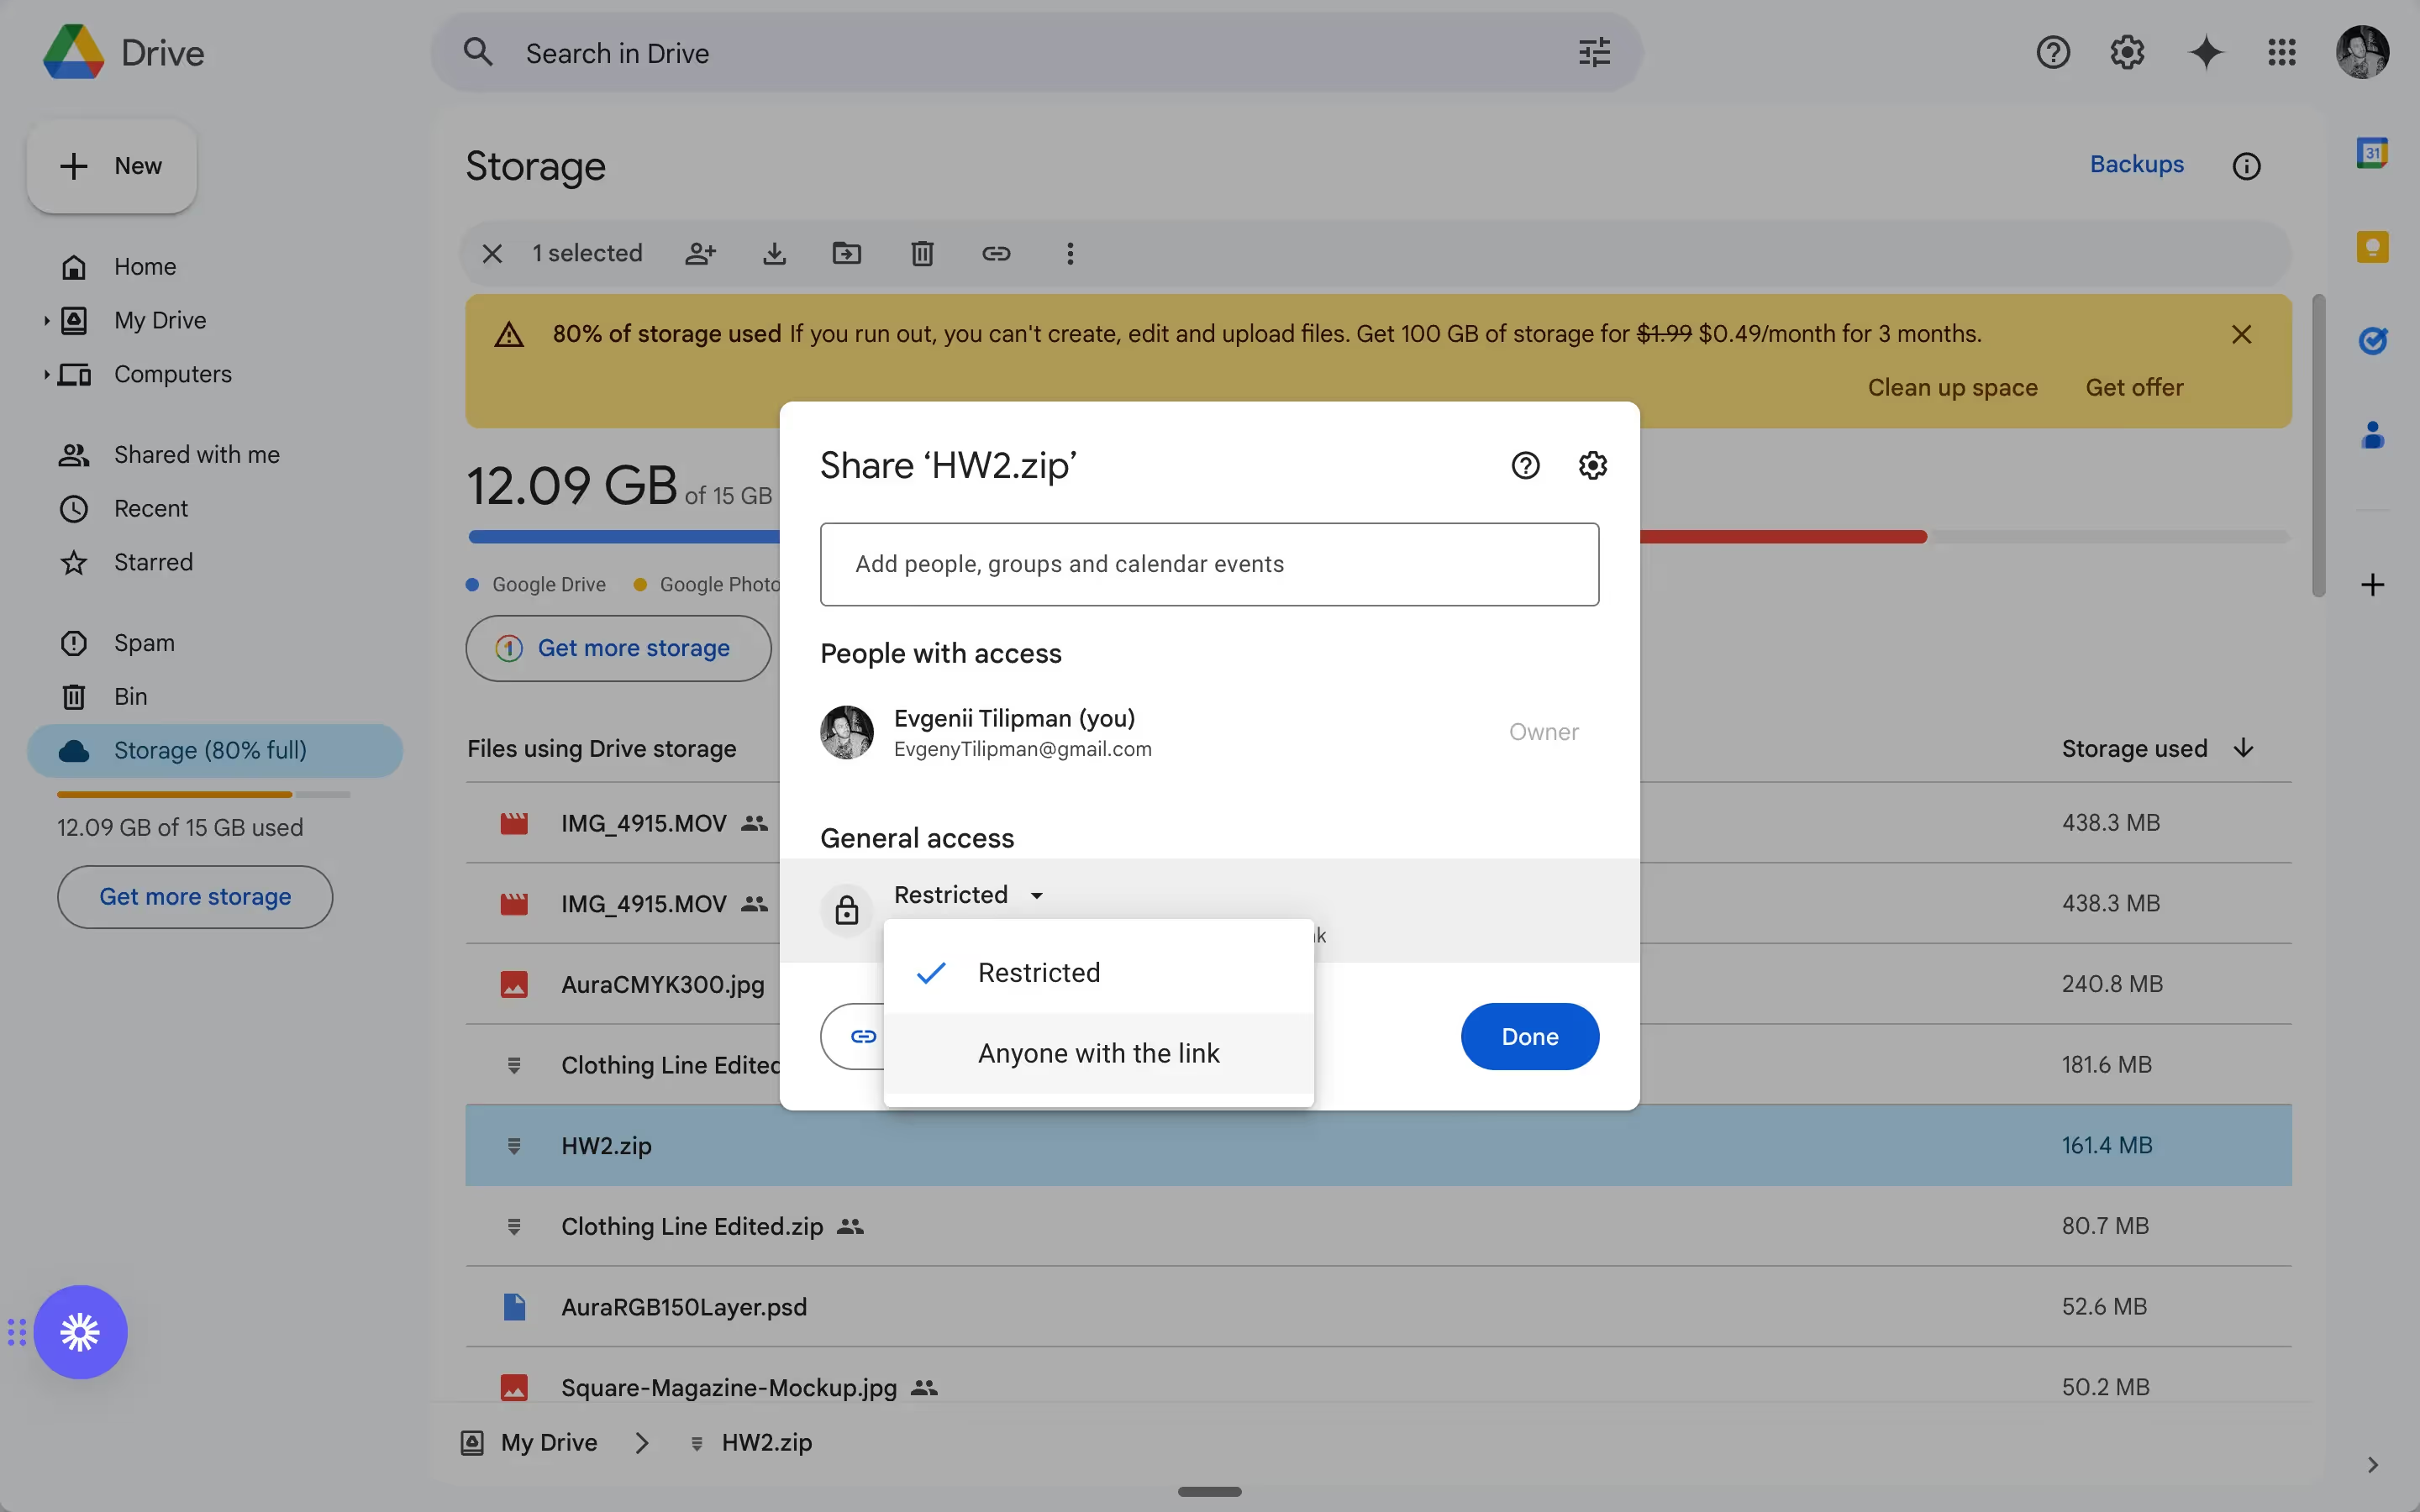
You can also host files externally using Google Drive, Dropbox, or Amazon S3 and copy the shareable link. We prefer using this method and hosting files in Google Drive as the tool allows you to host file types that are not supported by Webflow. We are going to use Google Drive as the file hosting tool as anexample for the article.
First thing's first—make sure that the sharable links are available to the public.
Step 2: Generate the Direct Download Link
Once you have the file URL:
- If hosted on Webflow, use the URL from the Asset Manager.
- If using an external service, make sure the link allows direct downloads (e.g., for Google Drive, remove ending
view?usp=sharingfrom the URL and adduc?export=download&id=after the first "/").
Step 3: Add the Download Link to Your Webflow Site
If you're looking to insert the direct download link on a static page, follow these steps:
- Select a Text Link or Link Block for the Download Link
- If you want a text link, add a Text Link or Link Block.
- If using an image, first wrap it inside a Link Block.
- Set the Download Link
- Open the Settings panel on the link by clicking "D" on your keyboard and then clicking on the Gear icon.
- In the Link field, paste the copied URL from Step 1.
- Adjust Settings for Better UX
- Enable “Open in new tab” (optional but useful for PDFs).
- Use a clear and descriptive label like “Download Now” if styling text links and button elements.
- Publish & Test
- Click Publish in Webflow and test the download link on desktop and mobile.
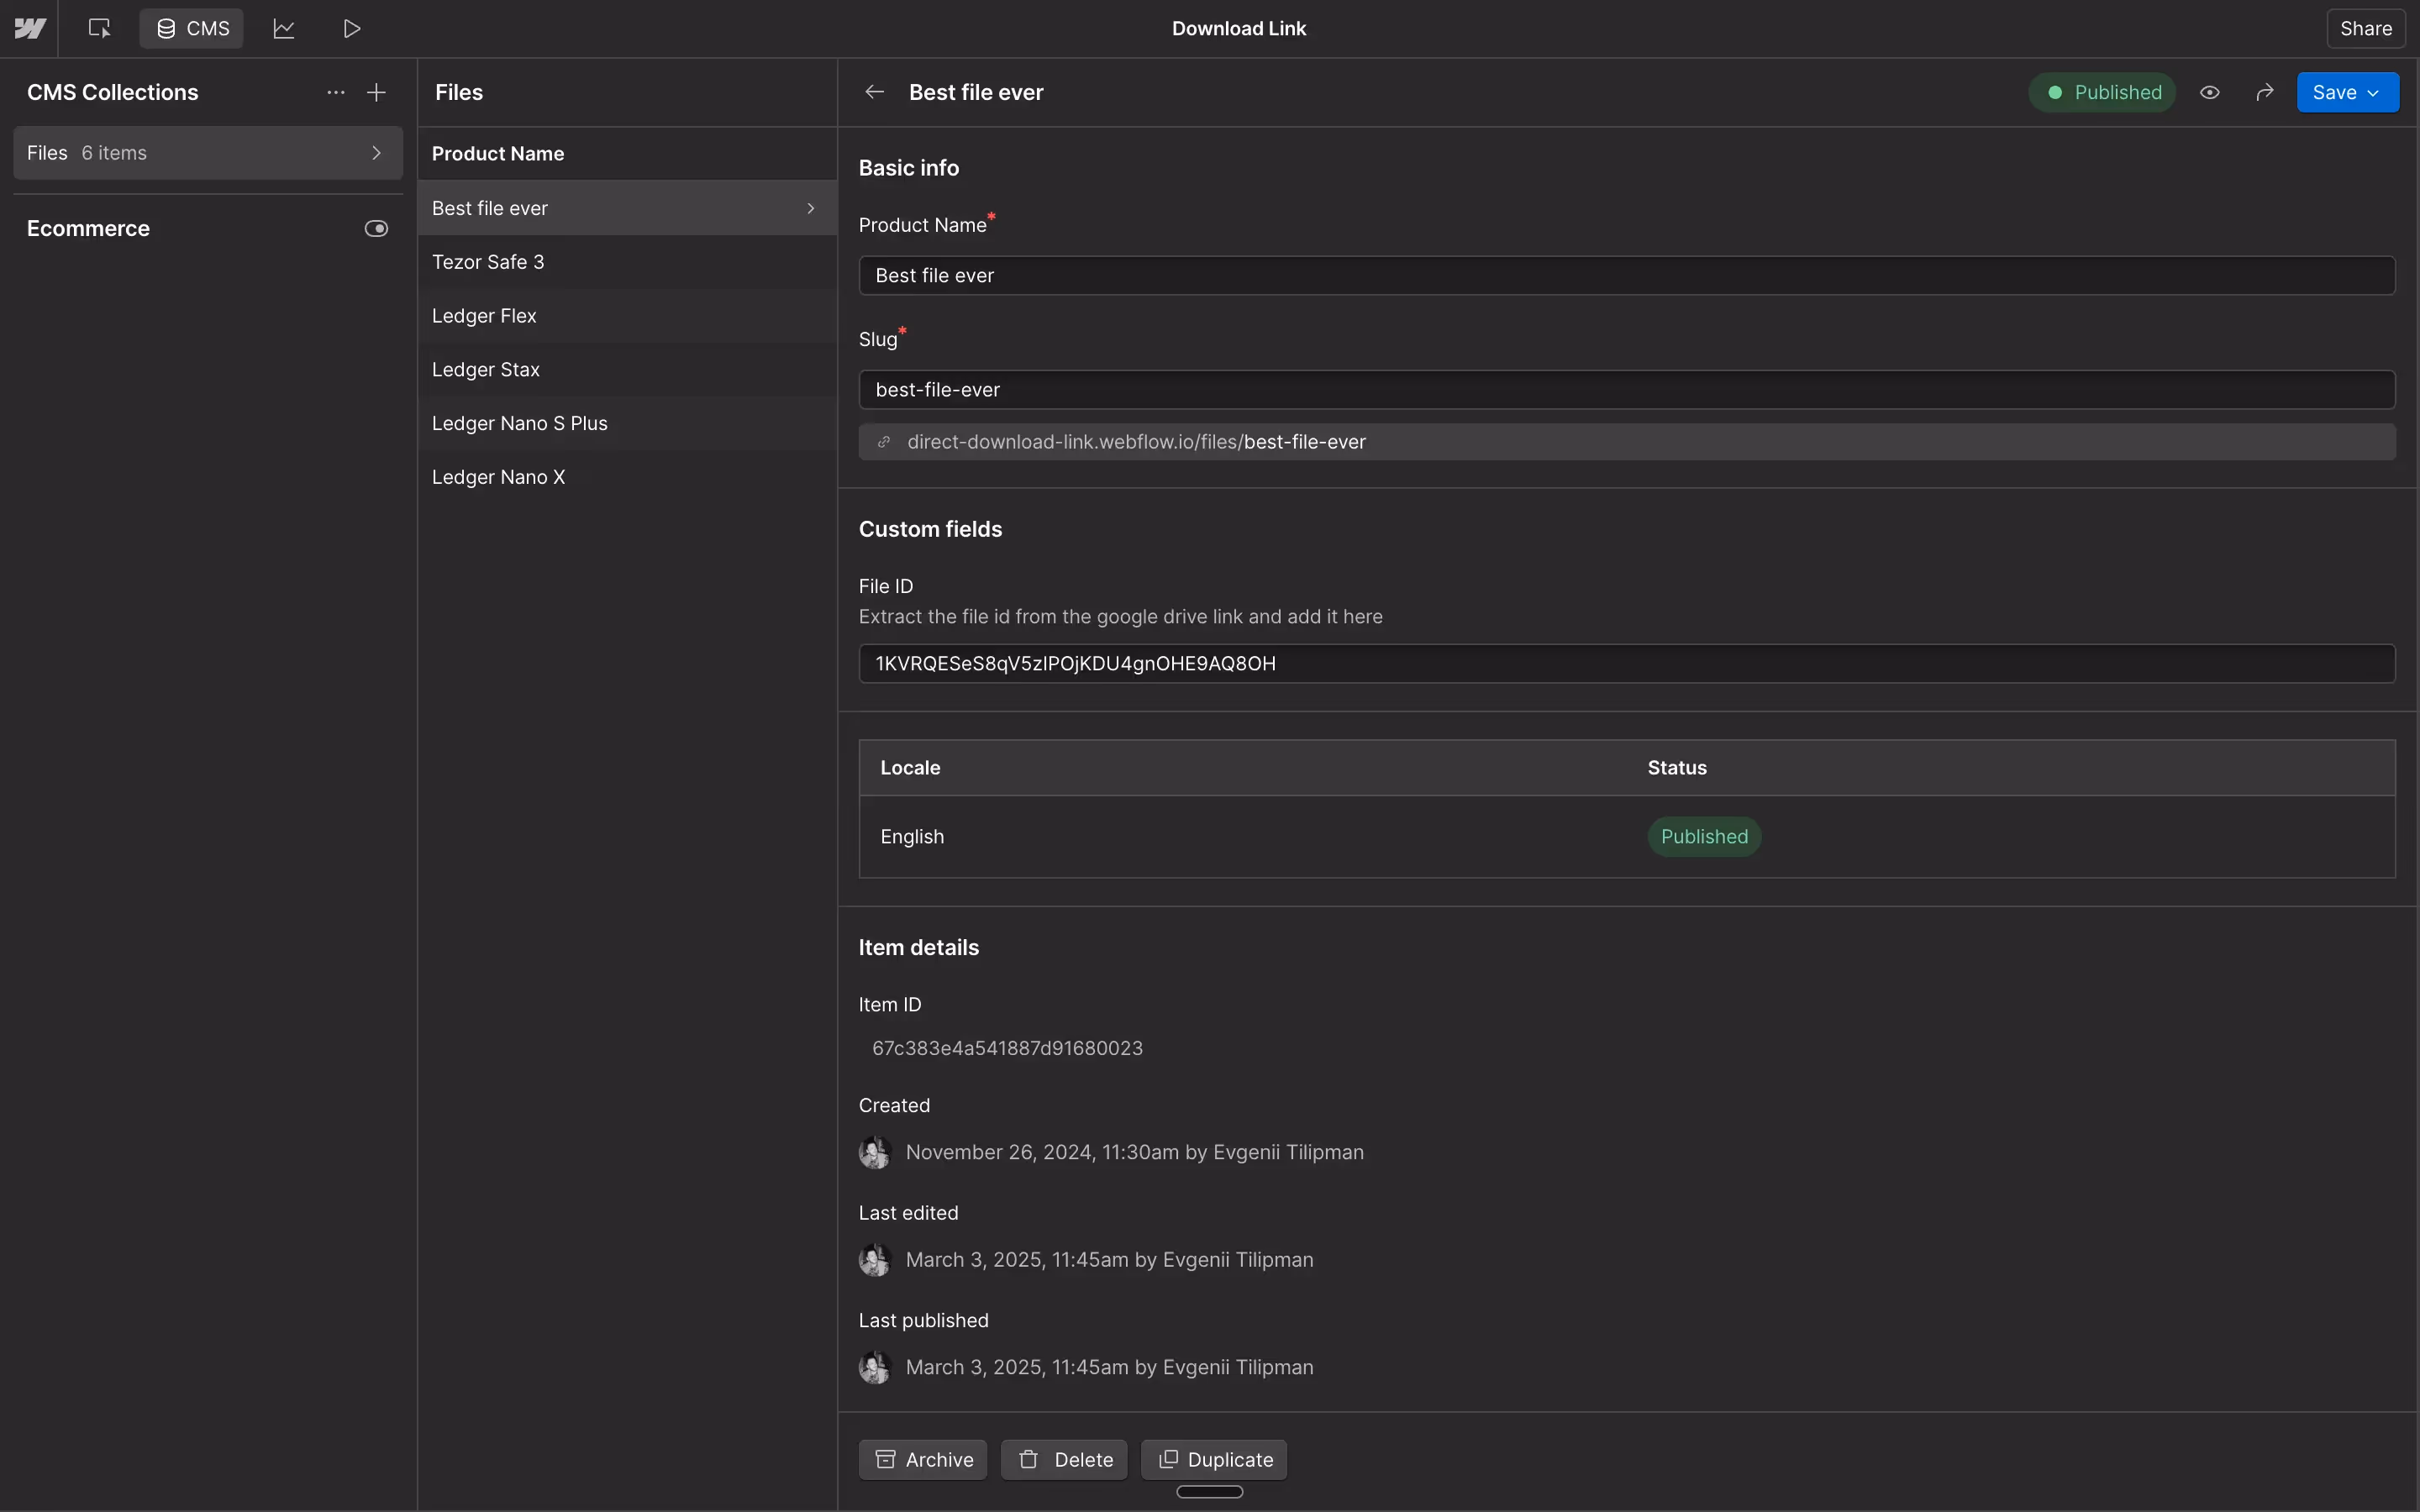
If you're adding the direct download link to a dynamic (CMS) page, follow these steps:
- Add a text field in CMS
- Name it something like “Link ID”.
- Insert an Embed Element Instead of a Text Link or Link Block
- Drag an Embed element onto the CMS page where the download link should appear.
- Add the Following Code Into the Embed:
1<a href="https://drive.google.com/uc?export=download&id={{Link ID}}" class="button" target="_blank">Download Now</a>- Replace
{{Link ID}}with the dynamic field from the CMS containing the unique file identifier.
Best Practices:
- Make sure your button or link is easy to find.
- Keep file names clear and relevant.
Our YouTube Guide on Download Links in Webflow
For a visual walkthrough, watch our YouTube tutorial:
Testing and Optimizing Your Download Links
Before publishing:
- Click the link on desktop and mobile to confirm it works.
- Check file permissions to ensure users can download it.
- Use Google PageSpeed Insights to get insights to avoid slowdowns.
- Protect sensitive files by hosting them securely.
Bonus Tip: Why the download Attribute Doesn’t Work in Webflow (and a Workaround)
If you’ve tried using the download attribute in Webflow, you might have noticed it doesn’t work as expected. That’s because Webflow hosts all uploaded files on a different domain (specifically, cdn.prod.website-files.com), and for security reasons, modern browsers only allow the download attribute to work on links that match the website’s domain.
Workaround for Advanced Users:
If you need the download attribute to work properly:
- Host your files on a service like Cloudflare R2 or Amazon S3.
- Set up a subdomain (e.g.,
downloads.yoursite.com) that points to your storage bucket. - Use JavaScript to apply the
downloadattribute dynamically to links that point to your subdomain.
Example of JavaScript:
1document.addEventListener("DOMContentLoaded", function () {
2  const links = document.querySelectorAll('a[href^="https://downloads.yoursite.com"]');
3
4  links.forEach(link => {
5    link.setAttribute("download", "");
6  });
7});
This method is overkill for most use cases, but if you're building a gated or controlled download system, it might be the right move.
For most users, we still recommend using Google Drive or Dropbox with a direct link format—it’s faster to set up and works reliably.
FAQs on Direct Download Links in Webflow
Can I use direct download links for any file type in Webflow?
Webflow supports downloads for common files like PDFs and images, but formats like ZIP and JSON require hosting on external platforms like Google Drive, AWS, or Dropbox. You can still create direct download links from these platforms with a few tweaks.
How can I track file downloads on my Webflow site?
Webflow doesn’t track downloads out of the box. To see how often users click your download links, you can set up Google Analytics or Tag Manager. If you’re looking for a done-for-you solution, our team can help implement this seamlessly.
Can I make a download link private or password-protected?
Webflow doesn’t allow password-protecting individual files. However, you can place download links on a password-protected page or use expiring links from Google Drive for tighter control.
What happens if I move the file in Google Drive?
If you move a file, the original link may break. Always double-check and update your Webflow site with the new link to avoid errors.
Need Help with Webflow Development?
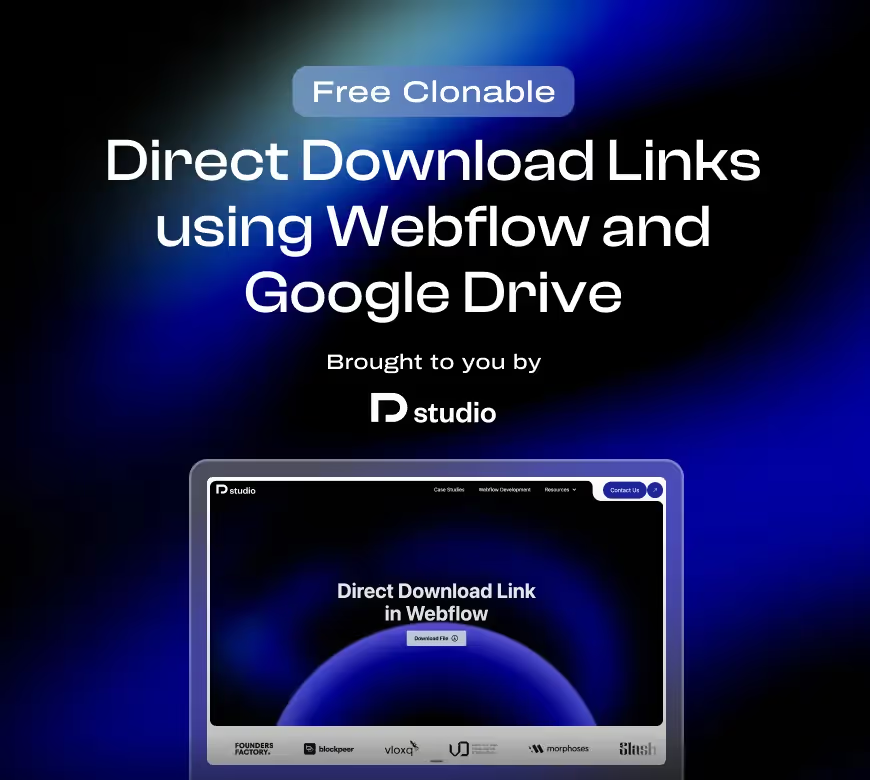
Want an easier way to add a direct download link? We’ve created a free Webflow clonable that you can use right away. It’s fully customizable and saves you time when setting up file downloads on your site.
And if your needs are surpassing a file management system with download link functionality, our Webflow Development Agency.