


Introduction
Most Webflow pages follow a standard scrolling pattern—users move down through stacked sections of content. But when presenting a pitch deck, a continuous scrolling experience can enhance engagement and create a more structured presentation.
An infinite vertical slideshow allows content to flow seamlessly without abrupt stops, making it ideal for client presentations, product showcases, interactive portfolios, and storytelling.
While Webflow supports infinite sliders, they are limited to horizontal layouts. Workarounds exist for vertical loops using native Webflow interactions, but these methods are often unreliable for real-world use. Instead, we built a fully functional infinite vertical slideshow using CSS and Swiper.js to host a pitch deck directly on a Webflow page.
This guide provides a step-by-step walkthrough for setting it up in Webflow. If you’re looking for expert implementation, we cover this as part of our Webflow Development Services.
Why Use a Vertical Slideshow for a Pitchdeck?
A vertical slideshow changes how content is presented by guiding users through it, rather than letting them passively scroll.

Use Cases
- Client presentations – Seamlessly walk prospects through your work.
- Product showcases – Highlight features in an interactive, engaging way.
- Portfolios – Create a high-end, immersive experience.
- Storytelling – Make landing pages more engaging and fluid.
Why Webflow Requires Customization
Webflow has several limitations when it comes to implementing a vertical slideshow for a pitch deck:
- It only supports horizontal sliders—vertical sliders require custom code.
- There’s no built-in infinite loop support, making the experience feel limited.
- Webflow’s default scroll behavior does not allow smooth, controlled auto-scrolling.
To address this, we used Swiper.js to create a fully responsive, looping vertical slideshow.
What You’ll Need
To implement an infinite vertical slideshow, ensure you have:
- A Webflow project with custom code capabilities.
- Basic understanding of CSS & JavaScript.
- A basic understanding of Swiper.js.
Recommended Resources:
Step-by-Step Guide
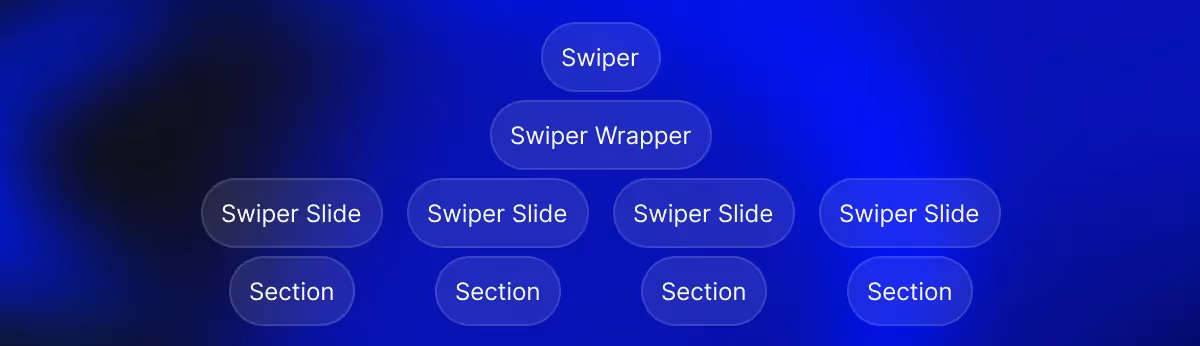
Step 1. Setting Up Your Webflow Structure
- Create a slider div block (
swiper). - Create a slider wrapper block (
swiper-wrapper). - Add child div blocks for each slide (swiper-
slide). - Ensure each slide contains content—images, text, or buttons.
- Set swiper to overflow to hidden to keep everything contained and prevent issues.
Step 2. Styling the Layout with CSS
To ensure the slides stack vertically and behave smoothly, add the following CSS:
1.swiper-slide {
2  min-width: 100vw;
3  min-height: 100svh;
4  padding: .75rem;
5  display: flex;
6  align-items: center;
7  justify-content: center;
8}
9.swiper {
10  width: 100vw;
11  min-height: 100svh;
12}
Key takeaways:
min-height: 100vhensures each slide fills the full screen.overflow: hiddenprevents unwanted scrolling outsde of the viewport boundaries.- code from
display: flexonwards centers the content.
Step 3. Adding Smooth Motion with Swiper.js
Keep in mind, there are various wasys to create the same functionality. We are using Swiper.js for simplicity sake
- Add the Swiper.js CDN in Webflow’s Page Settings > Custom Code under
<head>:
1<script src="https://cdn.jsdelivr.net/npm/swiper@8/swiper-bundle.min.js"></script>-
Initialize Swiper in Custom Code before</body>:
1  var swiper = new Swiper('.swiper', {
2    direction: 'vertical',
3    loop: false, // Change to true for infinite scrolling
4    mousewheel: true,
5    keyboard: true,
6    speed: 500,
7  });
This method enables smooth vertical scrolling and pagination indicators.4. Enhancing the ExperienceTo improve usability:
- Enable autoplay – Add
autoplay: { delay: 3000 }in Swiper.js settings. - Add navigation – Use arrows or pagination for better control.
- Ensure mobile-friendly behavior – Test touch gestures for a smooth experience.
For basic sliders that don’t require custom JavaScript, or uncommon functionalities such as this one, Webflow’s native slider component offers a simple and effective solution. We cover how to build different slider types in our guide on Webflow Sliders.
Step 5: Restricting the Slideshow to Desktop Only
Because this pitch deck is designed for live client presentations, we made sure it is accessible only on desktop devices.
To do this, we:
- Hide the page from mobile breakpoints in Webflow.
- Optimized Swiper.js for desktop interactions (mousewheel & keyboard navigation).
- Ensured the aspect ratio fits widescreen displays.
This guarantees a smooth, professional experience during presentations.
Step 6. Testing & Optimizing
Before publishing, check for:
- Cross-device compatibility – Ensure smooth scrolling on mobile and desktop.
- Browser support – Test on Chrome, Safari, Edge, and Firefox.
- Performance optimization – Use lazy loading for images inside slides.
This video is a perfect explainer of how Swiper is used to create sliders in Webflow. Watch it to get a deeper understanding of the tool.
Advanced Settings – Making It Infinite
By default, a vertical slideshow stops at the last slide. To make it infinite, apply one of these methods:
Option 1: Enable Swiper.js Loop
Modify the Swiper settings:
1loop: true, // Enables infinite loopingWhile this method is simple, it can sometimes cause flickering in transitions.
Option 2: Duplicate Slides for Seamless Looping
A more robust approach is manually duplicating the first and last slides in Webflow. When users reach the last slide, the transition back to the first slide appears seamless.
Taking It Further
To extend functionality:
- Integrate Webflow CMS – Dynamically load slideshow content from the CMS.
- Customize animations – Add fade-in/out effects between slides.
- Experiment with layouts – Use multi-column sections inside each slide.
Conclusion
An infinite vertical slideshow enhances engagement by making content flow seamlessly.
Webflow does not support this natively, but with CSS and Swiper.js, it is entirely possible to build.
For businesses and designers looking for an expert implementation, our Webflow Development Services ensure a seamless setup without technical complexities.
Otherwise, if you feel like this article has helped you clear up the utilization, but would like to see real life use case, feel free to download our clonable.