


Customizing the text selection color on your Webflow site can be a subtle yet impactful way to enhance your website’s design and user experience. This guide will show you how to implement custom text selection styles in Webflow using both CSS and JavaScript. Additionally, we'll introduce a feature that cycles through a palette of vibrant colors for selected text and ensures great contrast for readability.
Why Customize Text Selection?
Customizing text selection is a subtle yet impactful way to elevate your website’s design, which ultimately leads to higher website engagement. By doing so, you can:
- Create a more engaging, cohesive experience that reflects your brand identity.
- Strengthen your branding by incorporating your brand’s colors.
- Add a subtle interactive element that delights users.
- Create a more polished design.
For B2B websites, where design plays a crucial role in establishing trust and credibility, such elements can leave a lasting impression. If you're aiming to create a memorable and functional digital presence, partnering with a B2B web design agency ensures every detail aligns with your brand strategy.
Let's dive into implementing such solution in Webflow.
Prerequisites
Before diving in, ensure you have:
- A Webflow project with custom code enabled (available on paid plans).
- Basic understanding of how to work with global CSS and JavaScript in Webflow.
Option 1: Customizing Text Selection with CSS
You can style text selection by adding a global CSS snippet to your site. This CSS defines custom colors for text selection, including variations based on section attributes.
CSS Snippet
Depending on the design, you will want to customize the CSS snippet. We will go over the simpler and a more complex CSS implementation.
Simple Implementation
The simple implementation edits the selection style regardless of whether or not there are dark and light sections within the site.
1::selection{
2	background: #DB005F;
3	color: #FFFFFF;
4}
Advanced Implementation
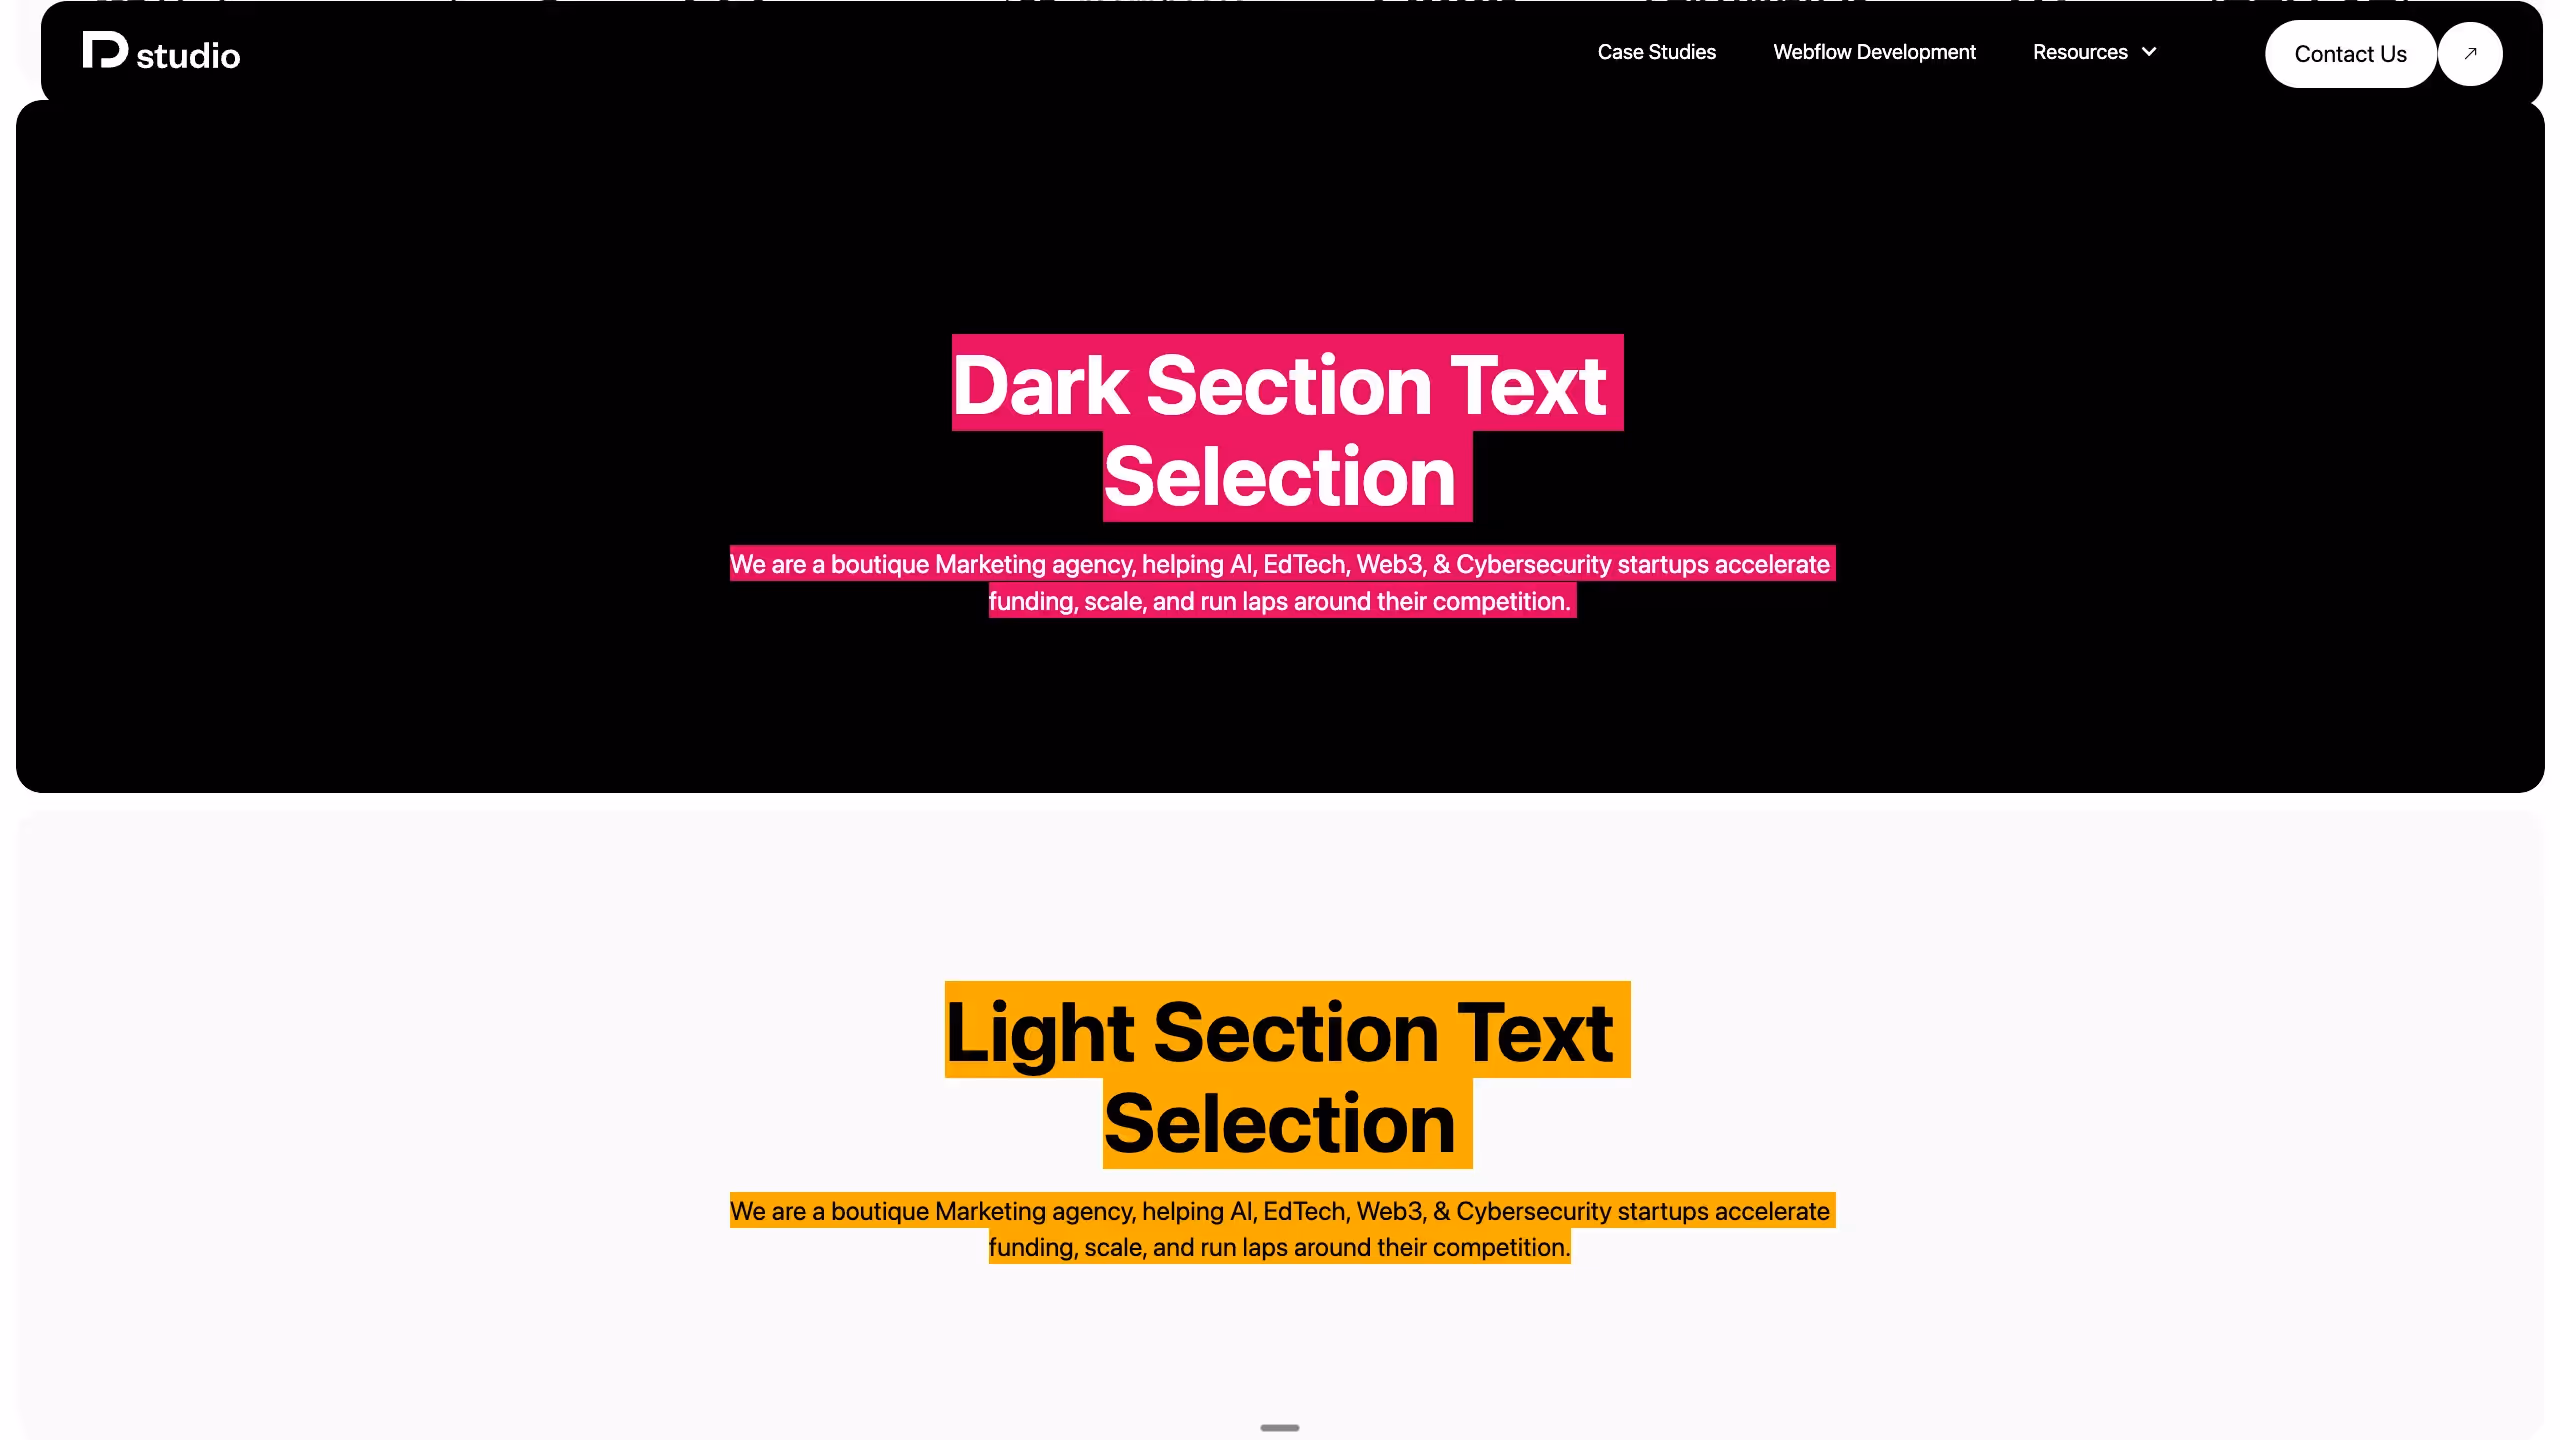
The advanced implementation edits the selection style depending on the attribute of the sections.
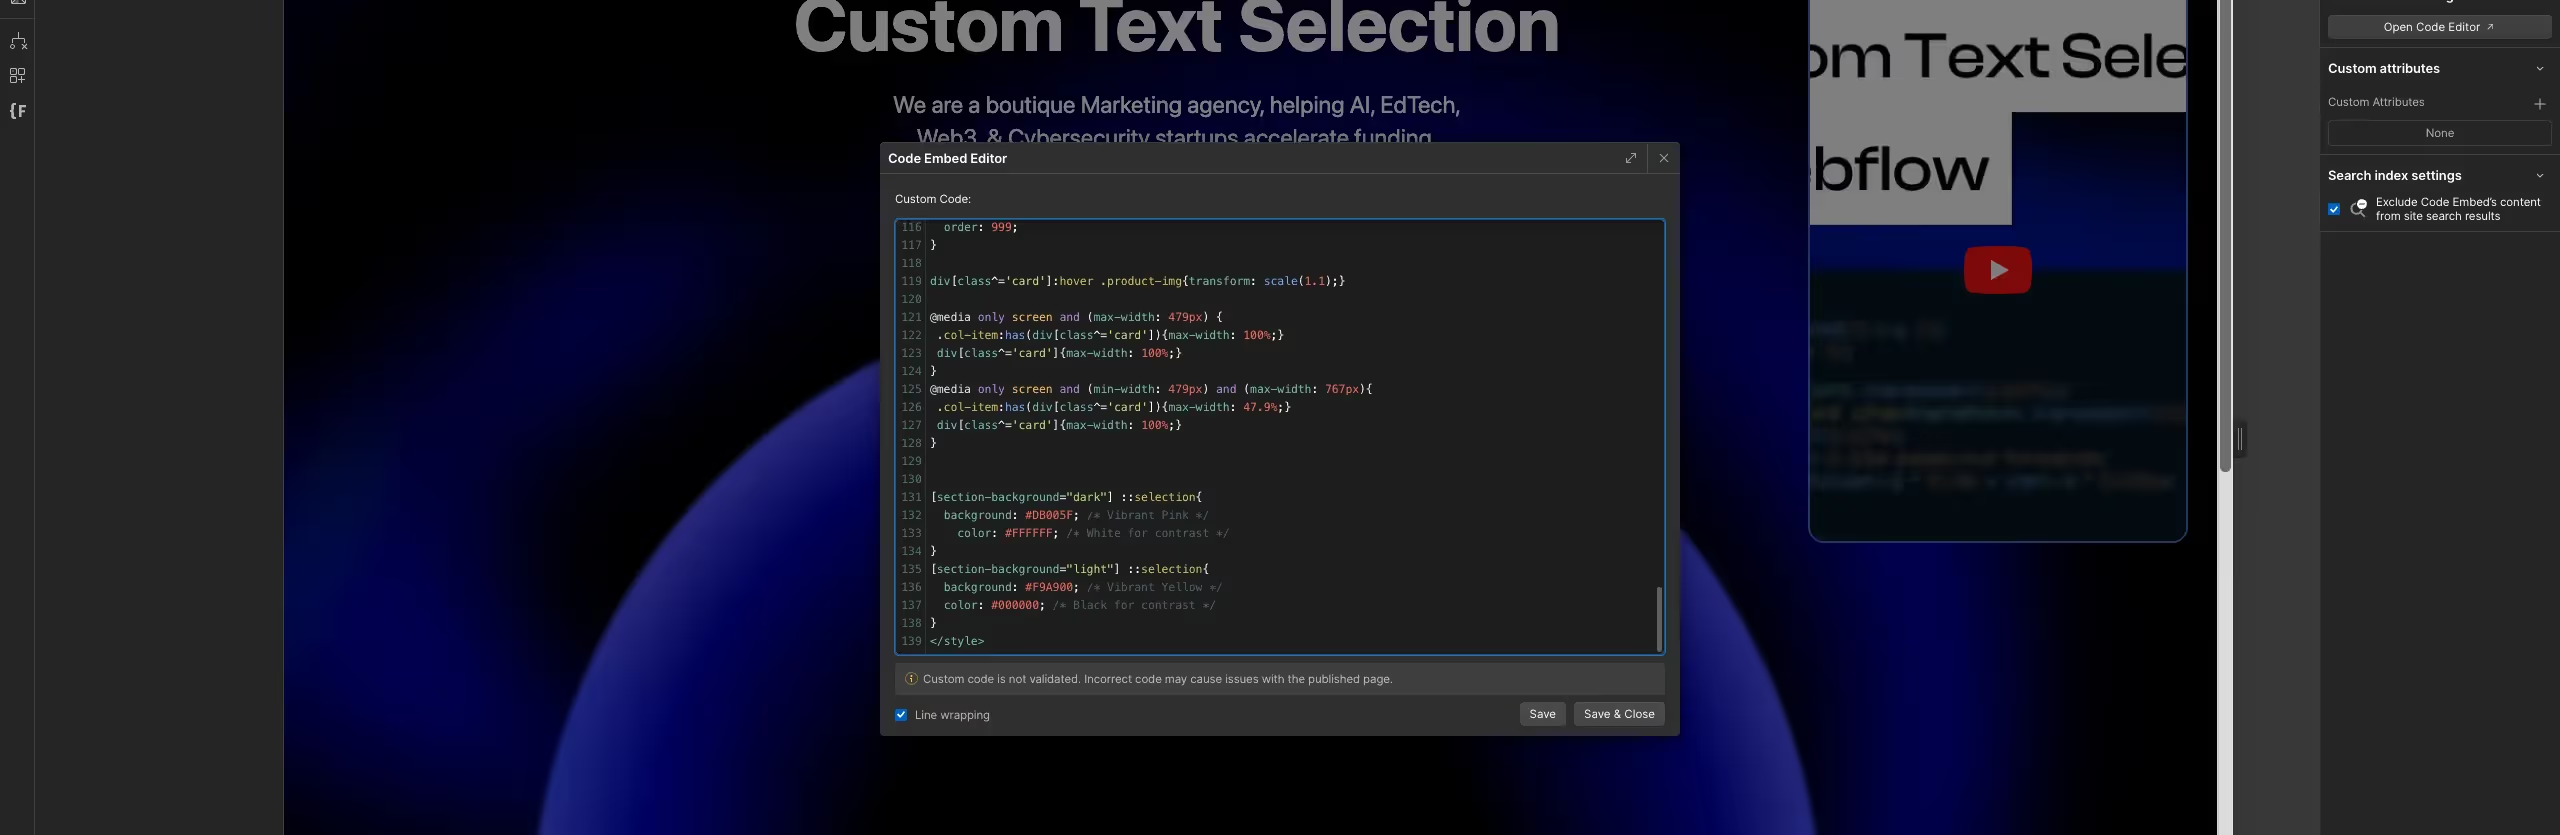
1[section-background="dark"] ::selection{
2	background: #DB005F; /* Vibrant Pink */
3    color: #FFFFFF; /* White for contrast */
4}
5[section-background="light"] ::selection{
6	background: #F9A900; /* Vibrant Yellow */
7	color: #000000; /* Black for contrast */
8}- The
[section-background="dark"]and[section-background="light"]attributes should be added to your section elements in Webflow. - Text within sections marked with these attributes will display custom selection colors.
How to Add the CSS:
There are 2 best weys to add the code to the site.
First Method — Site Settings
- Navigate to your Webflow project settings.
- Under Custom Code, paste the CSS in the
<style>tags of the Head Code or in a global embed component. - Publish your changes.
Second Method — Global Embed Component
- Navigate to designer view.
- Go to Global Embed, and drop into the component's embed.
- Add the code, and save the embed.
- Publish your changes.
Option 2: Enhancing the Selection Experience with JavaScript
If you want to go a step further and dynamically cycle through multiple selection colors, here’s how you can implement a JavaScript solution.
JavaScript Snippet
This script cycles through four background colors (#DB005F, #F9A900, #C238DA, and #FF5900) and ensures that the text color contrasts well with the background.
1    // Define an array of background colors to cycle through
2    const highlightBackgrounds = ['#DB005F', '#F9A900', '#C238DA', '#FF5900'];
3
4    // Helper function to calculate the brightness of a color
5    function getBrightness(hexColor) {
6        const r = parseInt(hexColor.substr(1, 2), 16); // Red component
7        const g = parseInt(hexColor.substr(3, 2), 16); // Green component
8        const b = parseInt(hexColor.substr(5, 2), 16); // Blue component
9        return (r * 0.299 + g * 0.587 + b * 0.114) / 255; // Weighted brightness formula
10    }
11
12    // Helper function to determine text color for optimal contrast
13    function getTextColor(hexColor) {
14        return getBrightness(hexColor) > 0.5 ? '#000000' : '#FFFFFF';
15    }
16
17    // Create a <style> element to dynamically update ::selection styles
18    const style = document.createElement('style');
19    document.head.appendChild(style);
20
21    // Counter for cycling through highlight colors
22    let selectionCount = 0;
23
24    // Function to update ::selection styles dynamically
25    function updateSelectionStyle() {
26        const currentBackground = highlightBackgrounds[selectionCount % highlightBackgrounds.length];
27        const currentTextColor = getTextColor(currentBackground);
28        style.textContent = `
29            ::selection {
30                background: ${currentBackground} !important;
31                color: ${currentTextColor} !important;
32            }
33        `;
34    }
35
36    // Initialize the ::selection style
37    updateSelectionStyle();
38
39    // Event listener for mouseup to cycle selection colors
40    document.addEventListener('mouseup', () => {
41        const selectionText = window.getSelection().toString(); // Get selected text
42        if (selectionText.length > 0) {
43            selectionCount++; // Increment selection counter
44            updateSelectionStyle(); // Update the selection style
45        }
46    });
47
48    // Optional: Handle cases when the user clears the selection
49    document.addEventListener('selectionchange', () => {
50        if (window.getSelection().toString().length === 0) {
51            // No reset required here unless intended
52        }
53    });
How to Add the JavaScript:
- Copy the script above.
- Navigate to your Webflow project settings.
- Paste the script into the Before Body Tag section of the custom code settings or use a global embed component.
Drawbacks of Using JavaScript for Text Selection
While JavaScript can create more dynamic and engaging experiences, there are some drawbacks:
- Increased Complexity: JavaScript adds a layer of complexity, especially for a simple customization.
- Performance Concerns: Custom selection styles using JavaScript can slightly affect page performance compared to a CSS-only solution.
- Potential for Rage Clicks: Dynamically changing selection styles might confuse users, leading to continuous clicking, especially on content-heavy pages.
When to Use JavaScript
Reserve the JavaScript method for projects where interactivity is essential and user experience won’t be hindered by potential complexity.

Conclusion
If you’ve followed these steps correctly, you should now have a fully functional, dynamic text selection customization that cycles through contrasting colors, tailored to your site’s design. Whether using CSS for efficiency or enhancing it with JavaScript for interactivity, this implementation adds a polished, user-focused touch to your website’s experience.
However, if you’ve followed along and still find yourself stuck or unsure about the implementation, our Webflow Development Agency is here to help. With proven expertise in crafting custom solutions, we can ensure your project achieves the level of precision and functionality it deserves.
Looking for more small details you can add that can help you polish your brand? Read our guide on creating custom scrollbars in Webflow.