


Introduction – Why Redirects Matter
If you’ve ever redesigned your website, moved pages around, or migrated from another platform, you’ve likely run into the need for redirects — specifically, 301 redirects.
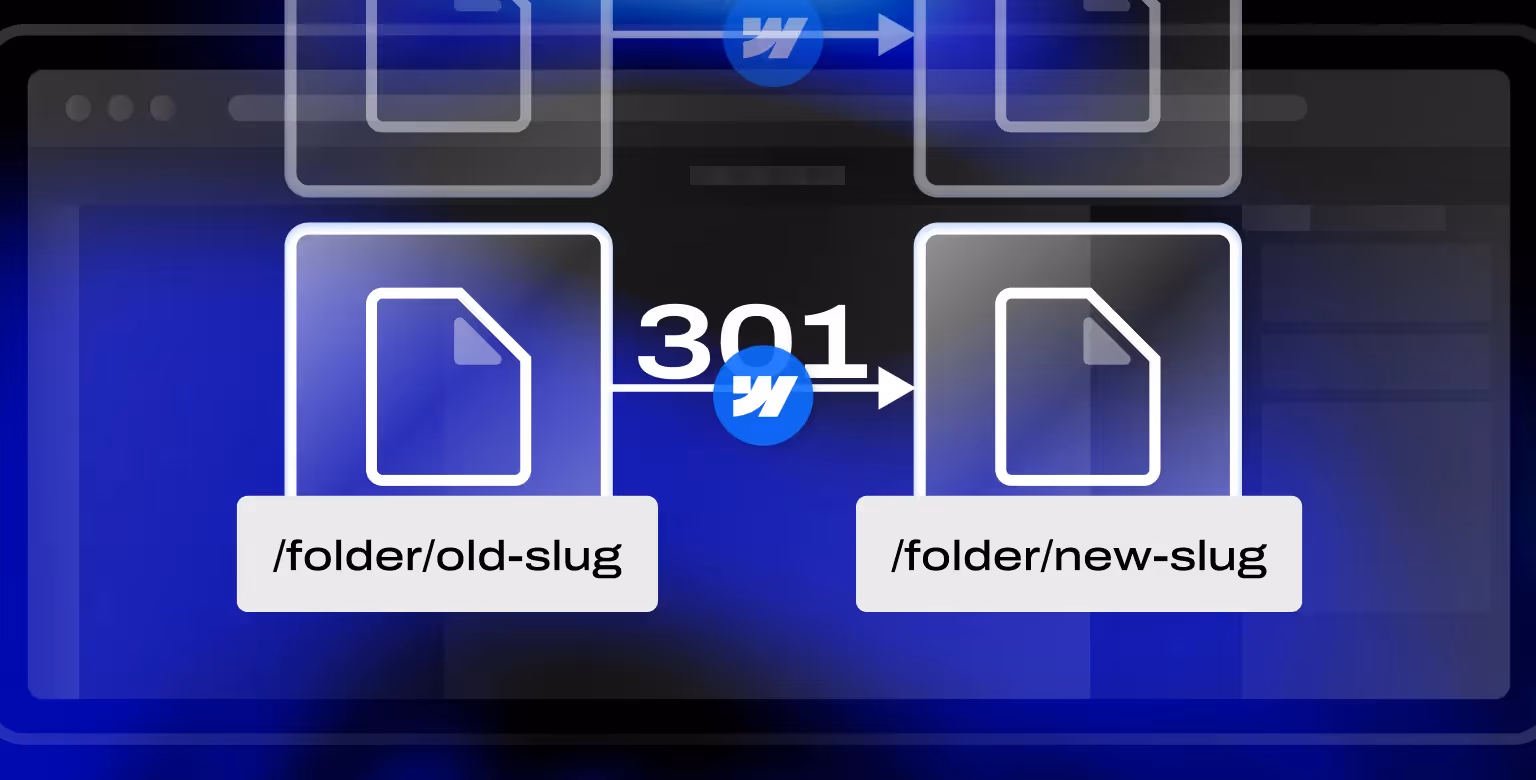
A 301 redirect is a way to send both users and search engines from one URL to another. It ensures that anyone visiting your old URL is automatically sent to the new one, preserving traffic and link equity. Think of it as forwarding your mail when you change addresses.
In Webflow, setting up 301 redirects is so simple you won’t need a developer’s help. Even if you’re building your site solo, you can manage redirects confidently on your own.
In this guide, we’ll explain when and why to use 301 redirects in Webflow, how to set them up, avoid common mistakes, and keep your site clean and search-friendly.
What Is a 301 Redirect? (Plain English)
A 301 redirect is like a change-of-address notice for your website. When someone (or Google) tries to visit an old URL, the redirect tells their browser, "Hey, this page has moved permanently — here’s the new location."
From a technical standpoint, a 301 status code signals a permanent redirect. This is different from a 302, which is used for temporary redirects. Google and other search engines treat 301s as permanent and pass most of the SEO value (like backlinks) from the old URL to the new one.
If you want to explore how Webflow handles SEO, check out our article: Debunking Webflow Misconceptions: Does Webflow Negatively Impact SEO?.
In Webflow, 301 is the standard. And for good reason — it’s the most SEO-friendly way to ensure your updated URLs still perform and rank.
When Should You Use a Redirect?
Here are a few common situations where adding a 301 redirect in Webflow is not just helpful, but essential:
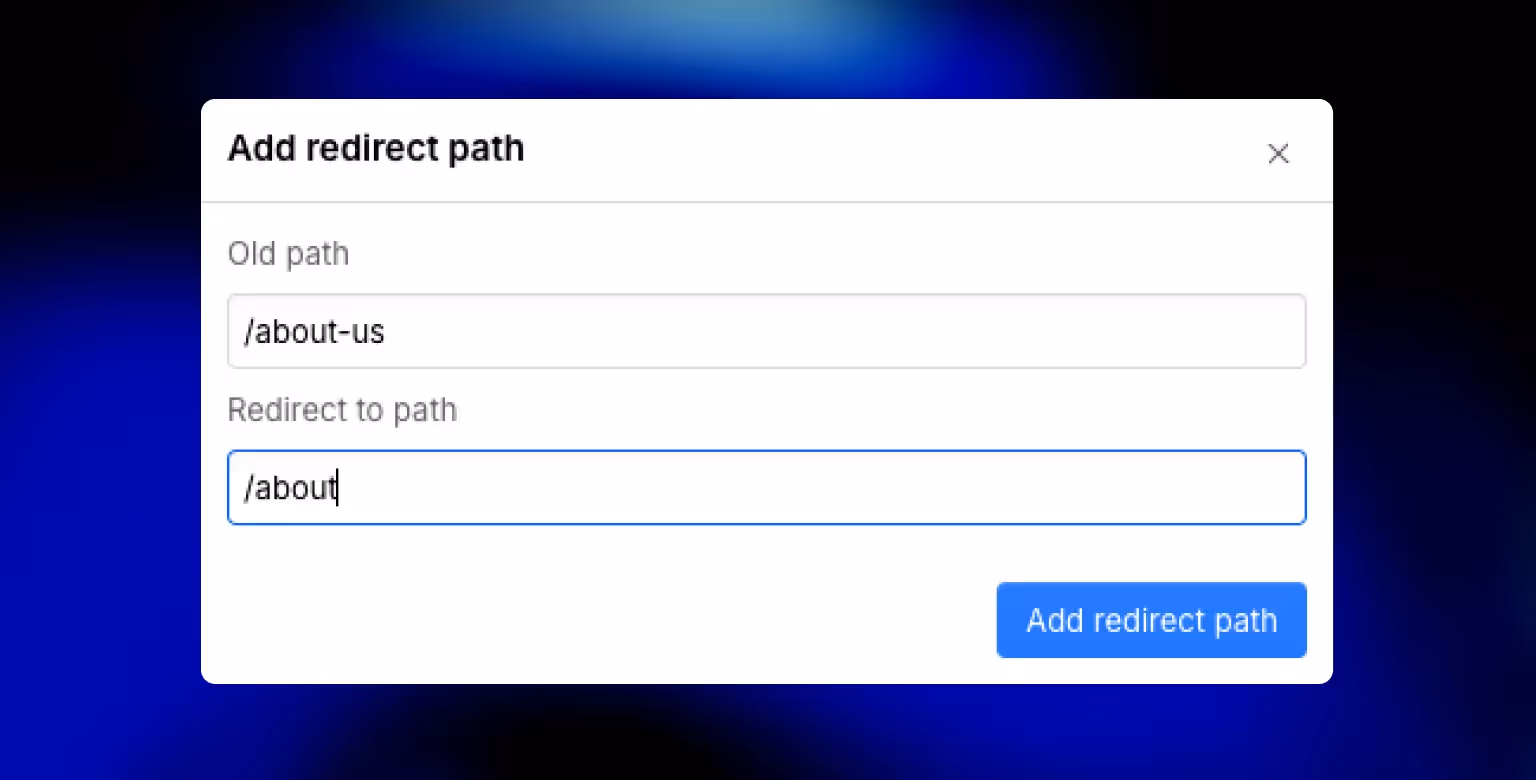
- You changed a page slug (e.g.,
/about-us→/about) - You deleted or merged a page and want to send visitors to a relevant replacement
- You migrated your website from another platform and want to preserve traffic from old URLs
- You’re consolidating several pages into one new destination
Using redirects in these scenarios helps you maintain link authority, prevent 404 errors, and provide a better user experience.
Even if you're not an SEO expert, setting up a 301 redirect in Webflow is straightforward, and worth doing right. It’s one of the simplest ways to improve your site’s structure and protect search performance as your content evolves.
How to Create a 301 Redirect in Webflow (Step-by-Step)
Ready to implement a redirect? Here’s how to do it in Webflow:
- Open Project Settings – Log into your Webflow dashboard and open the site you’re working on.
- Go to Hosting Tab – Navigate to the Hosting section of the settings.
- Scroll to the 301 Redirects Section – It’s near the bottom of the page.
- Enter the Old Path – This is the URL you want to redirect from. Example: /old-page (no domain needed).
- Enter the New Path – This is the destination URL. Example: /new-page or https://externaldomain.com/new-location.
- Click “Add Redirect Path” – The redirect rule will now appear in your list.
- Publish Your Site – Redirects won’t go live until you publish the changes.
💡 Pro Tip: The paths must be an exact match. Be sure to test capitalization, dashes, and spelling. Webflow does not require the full URL — just the relative path.
Once live, your 301 redirect will quietly send both users and bots to the correct location, protecting your SEO value and user experience. Still, if you want to ensure your pages are indexed as quickly as possible, you'll want to submit for indexing in Google Search Console (GSC). Not sure how to do that? We have written a guide outlining the Google Search Console Webflow integration.
Tip: Redirecting a Page That’s Currently Published
Webflow won’t allow you to create a 301 redirect for a URL that’s still tied to a live page in your project. If a page exists and is published, trying to redirect its URL will trigger an error. Failing to do so can trigger errors like the Webflow too many redirects error, which often stem from conflicting domain or redirect configurations.
The solution?
You need to unpublish or archive the page first. Here’s how:
- Option 1: Mark the Page as Draft – Go to the page settings and toggle the "Draft" option. This removes it from future publishes.
- Option 2: Delete the Page – If the page is no longer needed at all.
Once unpublished or removed, you’re free to create a 301 redirect for its old URL.
This method directly solves the issue many users face when they search: "Webflow redirect a draft page." It’s a simple step but one that trips up a lot of beginners (and even some experienced users).

Launching soon? Don’t wing it.
Use our free website launch checklist to avoid common pitfalls—like broken links, tracking issues, and SEO mistakes. It’s a comprehensive pre- and post-launch guide built for teams that care about getting it right the first time.
Wildcard & Folder Redirects (Advanced Tip)
If you're making larger structural changes to your website, such as renaming an entire folder or consolidating many URLs, wildcard redirects can save a ton of time.
Example Use Case:
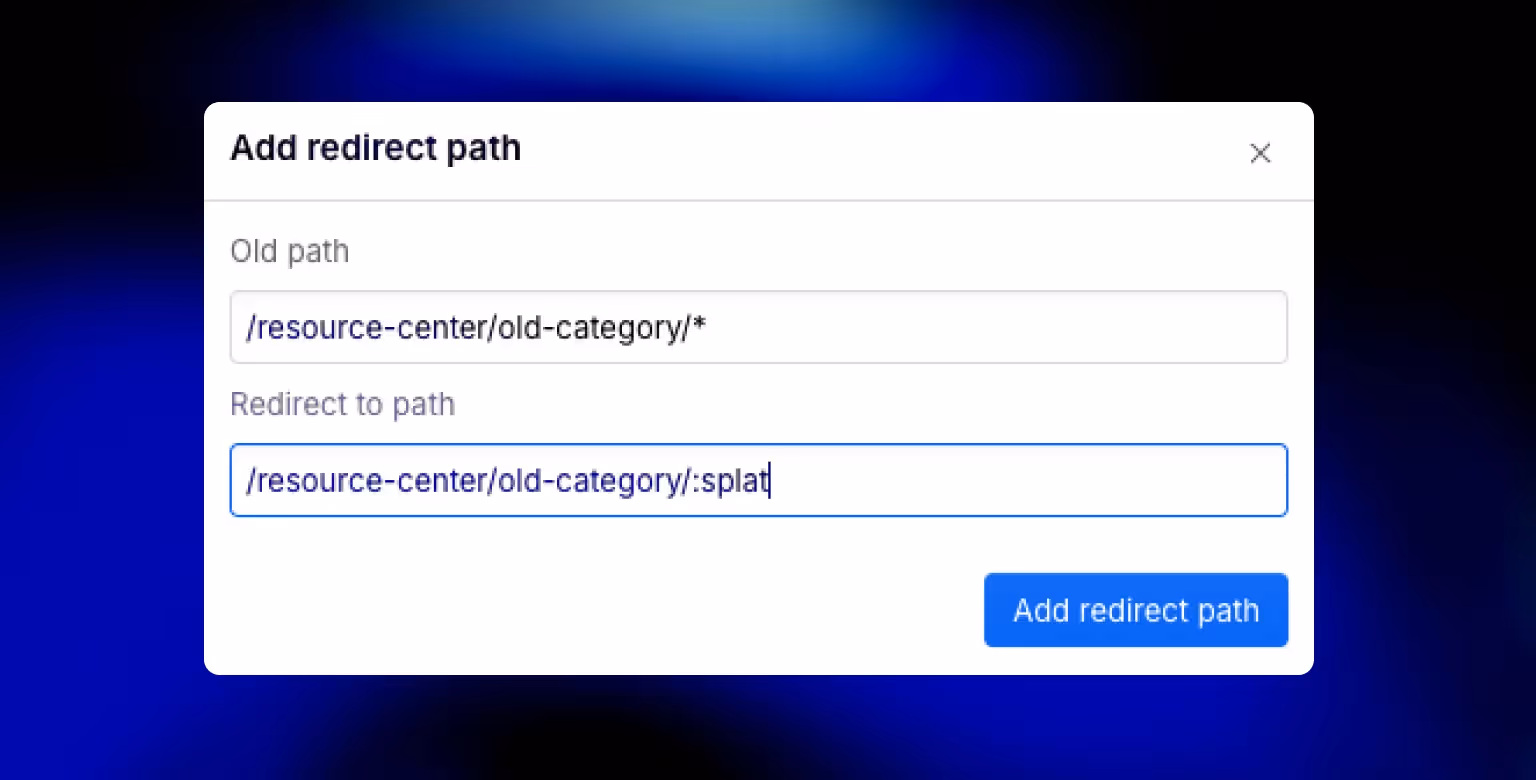
Let’s say you’re moving all your blog posts from /blog/old-category/ to /blog/new-category/.
Instead of redirecting each post individually, you can set up a wildcard redirect like this:
Old Path: /blog/old-category/*
New Path: /blog/new-category/:splat
The * captures anything after the old path, and :splat passes that value through to the new one.
This tells Webflow to redirect any URL under /blog/old-category/ to the matching page under /blog/new-category/ — a huge time-saver.
🔒 Note: Wildcard redirects are a powerful tool, but use them carefully. One bad rule can unintentionally override or break other redirects. Always test thoroughly after publishing.
Testing Your Redirects
Once you’ve added a redirect, don’t assume it’s working, test it.
Here’s how to verify your 301 redirects in Webflow are functioning properly:
- Use Incognito Mode – Open a private browser window to avoid cached results.
- Visit the Old URL – Type in the old path (e.g., yourdomain.com/old-page).
- Check the Behavior – It should immediately redirect to the new URL without errors.
If it doesn’t work:
- Make sure you published the site after creating the redirect.
- Double-check the path formatting (e.g.,
/page-nameinstead ofhttps://yourdomain.com/page-name). - Verify spelling, case sensitivity, and trailing slashes.
For a more technical approach, you can also use tools like:
- httpsaurus — Easily check status codes, response headers, and redirect chains.
- Redirect Checker — Check redirects and status codes.
These help confirm the type of redirect in use and flag any potential issues. Testing takes just a few minutes but can save you from broken links and SEO losses down the line.
Common Mistakes to Avoid
Setting up 301 redirects in Webflow is simple, but there are a few easy-to-miss pitfalls that can cause issues if overlooked:
Don’t redirect a live page
Webflow won’t let you redirect a URL that still exists as a published page. Unpublish or delete the page first.
Avoid redirect chains
Redirect chains happen when you redirect /page-a → /page-b, then later redirect /page-b → /page-c. Instead, go directly from /page-a → /page-c. Chained redirects slow down page loads and dilute SEO equity.
Use 301, not 302 for permanent changes
302 redirects are temporary and don’t pass full SEO value. For any permanent page changes, always use a 301 redirect.
Don’t use full URLs in the redirect field
Webflow only requires the relative path (e.g., /old-page). Including https://yourdomain.com/old-page will not work.
Avoiding these issues will help ensure your redirects work as intended, protecting both SEO rankings and user experience.
Conclusion
Webflow makes it surprisingly easy to implement 301 redirects and the payoff is huge.
By setting up redirects correctly, you can:
- Prevent 404 errors that hurt user experience
- Preserve your site's SEO equity when changing URLs
- Ensure a smooth migration from old content to new
In a recent project, we set up 301 redirects for all changed URLs on Cryptoworth’s site during a redesign. This preserved their search rankings and kept traffic steady.
Tilipman Digital’s redirect strategy saved our SEO – even with a big site migration, our organic traffic held strong.
— Ariel Eiberman, CMO @Cryptoworth

It only takes a few minutes to do, but the benefits last for the long haul. Whether you're launching a redesign, cleaning up your URL structure, or consolidating pages, 301 redirects are essential.
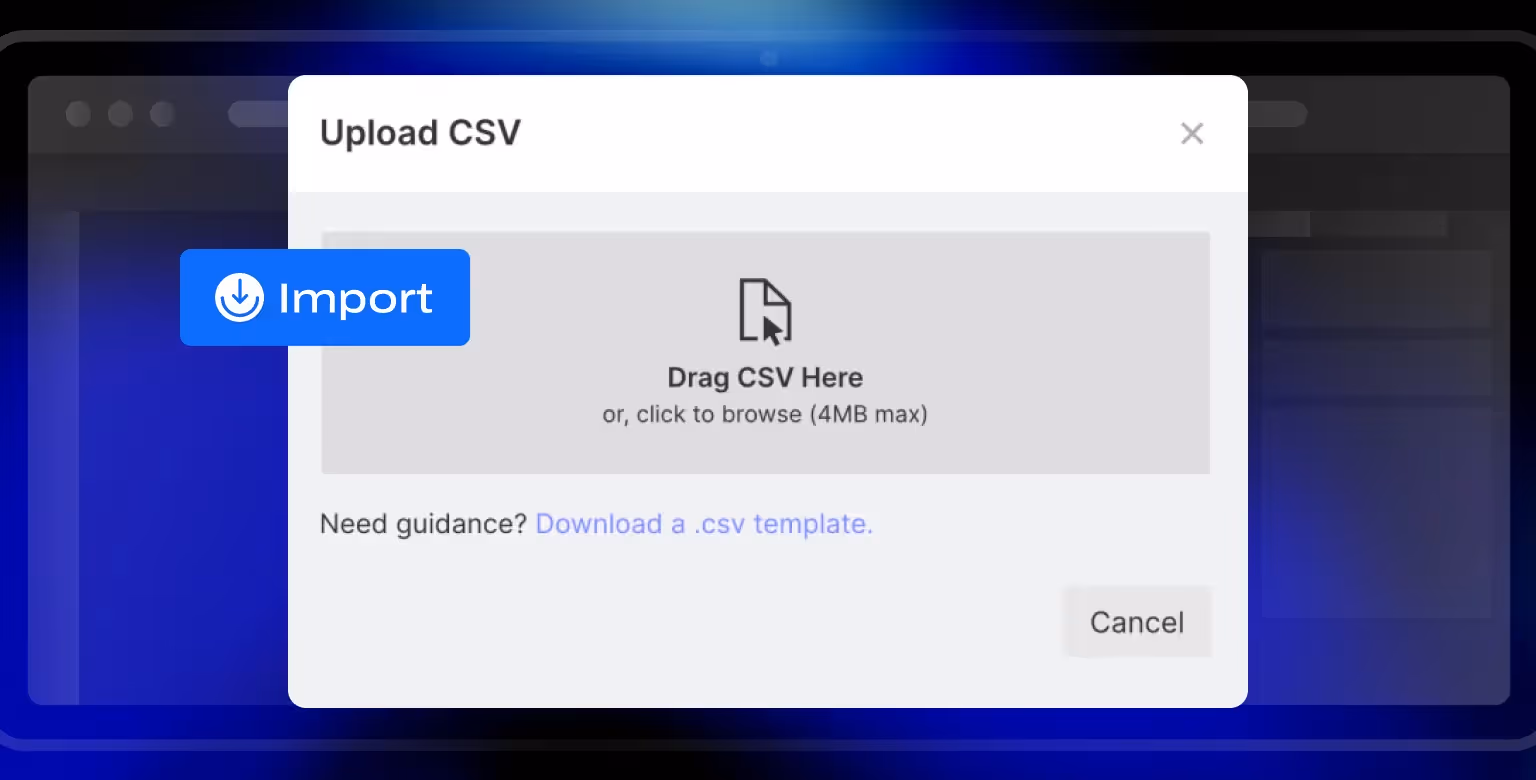
Bonus tip: Webflow also supports bulk redirect uploads via CSV, perfect for larger migrations. If you’re working on a full-scale overhaul or platform migration, consider partnering with a Webflow development agency to handle it efficiently.
And if SEO is a core part of your strategy, especially for growth-stage or enterprise websites, check out how we support companies like yours as an SEO agency for tech startups.
Redirects are more than just a fix. They’re a smart move toward a faster, more polished, and search-friendly website.
FAQs – Webflow 301 Redirects
Do I need a paid Webflow plan to use 301 redirects?
Yes. 301 redirects are only available on Webflow-hosted plans. If your project is on the Free or Starter plan, you won’t be able to access the hosting settings where redirects are configured.
How many 301 redirects can I add in Webflow?
Webflow allows up to 3010 redirect rules per project. This should be more than enough for most use cases, including full site migrations.
Can I use a full URL in the redirect input field?
No. Webflow requires the relative path only. For example, use /old-page instead of https://yourdomain.com/old-page.
What’s the difference between 301 and 302 redirects?
A 301 redirect is permanent and passes SEO value to the new URL. A 302 redirect is temporary and tells search engines not to treat it as a permanent move. In Webflow, you’ll only be setting up 301 redirects.
Can I bulk upload redirects in Webflow?
Yes. You can upload a CSV file with multiple redirect rules in the format:
/old-url,/new-url
/old-url-2,/new-url-2
This is ideal for larger migrations or restructuring projects.