Deleting unnecessary pages in Webflow helps you keep your site organized, lightweight, and easier to manage. Whether you're cleaning up after a redesign, removing template leftovers, or simply streamlining your content, it's useful to understand the right process for each type of page.
As a Webflow development agency, we often help clients clean up old pages, remove template bloat, and simplify their site structure. In this guide, we’ll walk through one of the tactics we use to cleanup the websites we work with. We will go over how to delete a page in Webflow—covering static pages, CMS collection pages, and eCommerce system pages. You’ll also learn which pages Webflow doesn’t allow you to delete, and what best practices to follow to avoid broken links or SEO issues.
By the end, you’ll have a clear, step-by-step understanding of how to delete a page on Webflow—safely and effectively.
Deleting a Static Page in Webflow
Static pages in Webflow include standard pages like “About,” “Contact,” or “Pricing.” These are created manually and listed under the Static Pages section in the Pages panel. Deleting them is a simple process:
Steps to Delete a Static Page
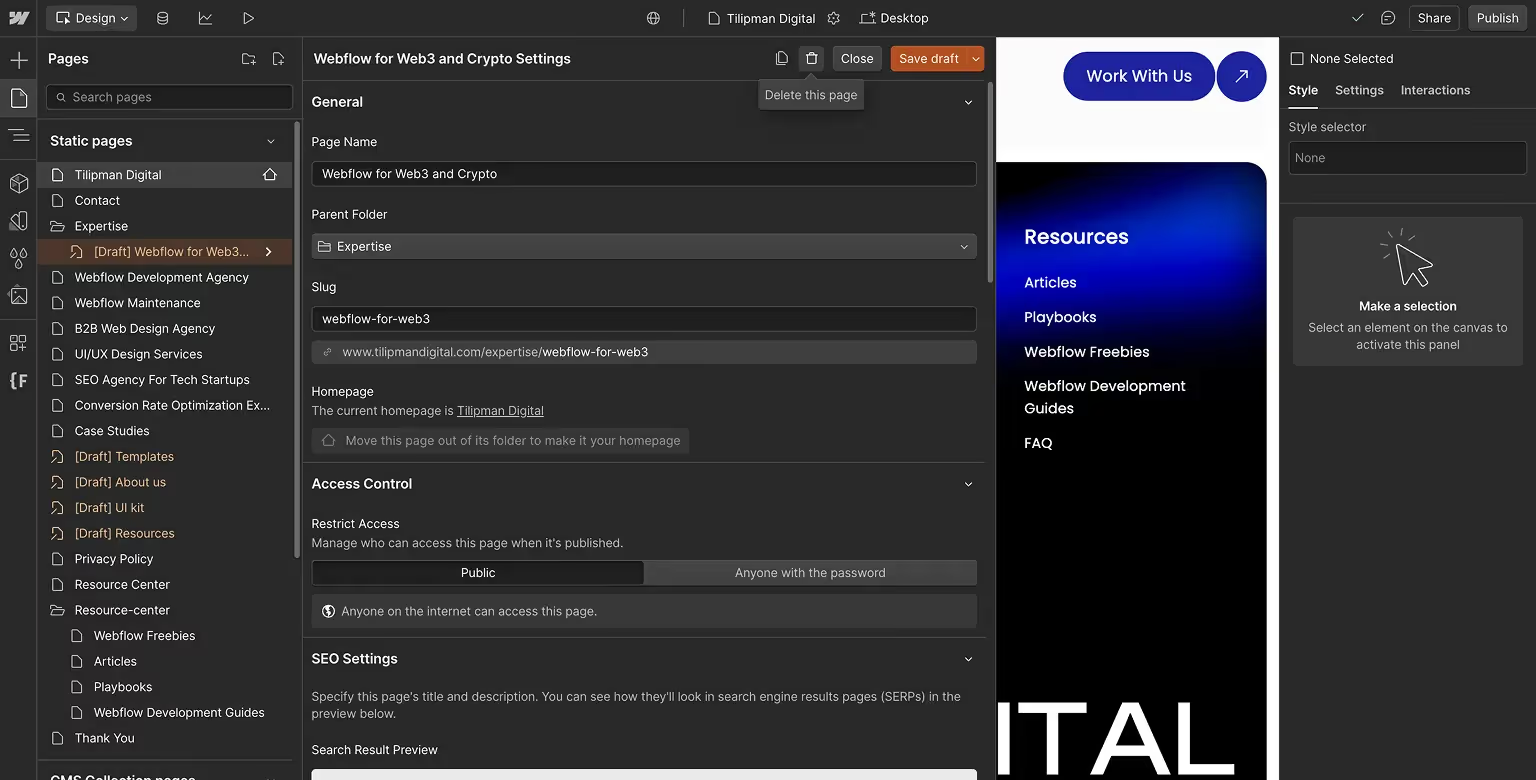
- Open the Pages Panel: In the Webflow Designer, click the Pages icon in the left-hand sidebar to reveal your site's structure.
- Select the Page to Delete: Find the static page you want to remove (e.g., “Contact”) in the list under Static Pages.
- Open Page Settings: Hover over the page name and click the settings (cog) icon to open the page’s configuration panel.
- Click the Delete Icon: Scroll to the bottom of the settings panel and click the trash can icon. A confirmation popup will appear.
- Confirm Deletion: Confirm that you want to delete the page. Once confirmed, the page will be permanently removed from your project.

Important Notes
- Webflow does not allow deletion of the homepage. If the page you want to delete is currently set as the homepage, you’ll need to assign another page as the home first.
- Deleting a static page is permanent unless you restore a site backup.
Before removing any page, double-check that it isn’t linked in your navigation or elsewhere on the site. Deleting a page without updating links can lead to broken navigation or 404 errors.
Deleting CMS Collection Pages in Webflow
CMS Collection pages are dynamic pages generated from content in your Collections—like blog posts, case studies, or testimonials. If you're unsure what CMS is, we cover Webflow's CMS capabilities in a separate article. Unlike static pages, these pages can’t be deleted directly from the Pages panel. Instead, you manage them through the CMS structure.
Option 1: Delete a Single CMS Item Page
If you want to delete one specific dynamic page (like a blog post), follow these steps:
- Open the CMS panel (database icon in the left sidebar).
- Select the relevant Collection (e.g., “Blog Posts”).
- Locate the item you want to delete.
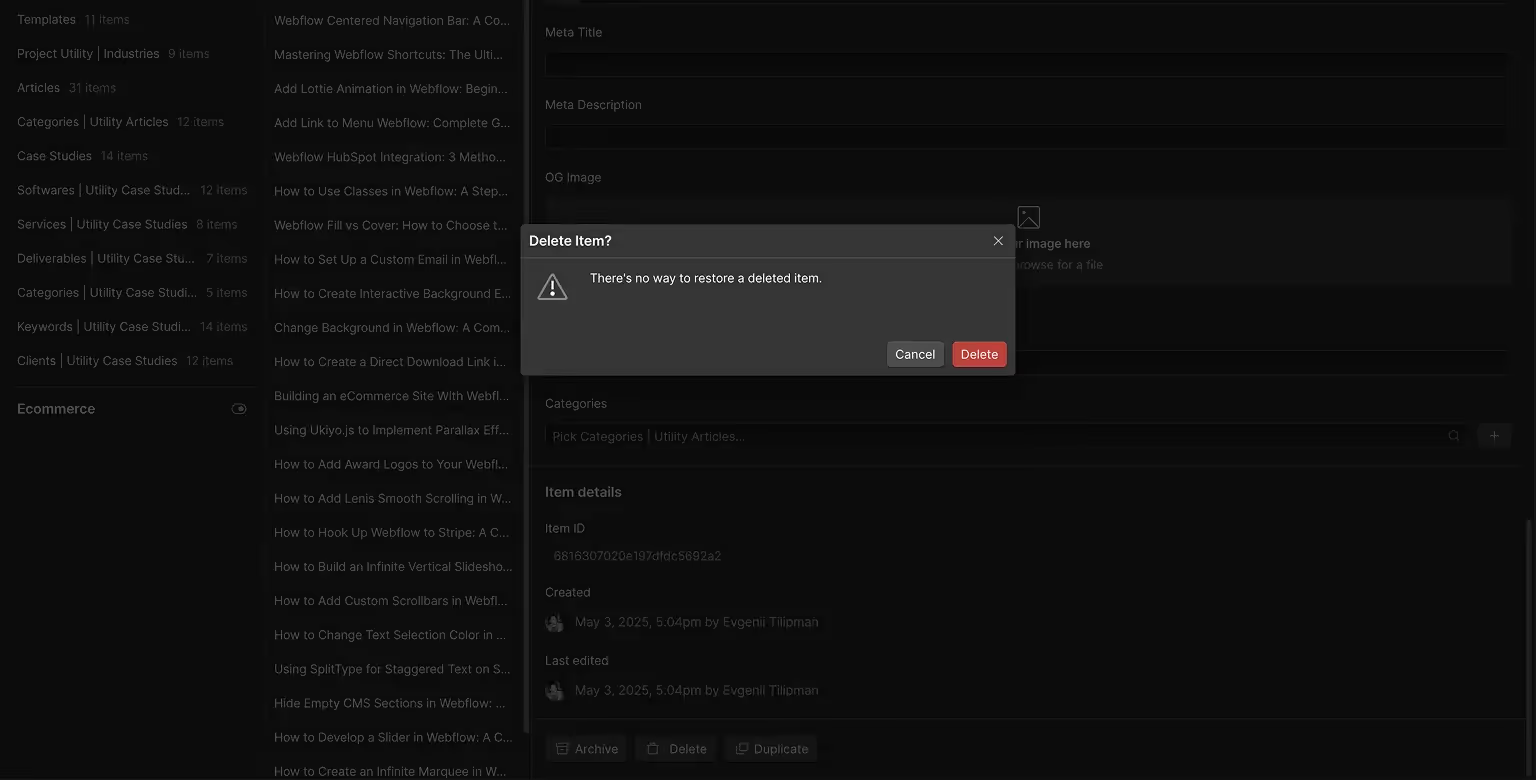
- Click Delete. This removes the item and unpublishes its corresponding page.
Note: Deleted pages will return a 404 error if visited, so if deleted, a good idea is to create a 301 redirect. To temporarily remove content without deleting the page, you can unpublish or archive the item instead.

Option 2: Delete an Entire CMS Collection and Template Page
To remove all CMS pages tied to a collection (e.g., a Testimonials section you don’t need):
- Delete all items in the Collection. Webflow won’t let you delete the collection if it still contains content.
- Check that no elements are still bound to this Collection across your site.
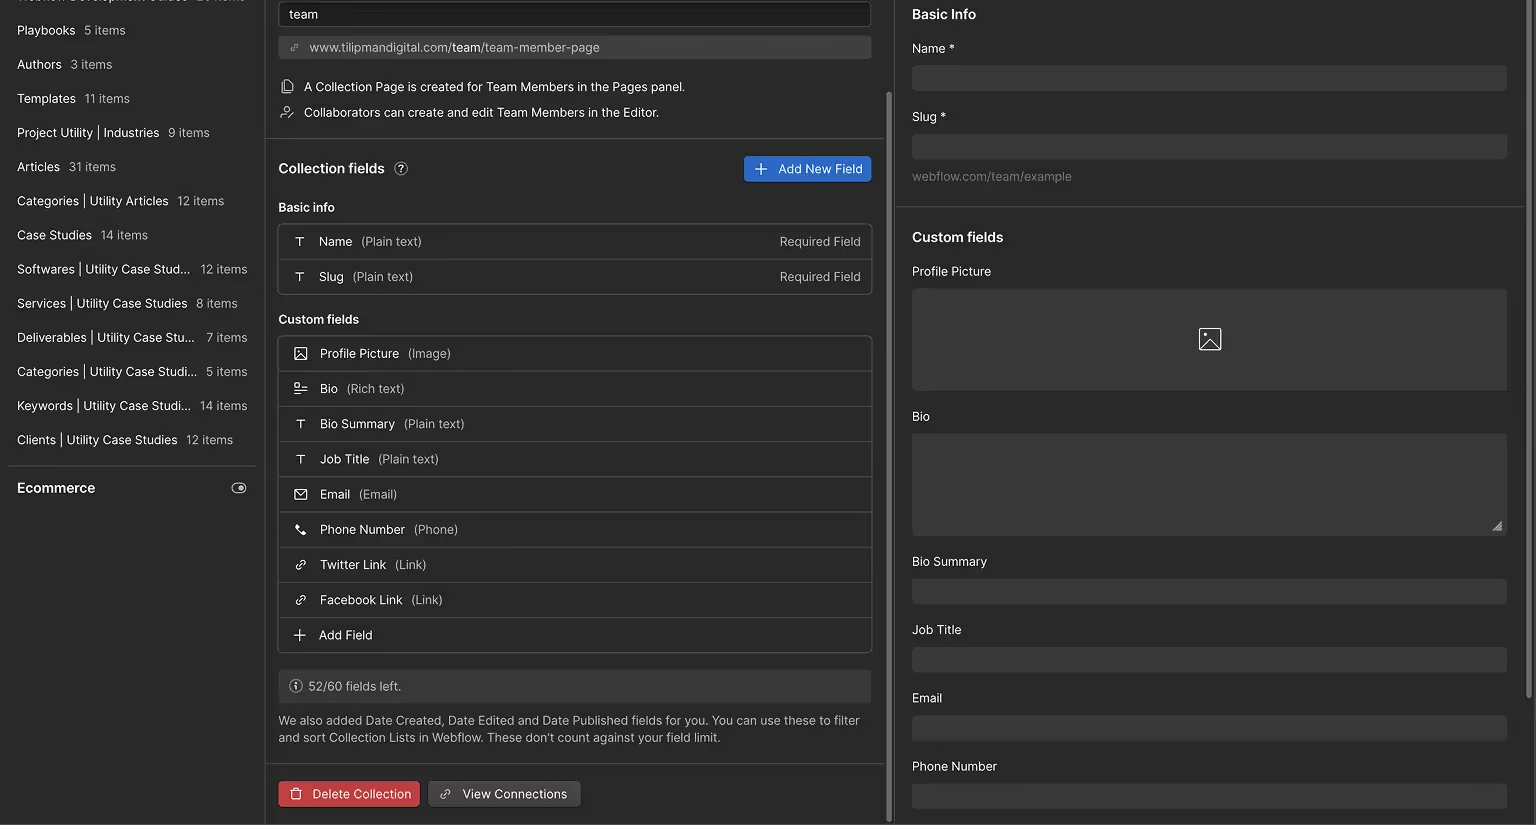
- In the CMS panel, open the Collection settings.
- Click Delete Collection.
This action removes both the Collection and its corresponding template page. Any links to those pages will now lead to 404 errors.
CMS Deletion Considerations
Once a CMS item or Collection is deleted, it’s permanent unless restored via backup. If you want to hide CMS pages instead of removing them completely, consider:
- Setting the item to Draft
- Using a “noindex” tag to block it from search engines
Only delete CMS content if you're confident it won’t be needed later.

Deleting Ecommerce Pages in Webflow
Webflow automatically generates Ecommerce pages when you enable store functionality in your project—or when you start from a template that has Ecommerce pre-configured. These pages include Product and Category templates, as well as system pages like Cart, Checkout, and Order Confirmation.
If you’ve decided not to use Webflow Ecommerce, here’s what you need to know about removing or disabling these pages.
Product and Category Template Pages
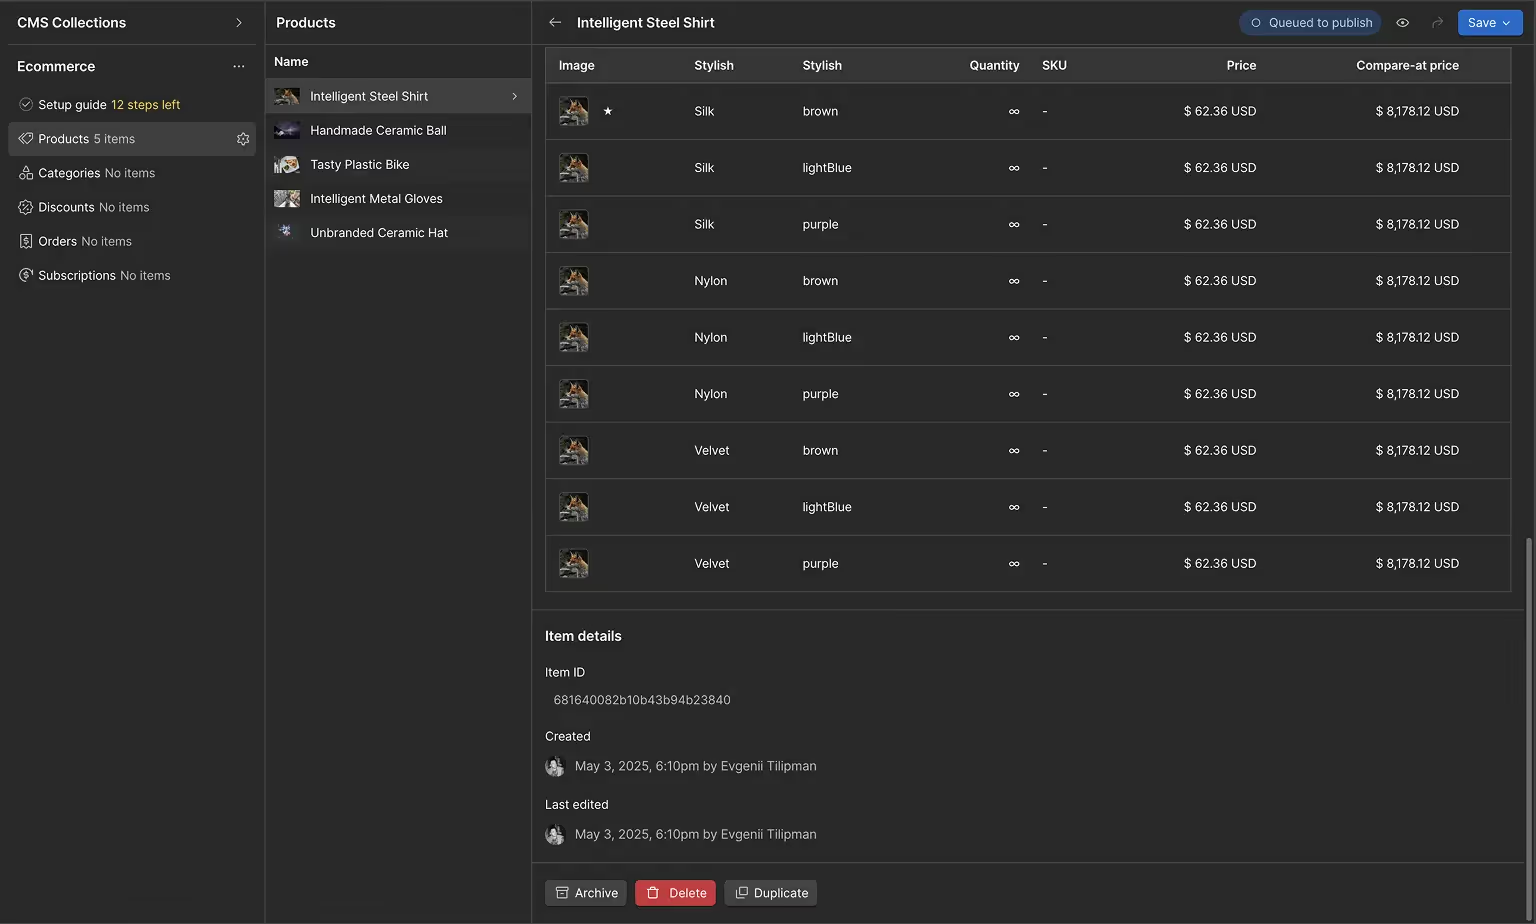
These templates behave like CMS Collection pages. You can delete individual products or categories from the Products panel, and those pages will no longer display. However, the Product Template and Category Template pages themselves will still appear in your Pages panel.
Even if the product list is empty, Webflow does not currently allow you to delete the templates entirely as long as Ecommerce is enabled. These pages become empty—but remain part of your project.
System Ecommerce Pages (Cart, Checkout, etc.)
Pages like Cart, Checkout, and Order Confirmation are generated automatically. They are system-required and cannot be deleted—even if you don’t use them. You won’t see any trash icon or option to remove them in the Designer.
Can You Fully Remove Ecommerce From a Webflow Project?
Unfortunately, no. Once you activate Ecommerce, Webflow does not provide a built-in way to deactivate or roll it back. If you:
- Enabled Ecommerce by mistake
- Used a template with Ecommerce but don’t need it
Your options are limited:
- Contact Webflow support to request backend removal (not guaranteed)
- Duplicate or rebuild your site in a clean project without enabling Ecommerce
To avoid extra work later, only enable Ecommerce if you're confident you’ll use it. If you’re just getting started with eCommerce in Webflow, check out our step-by-step guide on building an Ecommerce site in Webflow to understand when and how to enable these features the right way.
eCommerce Page Deletion TL;DR
Webflow doesn’t let you fully delete Ecommerce templates or system pages. Instead, you can:
- Remove all products and categories
- Hide system pages from site navigation
- Prevent indexing with "noindex" meta tags
- Set up 301 redirects for any removed URLs
If you’re working with a template that includes Ecommerce pages you don’t need, the best approach is to hide and ignore them—they won’t show content without products or categories. To avoid making template related mistakes, read our guide on how to use Webflow templates.

Handling System Pages (404, Search, Password)
Webflow includes a set of system pages that serve essential backend functions. These utility pages—such as the 404, Search Results, Password, and Coming Soon pages—cannot be deleted, even if they’re not in use.
Types of System Pages
- 404 Page — Shown when a user visits a non-existent URL. Fully customizable, but not removable. Here's some inspiration for 404 error pages styling.
- Search Results Page — Appears if site search is enabled. If unused, it can be styled or ignored.
- Password Page — Displays when password protection is active. Remains hidden unless required.
- Other Utility Pages — Includes Offline and Coming Soon pages if enabled. These are also locked.
Best Practices
- Style them to fit your brand — Add logos, fonts, or tone adjustments where relevant.
- Leave them alone if unused — They won’t affect your project’s performance or page limits.
- Add a "noindex" tag — Only for optional system pages like Search Results if you're mindful of SEO (404 is already excluded).
These pages won’t appear unless triggered and are harmless in the background—just keep them tidy and consistent with your design system. These utility pages—such as the 404, Search Results, Password, and Coming Soon pages—cannot be deleted, even if they’re not in use.
Best Practices for Removing Pages in Webflow
When deleting static or dynamic pages in Webflow, a few key practices can help maintain a healthy site structure and avoid SEO or usability issues:
- Confirm Before Deleting — If you might reuse the content later, mark the page as a Draft or duplicate page in Webflow instead of deleting it. Deletions are permanent unless you restore a backup.
- Update Navigation — Check your nav menus, footers, and internal links. Make sure nothing points to the deleted page to avoid broken navigation. In case you deleted a link on accident, either undo by using a Webflow shortcut
Cmd + Zor re-add the link to menu. - Set Up Redirects — If the deleted page had traffic or backlinks, add a 301 redirect in your Hosting settings to guide users to a relevant page.
- Monitor SEO Impact — Use Google Search Console to spot 404 errors after deletion. Redirect or remove indexed pages as needed. Webflow updates sitemaps, but it’s worth double-checking.
- Create a Backup First — Always create a manual backup before making large changes. If you are looking to save up on Webflow costs, instead of deleting pages until you reach 2 pages to degrade to free plan, it might be safer to immediately Cancel Webflow Subscription instead. That way, your site stays preserved and recoverable.

Keeping things clean—pages, links, and redirects—makes your site more stable and improves the overall user experience.
Working with a Webflow Maintenance Partner
Site cleanup, page management, redirects—these things take time. And if you're not confident in making technical changes in Webflow, even a small mistake can cause real damage.
That’s where a Webflow maintenance partner can step in.
An experienced team or agency can handle everything from deleting unnecessary pages to optimizing your site structure and resolving CMS or Ecommerce clutter. They’ll ensure your Webflow project stays clean, performant, and error-free—without you having to get into the weeds.
If you're looking for a long-term partner to keep your Webflow site running smoothly, it might be time to bring in the pros.


