


If you're looking to build a membership site, gate content, or offer subscription-based access — all without writing a backend from scratch — Memberstack is one of the most powerful tools in the Webflow ecosystem.
And the best part? You don’t need to touch a line of backend code to make it work.
In this guide, we'll walk you through the creation of a membership site with a Memberstack Webflow integration. We aim to show you how to set up plans, gated content, and user fields — the core components of any membership website.
📌 Note: This tutorial covers the basic integration. More advanced features such as user-specific dashboards, multi-step onboarding, or advanced logic with Zapier and Make require custom JavaScript and external tools. Our Webflow Zapier integration guide shows how to set up these no-code automations outside of Memberstack. With that said, all of these are the kinds of solutions we build into premium Memberstack templates and client projects at such as Kahshe and Bass Lakes, where we’re certified Memberstack Experts.

Let’s dive in.
What Is Memberstack and Why Use It With Webflow?
Memberstack is a membership platform that lets you add user authentication, gated content, and payment functionality to your Webflow site — without needing a custom backend or external CMS.
It’s designed for no-code and low-code teams that want to create:
- Member-only areas
- Subscription paywalls
- User profiles and dashboards
- Gated resource hubs or learning platforms
While Webflow now offers its own native Memberships feature, Memberstack is often preferred when you need:
- More flexible plan management (free, one-time, recurring)
- Advanced control over gating rules and user permissions
- Integration with Make, Zapier, or custom JavaScript
- Clean separation between front-end design and authentication logic
Memberstack and Webflow work together seamlessly thanks to an official integration and shared focus on front-end flexibility. It’s a powerful pairing for SaaS projects, online communities, digital product businesses, and agencies building custom login flows.
For advanced membership and data needs, you will need to integrate a backend in addition to Memberstack. We like to use Xano as a backend and have written Xano Integrations with Webflow guide to give an overview.
If you're working with a Webflow development agency or building something beyond the basics, Memberstack offers the flexibility and scalability that native tools don’t yet support.
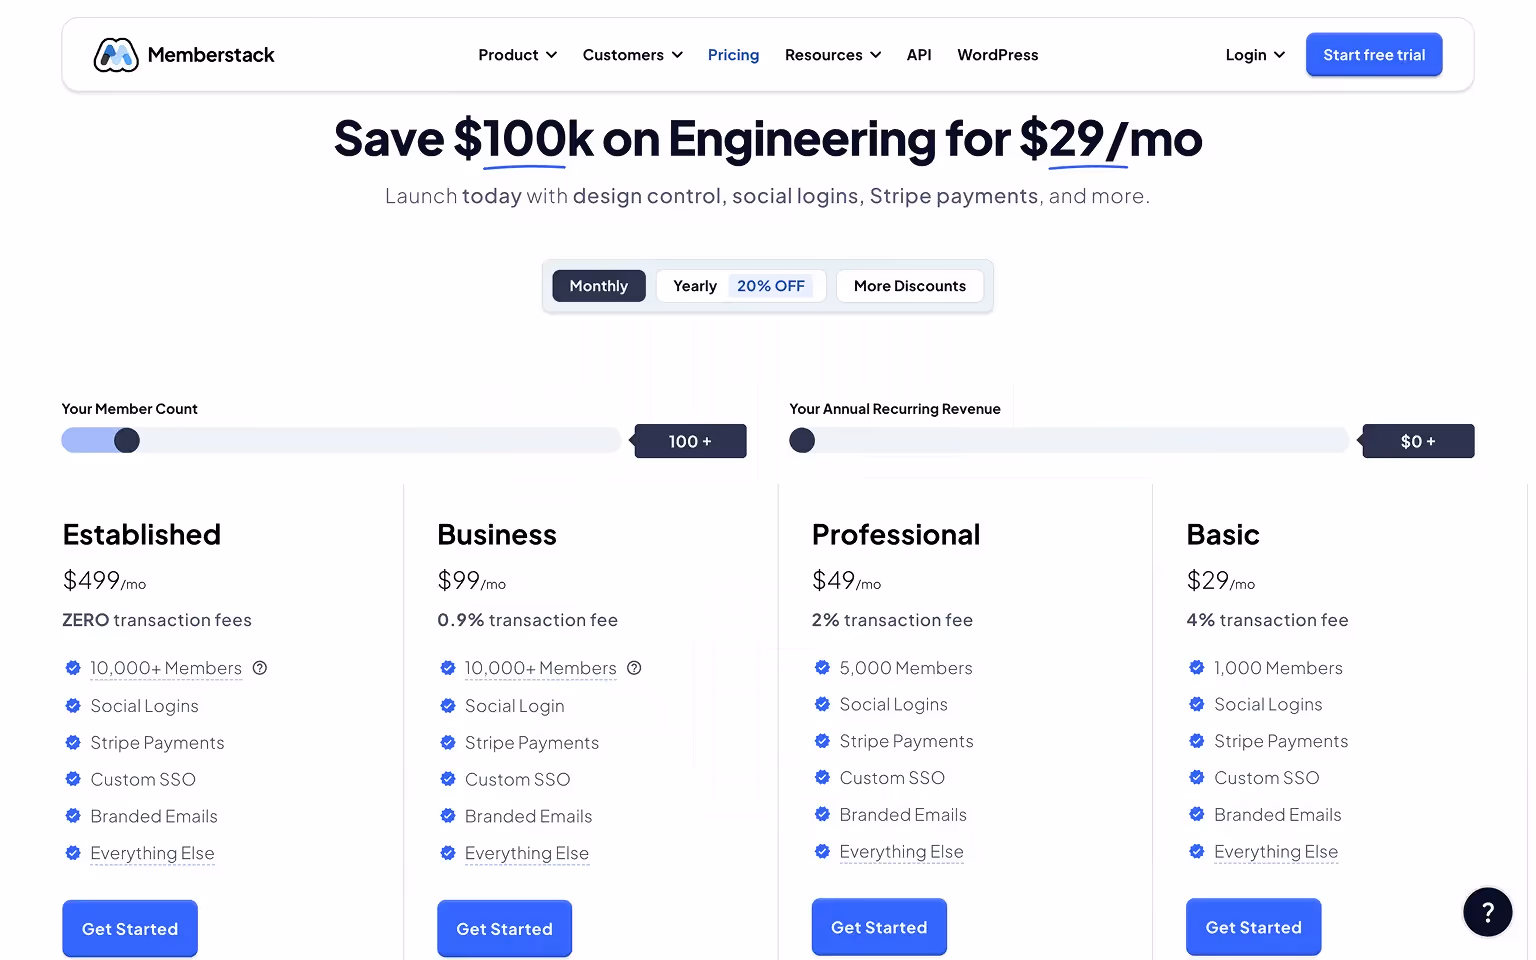
Memberstack Pricing
Understanding Memberstack’s pricing structure is key to choosing the right plan for your project, whether you're building a gated resource hub, a paid SaaS tool, or a subscription-based membership site.
Free Plan
Memberstack offers a Free plan that’s ideal for:
- Testing the platform
- Building out your user flows and gated content
- Launching small internal tools or MVPs
You’ll have access to core features like login, signup, gated content, and user data collection. Stripe and integrations are disabled on this tier, making it best for non-commercial use. If you still need to add Stripe, read our guide on Webflow Stripe integration.
Paid Plans
Once you're ready to go live, you can upgrade to one of the paid tiers. These unlock:
- Stripe integration for one-time payments, subscriptions, and metered billing
- Multiple membership plans and advanced access rules
- Additional user fields, gated CMS logic, and developer tools
- Email support and webhook/API access
Pricing is usage-based, starting with a base monthly fee that increases with the number of active members on your site. This makes it scalable for startups and enterprise use alike.
Which Plan Do You Need?
- Solo creators & small teams: Start with Free, then upgrade when Stripe is needed
- SaaS, marketplaces, and education platforms: Paid plans are a must, especially for automation and CRM workflows
Whether you're just starting or scaling something complex, our team brings the technical know-how and strategic clarity to turn your membership vision into a fully functional platform. From custom logic to seamless plan setup, we’re here to help you build with confidence.
Mike Katsevman
COM Board Member @Kahshe
Tilipman Digital did a great job developing an enterprise level solution for our community!
Read Case Study


Creating Plans and Gating Content in Memberstack
Before you jump into Webflow, it’s important to lay the foundation in Memberstack. This includes creating your membership plans, setting up gated content rules, and defining user fields that will power personalization and logic later.
Step 1: Create Membership Plans
In your Memberstack dashboard:
- Navigate to "Plans" and click "New Plan"
- Choose a plan type: Free, One-time payment, or Recurring subscription
- Add a plan name and set the slug (used for internal references and attribute targeting)
- Define the plan’s price (if applicable), access duration, and signup settings
💡 Tip: Use clear, logical slugs likebasic,premium, orenterprise— these will help when setting visibility rules later in Webflow.
Step 2: Set Gating Rules
Once your plans are in place, go to the "Pages" section to configure gated content:
- Select any page in your site
- Set the visibility to "Only members with specific plans"
- Choose which plans should have access to that page
This applies to entire pages. For more granular control (like gating sections or buttons), you’ll use Memberstack attributes inside Webflow, which we cover in the next section.
Step 3: Define User Fields
User fields allow you to store and retrieve custom data for each member — such as:
- First name
- Role or user type (e.g., creator vs. subscriber)
- Company name or country
To add fields:
- Go to "Settings → Fields" in Memberstack
- Add custom fields as needed (text, checkbox, dropdown, etc.)
You can reference these fields dynamically in Webflow using the data-ms-member="field-name" attribute.
Why This Setup Matters
With this structure in place, you’ll be able to:
- Display personalized messages (e.g., "Welcome, [Name]!")
- Show/hide elements based on plan or role
- Pass user data into automations using tools like Zapier or Make. For help deciding between these platforms, see our Make vs Zapier comparison.
It’s the backbone of any scalable Memberstack-powered project, so take time to get it right before jumping into design and build.
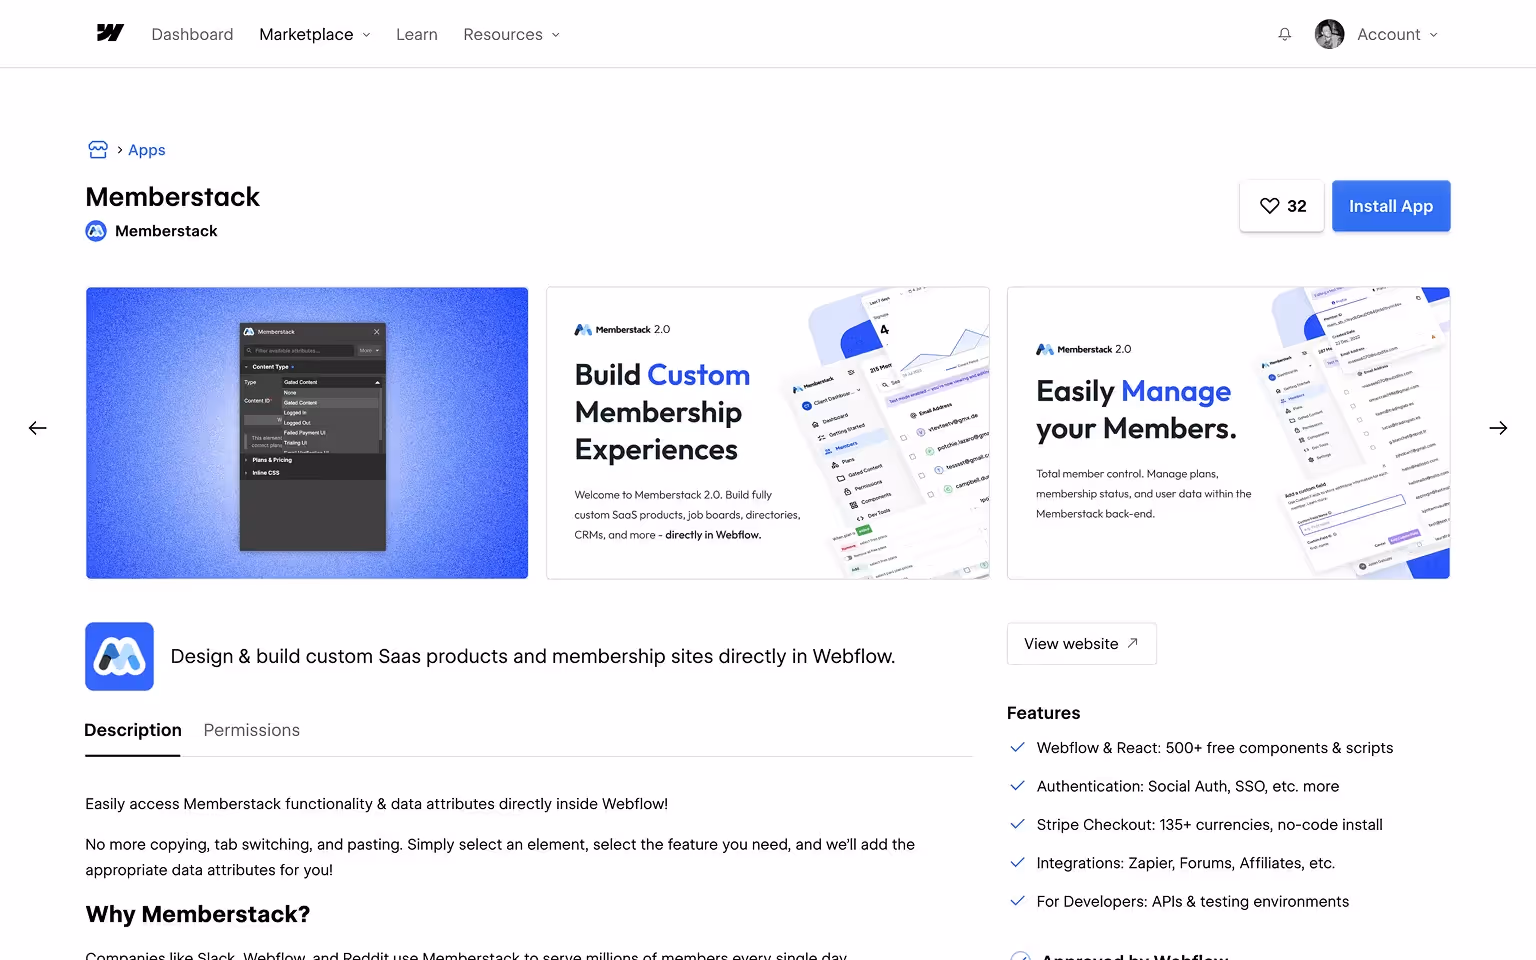
Installing the Memberstack App in Webflow
To get started, you’ll want to install the official Memberstack app from the Webflow App Marketplace. This integration simplifies the setup process and allows you to connect your Webflow project directly to your Memberstack account.
Step 1: Install the Memberstack App
- Search for Memberstack app in the Webflow App Marketplace
- Click Install App
- Authorize access to your Webflow account
Once connected, you can choose which Webflow project you want to link with your Memberstack workspace.
Step 2: Link Your Webflow Project
- After installing, Memberstack will prompt you to select a Webflow site.
- Once linked, Memberstack automatically injects the necessary scripts and attributes into your Webflow project.
This official app saves you from having to manually copy-paste script tags and makes it easier to manage future updates. It also ensures your attributes (like [data-ms-content] and [data-ms-member]) behave correctly without needing extra configuration.
With the app installed and your project connected, you're ready to begin building your membership stack.
Connecting Gated Content in Webflow
With your plans and gating rules set in Memberstack, the next step is to apply those rules directly inside your Webflow project. This is where the app’s integration shines — letting you control visibility without needing custom JavaScript.
Gate Entire Pages
If you’ve configured gated pages in Memberstack’s dashboard, the platform will automatically redirect unauthorized users away from protected URLs. This works great for pages like:
- Dashboards
- Profile areas
- Paid content libraries
Gate Specific Elements in Webflow
To gate individual sections or elements within a public page, use Memberstack attributes inside Webflow:
data-ms-content="members"→ Show content only to logged-in usersdata-ms-content="!members"→ Show content only to logged-out usersdata-ms-content="plan:premium"→ Show content only to members with a specific plan
You can also use:
data-ms-member="field-name"→ Dynamically populate content (like a user's name)
These attributes allow for:
- Conditional CTAs (e.g., “Upgrade” vs. “Log in”)
- Personalization (e.g., “Welcome back, [First Name]”)
- Dynamic UI experiences based on plan access
By combining Webflow’s visual power with Memberstack’s access logic, you get full control over who sees what — without writing custom code.
Prepare to Launch: Testing & Final Setup
Before launching your membership site, it’s essential to test the entire user journey — from signup and login to content gating and email flows. Here's how to make sure everything works smoothly and professionally.
1. Preview Mode vs. Live Testing
Webflow’s Designer and Preview modes don’t reflect live Memberstack behavior. To test properly:
- Publish your site to a staging domain (e.g. your-site.webflow.io)
- Interact as a real user would — from signup to logout
2. Run Through Core User Flows
Validate each key interaction:
- Sign up with a new email and password
- Log in and confirm gated content shows/hides as expected
- Access protected pages with/without authentication
- Switch between plans, if applicable
3. Review Member Data in Dashboard
Inside the Memberstack dashboard:
- Check user creation
- Verify plan assignments and login history
- Trigger password resets or manually update plans
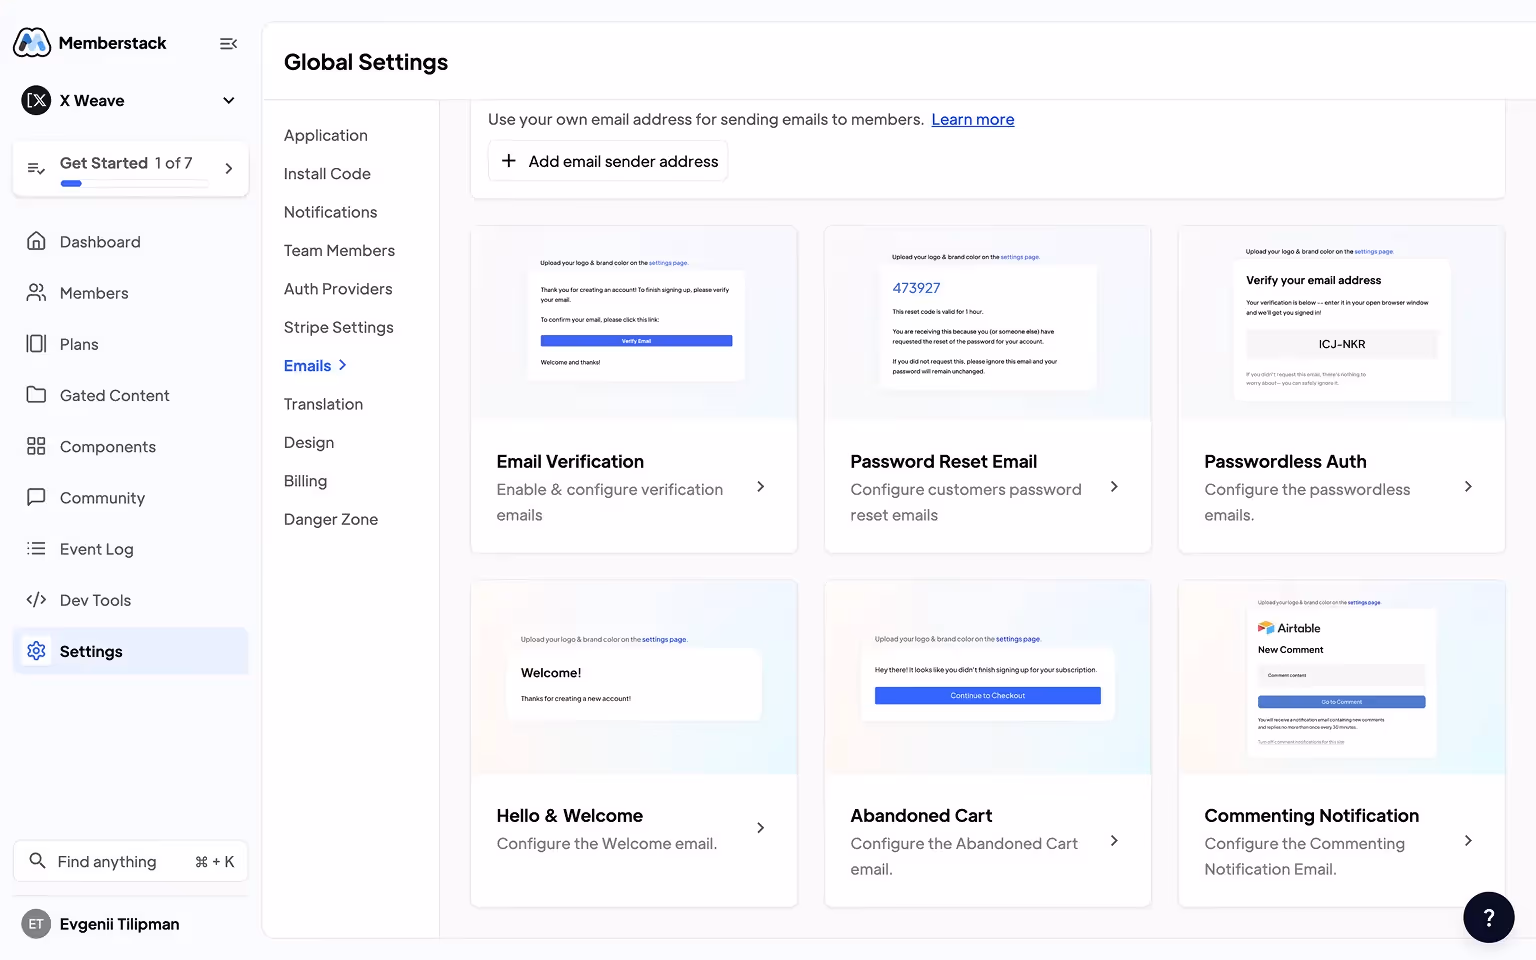
4. Set Up Built-in Email Flows
Navigate to Settings → Emails in Memberstack to configure:
- Welcome Emails
- Email Verification
- Password Reset Emails
- Abandoned Cart and Notifications (optional)
These built-in emails improve onboarding and ensure members stay engaged.
5. Switch From Test Mode to Live Mode
When you're confident everything works:
- Swap your API keys from test to live mode
- Follow this launch guide to ensure your domains and Memberstack environment are correctly configured
6. Debug Any Remaining Issues
Use Chrome DevTools Console to:
- Catch JavaScript errors
- Confirm attributes (e.g.,
data-ms-content,data-ms-member) are correct
Double-check:
- That all links are working
- Content visibility is accurate
- Plans and permissions reflect your intended logic
Final Tip
Test your flows early and often. A smooth launch reduces friction, support load, and ensures your first members have a great experience from day one.
And trust me when I say this, we get it — implementation can be tricky. Especially with complex use cases like job boards, multi-role dashboards, or gated communities. That’s where we come in. As certified Memberstack experts, we help teams select the right plan, configure their setup, and scale confidently based on their goals and roadmap.
Going Beyond: Custom Workflows with Memberstack
Once you’ve mastered the basics, Memberstack becomes a powerful engine for building custom workflows, dynamic user experiences, and full-scale platforms — especially when combined with tools like JavaScript, Make (formerly Integromat), and Zapier.
For front-end logic examples, tools like Wized can handle the dynamic, client-side interactions, see our Wized website examples built on Webflow for inspiration.
What Goes Beyond the Basics?
- User-specific dashboards
- Multi-step onboarding flows
- Automated plan upgrades/downgrades
- Content unlocking based on progress or behavior
- Triggering emails, CRM actions, or webhooks when a user signs up or updates data
These features aren’t included out-of-the-box, but they’re possible with Memberstack’s open data model and developer tools.
Tools That Help
- Custom JavaScript: Allows you to manipulate the DOM based on user data or actions
- Make / Zapier: Connect Memberstack with tools like Airtable, HubSpot, Stripe, Slack, and more. Read our Webflow Airtable integration guide to sync data between Airtable and Webflow
- Memberstack APIs & Webhooks: Perfect for syncing data and triggering automated flows
Examples From the Real World
At Tilipman Digital, we’ve built:
- Personalized learning environments with conditional access based on quiz performance
- Multi-role dashboards for platforms with both creators and subscribers
- Member referral programs integrated with CRMs and Stripe
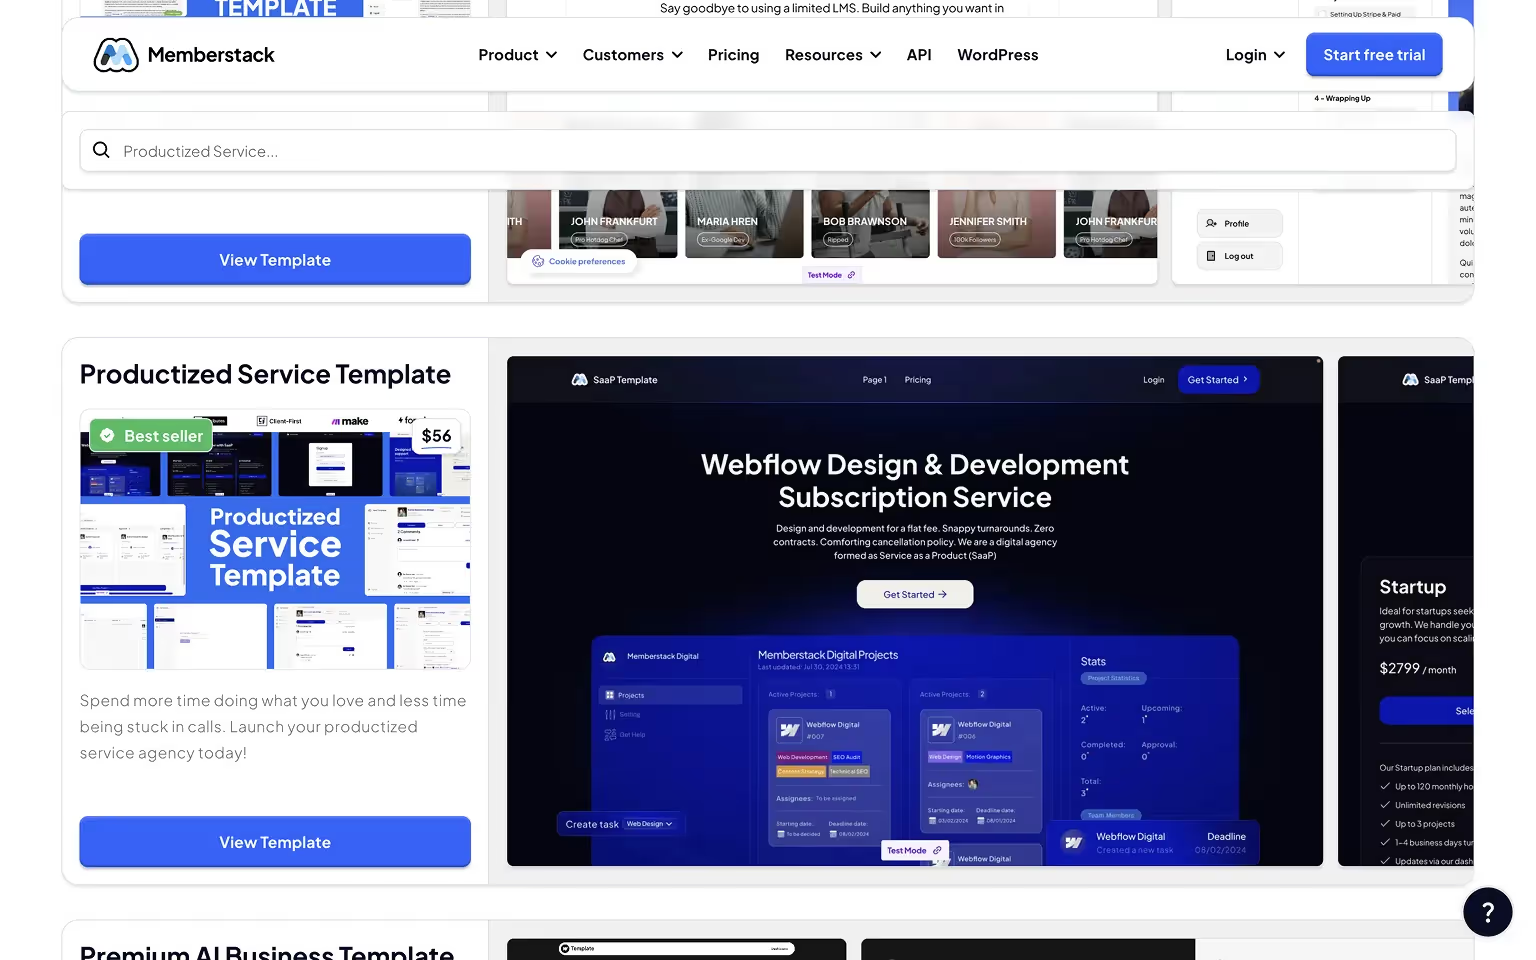
Many of these setups are now available as part of Memberstack’s premium templates, and we regularly help businesses tailor them further.
If your project demands more than simple logins and gated pages, Memberstack gives you the flexibility — and we’re here to help you unlock it.
Working with a Memberstack Expert
Integrating Memberstack with Webflow gives you full control over how users interact with your site, from gated content to recurring memberships, user dashboards, and beyond. But while the basics are easy to implement, many businesses quickly outgrow the default setup.
At Tilipman Digital, we’re proud to be Memberstack Certified Experts. We’ve helped job board platforms, productized service firms and online communities build:
- Multi-tiered membership structures
- Custom dashboards and gated CMS-driven content
- Onboarding flows integrated with CRMs, analytics tools, and automations
We also contribute to and enhance several of Memberstack’s premium templates, giving startups and scale-ups a faster path to production-ready platforms.
Whether you need to add Memberstack to an existing Webflow site or want to build something entirely from scratch, working with an expert can save time, reduce bugs, and unlock meaningful revenue.
Let’s build something powerful together.
Looking to integrate Memberstack and Webflow with the rest of your tech stack, but are not sure if we can integrate all these tools with Webflow, browse our Webflow integrations.
FAQs
Can you integrate Memberstack with Webflow?
Yes. Memberstack connects directly to Webflow through the official app. You can add logins, gated content, and memberships without writing backend code.
What is Webflow Memberstack Integration?
It’s the connection between Webflow and Memberstack that lets you manage user accounts, paid plans, and private content access on your site.
How to integrate Memberstack with Webflow?
Install the Memberstack app from the Webflow Marketplace, link your project, and set which pages or elements to gate. No scripts or coding needed.
What can I build with Memberstack in Webflow?
You can build member-only sites, paid communities, dashboards, learning platforms, or client portals.
Do I need to code to use Memberstack with Webflow?
No. Everything works visually inside Webflow. Code is only needed for advanced automations or custom logic.
Which tools work with Memberstack?
Memberstack connects with Stripe for payments. It can connect to anything through automation tools such as Zapier, Make and Wized.
What happened to Webflow Memberships?
Webflow discontinued its native Memberships feature in 2024. Memberstack is now the go-to solution for adding logins, subscriptions, and gated content to Webflow sites.

