


Launching a website is a high-stakes milestone. A clear website launch checklist helps prevent issues like broken links, tracking gaps, and SEO missteps that can derail your rollout.
Whether you're a founder shipping your first product or a marketing lead executing a broader B2B website strategy, this guide gives you the exact steps to get it right.
It’s split into two parts:
- Pre-launch: Tasks to complete before hitting "Publish"
- Post-launch: What to monitor and improve after going live
Use this checklist to support a well-executed website launch that performs as expected, ranks from day one, and delivers a smooth experience to your visitors.
Let’s begin with the pre-launch phase.
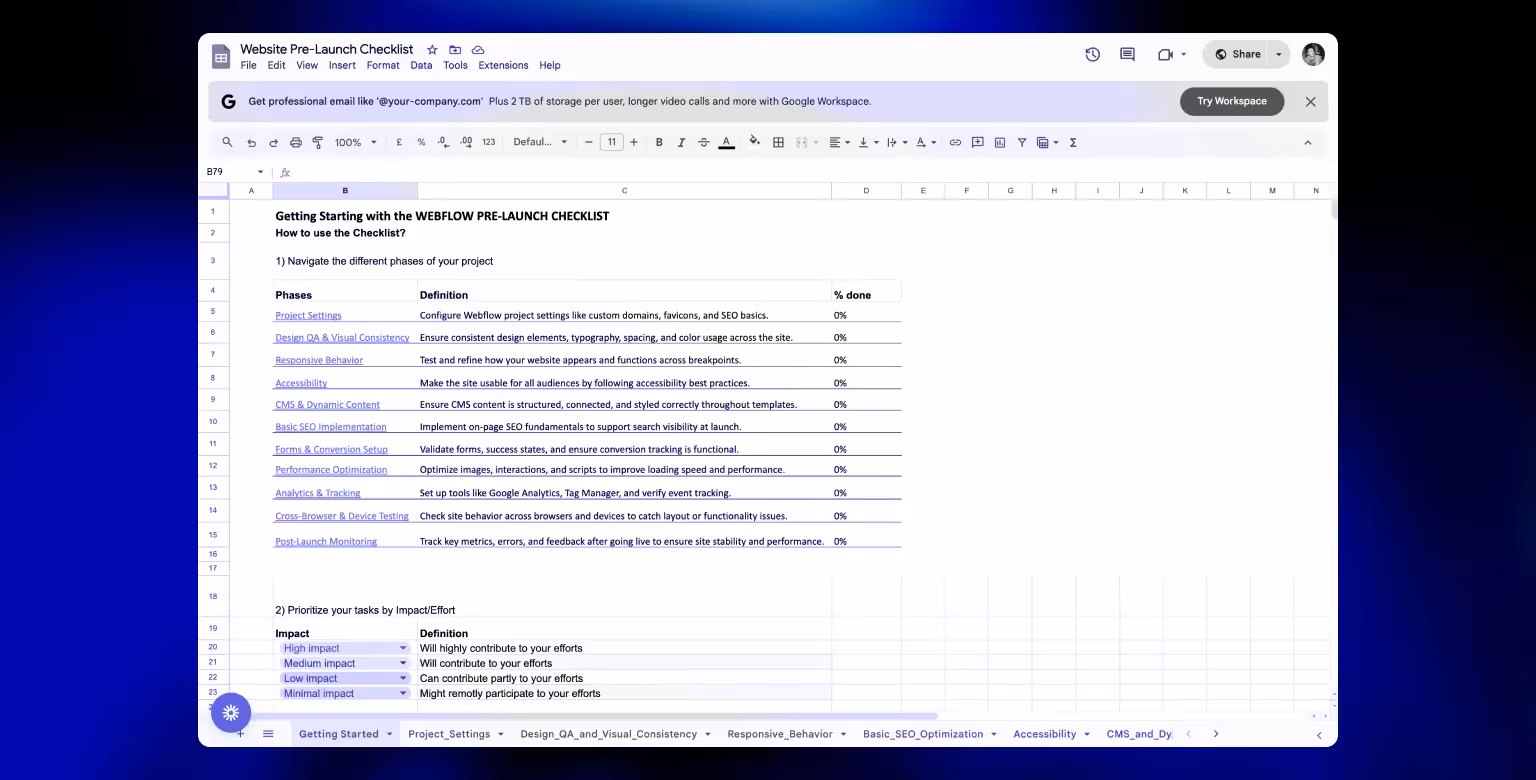
Pre-Launch Website Checklist – Preparing Your Site for Launch
Before going live, your site should be fully tested, optimized, and ready to perform across devices, browsers, and search engines. The following areas should be thoroughly reviewed:
Project Settings
- Connect and verify domain: Ensure DNS is set up and resolving correctly.
- Enable SSL and force HTTPS: Enforce secure connections sitewide.
- Set default domain: Choose between www and non-www and enforce it.
Content and Design Review
- Finalize all copy: Eliminate typos, placeholders, and tone inconsistencies.
- Ensure brand consistency: Align typography, colors, and UI elements with your style guide.
- Review layouts: Check vertical spacing, visual rhythm, and hierarchy.
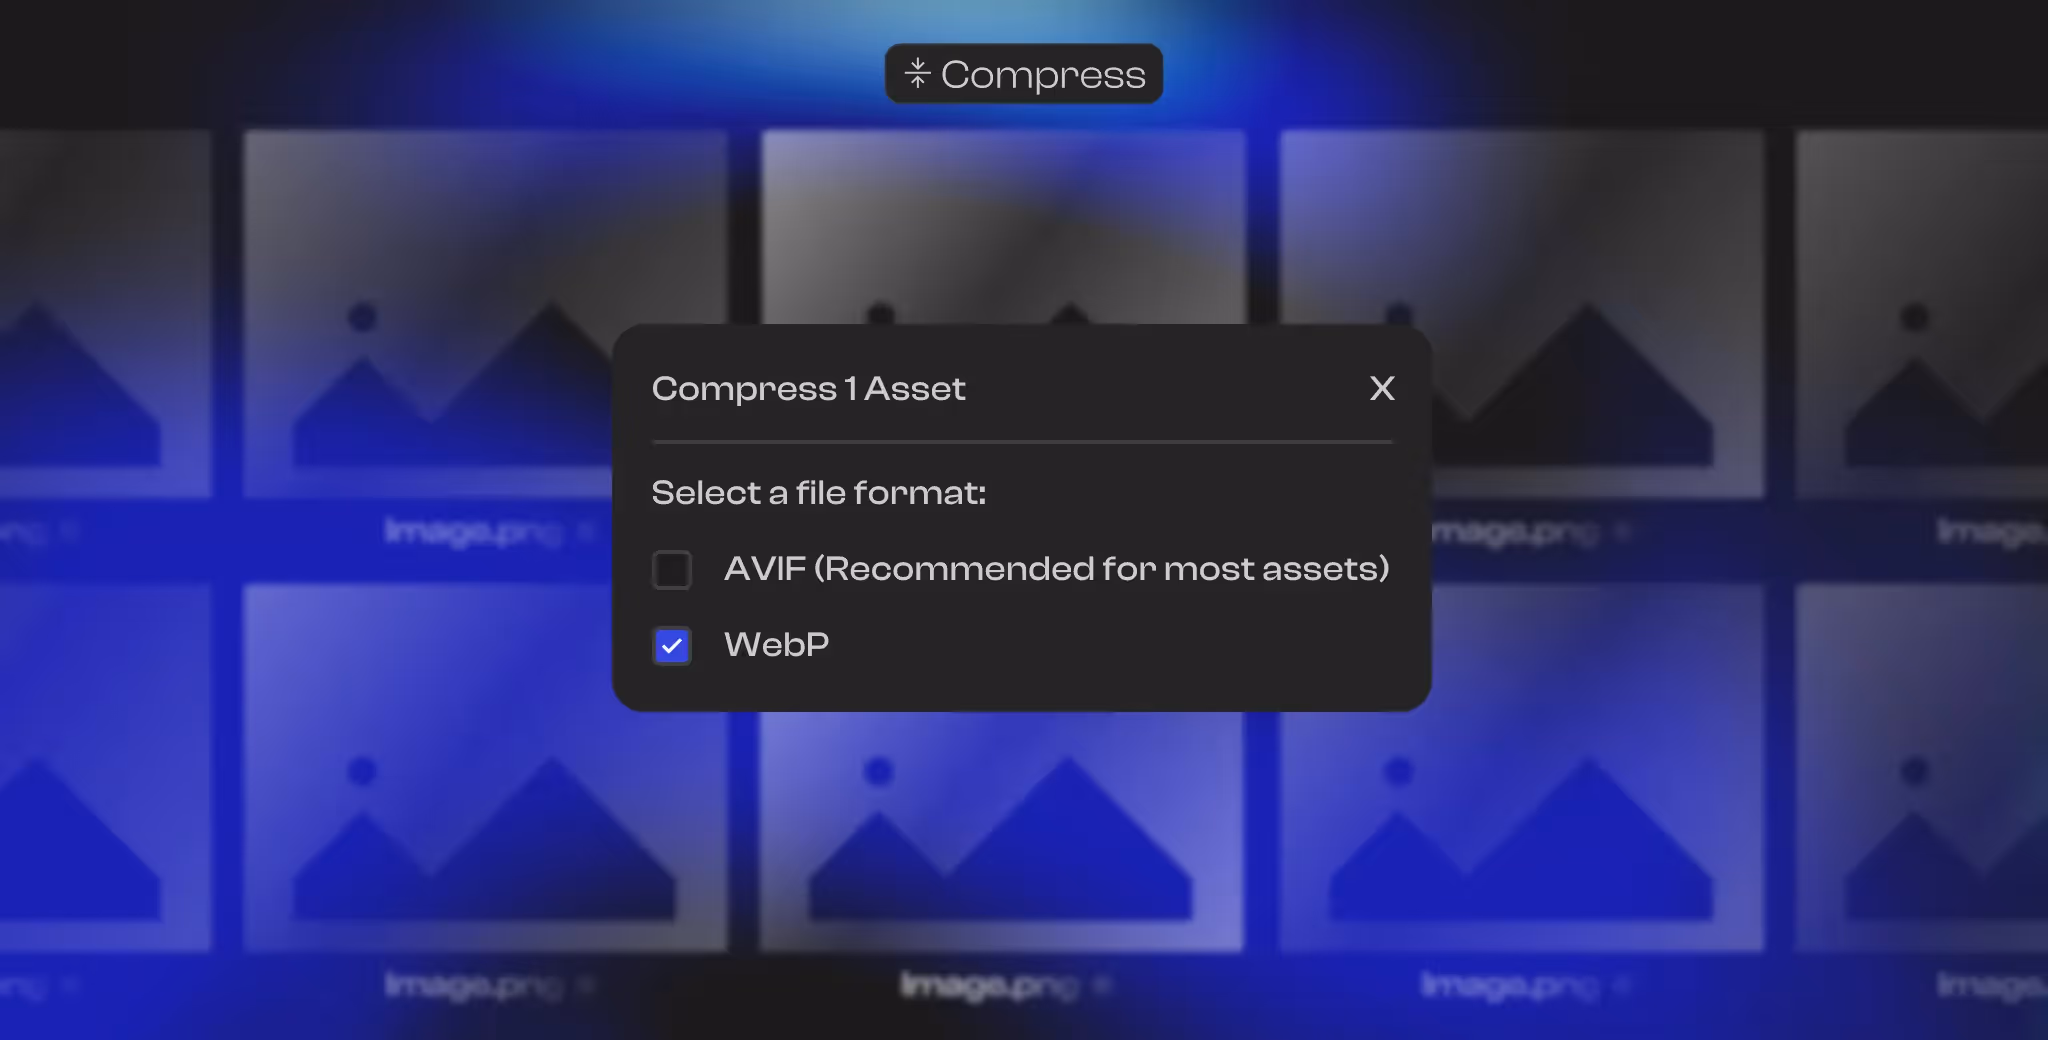
- Optimize images: Compress assets and add alt text to all visuals.
- Favicon and meta image: Upload a favicon and social share image.
Responsive Behavior
- Test all breakpoints: Confirm layout adapts at all major screen sizes.
- No horizontal scroll: Ensure no unintended overflow exists.
- Typography scaling: Validate font sizes and line heights across devices.
Accessibility
- Check contrast ratios: Meet WCAG standards for text and UI elements.
- Keyboard navigation: Ensure all functionality is operable without a mouse.
- ARIA roles and alt tags: Use semantic structure and label interactive elements.
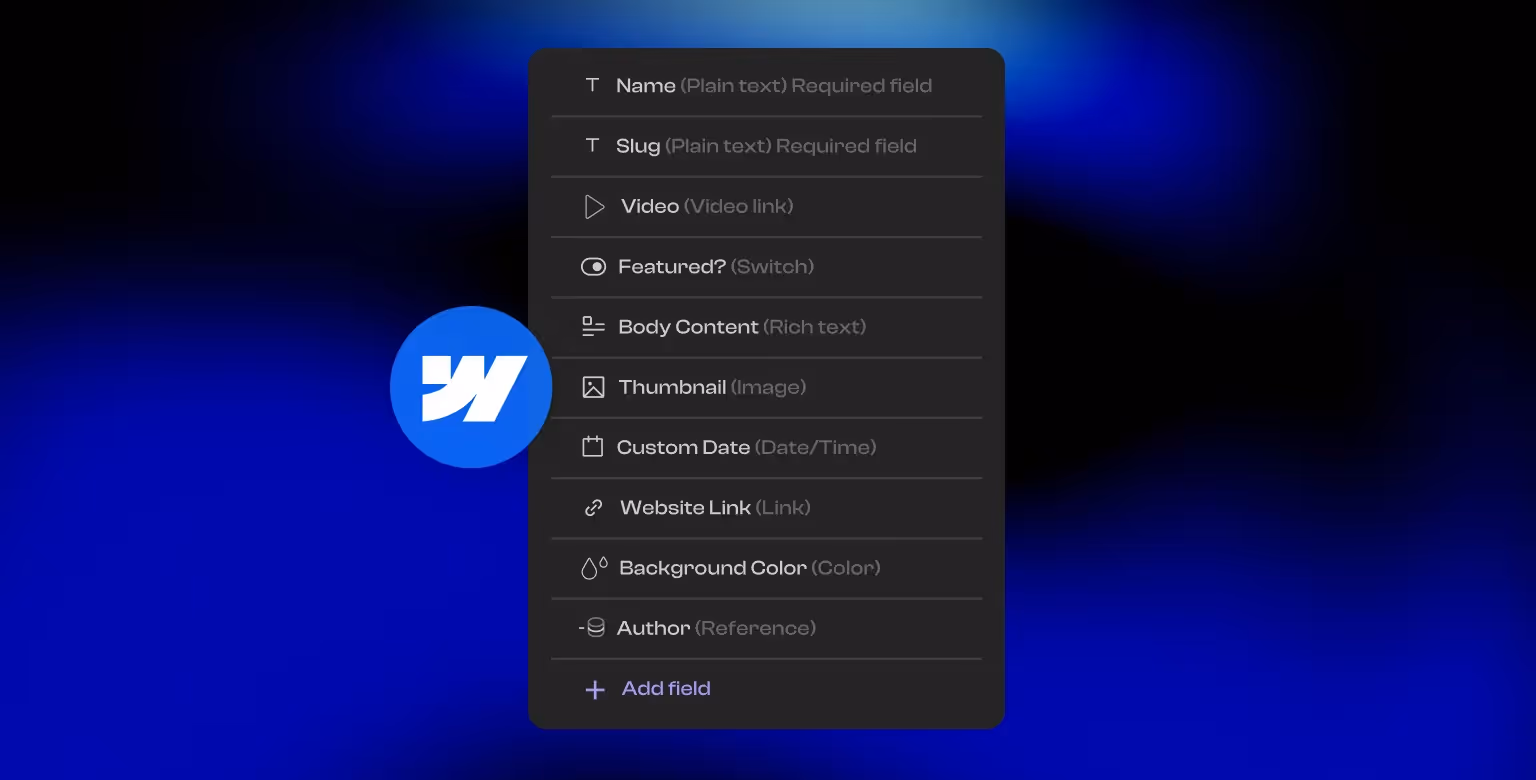
CMS & Dynamic Content
- Clean slugs: Use short, readable URLs in CMS collections. If you have outdated content, make sure to delete a page in Webflow properly to avoid 404 issues.
- Field mapping: Ensure all fields (headings, images, links) are bound correctly.
- Label structure: Use descriptive labels for fields and references.
Forms & Conversion Setup
- Input types and labels: Use appropriate types for email, phone, etc.
- Form naming: Assign clear names to each form and field.
- Success/error messages: Customize responses and confirm display.
SEO Setup Before Launch
- Page titles and descriptions: Write unique, keyword-optimized metadata for each page.
- Heading hierarchy: One H1 per page, followed by a logical structure.
- Image SEO: Include keywords in filenames and alt attributes.
- XML sitemap: Read our guide about adding a sitemap in Webflow, then enable and validate it before launch.
- Robots.txt: Confirm crawlable structure.
- Llms.txt: To have control over how your content is used by AI models.
- Remove noindex tags: Make sure all live pages are indexable. Fix technical SEO issues that might block crawlers or confuse search engines before launch.
- Search Console: Set up and verify property in Google Search Console.

Performance Optimization
- Compress assets: Use TinyPNG, ImageOptim, or Webflow asset panel.
- Lazy load media: Apply lazy loading to below-the-fold elements.
- Eager load hero content: Set important content to load early.
- Minify code: Enable CSS and JS minification.
- Use a CDN: Ensure files are delivered efficiently worldwide.
Analytics & Tracking
After launching, verify that all conversion paths are tracked correctly. For example, redirecting form submissions to a dedicated thank you page ensures each submission can be logged as a GA4 conversion event.
- Install GA4: Use Google Tag Manager to deploy analytics.
- Configure Clarity or Hotjar: Monitor user interactions.
- Add conversion pixels: Set up tracking for marketing channels.

Cross-Browser & Device Testing
- Browser coverage: Test on Chrome, Safari, Firefox, and Edge.
- Device variety: Check on Windows, macOS, Android, and iOS.
- Screen resolutions: Manually test small laptops and large monitors.
Legal and Compliance
- Privacy policy and terms: Ensure required legal pages are live.
- Cookie consent: Add regional compliance if necessary (GDPR, CCPA).
- Accessibility compliance: Meet basic WCAG 2.1 standards.
Once every item in the pre-launch checklist is complete and tested in a live environment or staging proxy, you're ready to move to the post-launch phase.
Post-Launch Website Checklist – What to Monitor After Going Live
The moment your website goes live, your focus shifts from preparation to performance monitoring. Post-launch is where early issues surface and where you lay the groundwork for ongoing improvements.
Re-Test Core Functionality
- Form submissions: Test all forms again in the live environment.
- Navigation: Revisit the main menu, footer links, and anchor links.
- Interactive elements: Click all CTAs, accordions, sliders, and tabs.
Performance and Analytics Monitoring
- Analytics tracking: Verify Google Analytics, Clarity, and any other tracking scripts are recording data.
- Uptime monitoring: Set up alerts via Pingdom, UptimeRobot, or StatusCake.
- Real-time traffic review: Watch initial visits for bounce patterns, high-exit pages, or rage clicks.
SEO Follow-Up Tasks
- Submit XML sitemap: Use Google Search Console to notify crawlers.
- Fix crawl errors: Review indexing issues or broken internal links.
- Track keyword performance: Start measuring rankings for primary keywords.

Promotion and Visibility
- Launch announcement: Post across LinkedIn, Twitter, and other relevant channels.
- Email blast: Send an announcement to your list.
- Community sharing: Share in Webflow forums, Slack groups, or niche communities.
Content Updates and Improvement Plan
- Create a content roadmap: Plan blog posts, case studies, or resource center items.
- Refresh high-priority pages: Use early data to optimize copy or structure.
- Add new sections: Based on feedback or internal priorities.
Maintenance and Security
- Daily backups: Ensure backup jobs are enabled and storing copies.
- Security scans: Run malware scans if applicable.
- Plugin/app updates: Keep third-party tools or CMS extensions updated.
- Monitor uptime and speed: Track over the first week to catch regressions. Then, set up a reliable process to monitor your website long-term for uptime and security.
Once post-launch tasks are complete, shift your focus to regular content publishing, SEO growth, and conversion optimization—or partner with an SEO agency for tech startups if you need support.
Post-launch, you’ll want to monitor uptime, keep plugins updated, and optimize based on data. If you need ongoing support, our Webflow maintenance service handles all of that for you.
Frequently Asked Questions about our Website Launch Checklist
What is a website launch checklist?
A website launch checklist is a structured list of tasks to complete before and after making a website live. It covers technical setup, design QA, SEO, compliance, and performance to ensure the site functions properly and supports long-term growth.
Why is a pre-launch checklist important?
Without a structured checklist, it's easy to miss important details like setting up analytics, submitting your sitemap, or checking responsiveness. These oversights can lead to lost traffic, poor UX, and wasted launch momentum.
Do I need a checklist if I’m using Webflow?
Yes. While Webflow simplifies many aspects of site setup, it doesn't cover everything. You still need to configure tracking, test CMS bindings, set up redirects, and check SEO metadata manually.
How soon should I submit my site to Google?
Immediately after launch. Once you’ve confirmed everything is live and functional, submit your XML sitemap via Google Search Console to start the indexing process.
What should I prioritize post-launch?
Focus on verifying functionality, monitoring analytics, and catching crawl issues. You should also begin promoting the site through email, social channels, and partnerships.
Can I use this checklist for future launches?
Absolutely. This checklist is repeatable and scalable across new builds, redesigns, and migrations. Save a copy and adapt it to fit your process.
What’s the difference between staging and live testing?
Staging tests simulate the live environment without real traffic. Post-launch testing validates performance, form delivery, and tracking scripts in real-time with actual users.
What if I find issues after launch?
Fix them quickly and re-test. Most post-launch fixes are expected and manageable. Document each one so you can refine your checklist for future projects.
