


For many teams, Airtable serves as a flexible database while Webflow provides a powerful front-end. Connecting the two allows marketers, founders, and developers to create scalable workflows without being slowed down by manual updates.
In this guide, we’ll break down the most common use cases, compare integration methods, and share best practices to help you set up a stable connection between Airtable and Webflow.
Why Integrate Webflow with Airtable?
Connecting Webflow with Airtable solves a common problem: managing large or frequently updated sets of data without spending time manually editing CMS items in Webflow. By treating Airtable as a database and Webflow as a front-end, you can create more scalable workflows that work for teams of any size.
Dynamic Content & Real-Time Updates
When content lives in Airtable, any updates you make can flow into Webflow’s CMS. This ensures your website always reflects the latest information without requiring duplicate work.
Centralized Data Management
Airtable becomes a single source of truth where marketing, sales, or content teams can make changes. Webflow then displays this data, keeping all stakeholders aligned. This approach aligns well with a B2B website strategy where centralizing content workflows directly impacts scalability and lead generation.
Automation & Efficiency
Integrations reduce repetitive tasks. Instead of manually creating CMS items, you can automate the process, freeing up time and minimizing errors.
Custom Workflows
Airtable supports linked records, formulas, and views, which means you can power complex workflows and unique site experiences when combined with Webflow.
Scalability
For large datasets like product catalogs or membership directories, Airtable provides flexibility and storage, while Webflow serves as the presentation layer.
Common Use Cases for Webflow + Airtable
Webflow and Airtable work well together because each tool has strengths that complement the other. Webflow provides a powerful visual front-end, while Airtable acts as a flexible backend for managing structured data. Below are some of the most common scenarios where teams connect the two.
CMS Content Publishing
Airtable can manage blog posts, events, or product listings. When integrated with Webflow, new Airtable records can automatically populate CMS collections, ensuring your site always reflects the latest data.
Lead Capture & CRM
Webflow forms can feed directly into Airtable, turning submissions into structured records. This setup is often used to build lightweight CRMs or marketing databases.
CRM integrations like HubSpot can also be tied to your Webflow site using no-code tools. For example, our Webflow HubSpot integration guide covers how to connect Webflow forms with HubSpot, wihich is analogous to syncing data into Airtable.
E-commerce & Inventory Management
Product data and inventory counts can live in Airtable and sync to Webflow. This allows non-technical teams to manage products without logging into Webflow’s CMS.
Team Directories & Resource Lists
Profiles, directories, or resource lists stored in Airtable can be synced into Webflow collections, making it simple to maintain large sets of structured content.
Custom Workflows
Campaign calendars, submission portals, or membership data stored in Airtable can be tied to Webflow for tailored site experiences. Airtable’s formulas and linked records provide logic that Webflow then displays.
Universal Integration Checklist
No matter which tool you choose (Zapier, Make, PowerImporter, or Whalesync), the integration process between Webflow and Airtable follows the same general steps. Use this checklist to keep your setup clean and reliable:
- Plan Your Data: Make sure Airtable bases and Webflow CMS collections match in field types (text, numbers, images, etc.).
- Pick the Right Tool: Zapier and Make work for one-way automations, PowerImporter for content-heavy CMS syncs, Whalesync for real-time two-way sync.
- Connect Accounts: Authorize Airtable and Webflow securely through your chosen tool.
- Map Fields: Align Airtable columns with Webflow CMS fields carefully, especially for images, multi-selects, and references.
- Test the Setup: Run a trial sync to confirm data flows correctly.
- Monitor Performance: Keep an eye on logs or error messages to catch sync issues early. For continuous support, consider Webflow maintenance services to manage updates and keep your integrations running smoothly.
Maintain and Update: Adjust mappings as your Airtable schema or Webflow collections evolve.
Integration Methods & Tools
There are several ways to connect Airtable and Webflow, each with its own advantages depending on your technical skills, budget, and the level of automation you need. The options range from simple no-code platforms to advanced custom API work.
How to Integrate Webflow and Airtable with Zapier
Zapier is one of the simplest ways to connect Webflow and Airtable. It uses a trigger-and-action system, which makes it beginner-friendly for anyone who wants to automate without writing code. See our Webflow Zapier integration guide for a detailed example of setting up similar workflows with Webflow.
An overview of Zapier documentation can help you better understand the tool.
Step 1. Create a Zapier Account
Sign up for a Zapier account. The free plan is usually enough for small, simple workflows.
Step 2. Set Airtable as the Trigger
Choose Airtable as your trigger app. Example: selecting New Record in Airtable will start the workflow whenever a new row is added.
Step 3. Set Webflow as the Action
Pick Webflow as the action app. Popular actions include:
- Create CMS item
- Update CMS item
- Send form submission data
Step 4. Map Airtable Fields to Webflow
Use Zapier’s mapping interface to connect Airtable fields (e.g., Title, Image, URL) to Webflow CMS fields.
Step 5. Test the Zap
Add a record in Airtable to check if it automatically creates or updates a CMS item in Webflow.
Step 6. Turn It On
Activate your Zap so the workflow runs continuously whenever the trigger conditions are met.
Best Use Cases for Zapier:
- One-way sync of Airtable records into Webflow CMS.
- Capturing Webflow form submissions into Airtable.
- Quick automations for small projects.
Limitations:
- One-way sync only.
- Task-based pricing can become costly at scale.
- Polling means “real-time” sync may have short delays.
Here's a visual explanation brought to you by Zapier:
How to Integrate Webflow and Airtable with Make (formerly Integromat)
Make is a powerful automation platform that allows for more complex Airtable–Webflow integrations compared to Zapier. It supports multi-step workflows, conditional logic, and looping through large sets of records, making it a strong choice for advanced setups.
Step 1. Sign Up and Log In
Create a Make account and access the scenario builder dashboard.
Step 2. Set Airtable as the Trigger
Choose Airtable as the starting app. You can trigger workflows with events such as Watch Records (new or updated records in a table).
Step 3. Add Webflow as the Action
Select Webflow as the action app. Make allows you to:
- Create CMS items
- Update existing CMS items
- Delete CMS items when records are removed

Step 4. Build Advanced Logic
Make supports branching, filters, and iterators. You can:
- Loop through multiple Airtable rows and update multiple CMS items in one workflow.
- Add conditions to sync only certain records (e.g., records tagged as “Published”).
Step 5. Map Fields
Use Make’s interface to connect Airtable fields (e.g., text, images, URLs) to Webflow CMS fields.

Step 6. Test and Run the Scenario
Run the scenario once to test the mapping. Verify that new Airtable records create or update the right CMS items in Webflow.

Step 7. Schedule or Enable Real-Time Runs
Set the workflow to run on a schedule (e.g., every 15 minutes) or keep it running continuously depending on your plan.
Best Use Cases for Make:
- Complex workflows requiring multiple steps or conditional logic.
- Updating or deleting Webflow CMS items based on Airtable changes.
- Large datasets that need bulk processing.
To get a better idea of the different things that can be done with Airtable using Make, read this guide covering 9 powerful Airtable integrations.
Limitations:
- Steeper learning curve compared to Zapier.
- One-way sync (Airtable → Webflow) unless custom workarounds are added.
- Advanced features require a paid plan.
If you would prefer to see how this is done visually, watch this video:
How to Integrate Webflow and Airtable with PowerImporter
PowerImporter is a dedicated tool designed to move and sync Airtable data into Webflow CMS. Unlike Zapier or Make, which are general automation platforms, PowerImporter is built specifically for the Airtable–Webflow use case. This makes it ideal for content-heavy projects where Airtable is the source of truth.
Step 1. Create a PowerImporter Account
Sign up for PowerImporter and log in to your dashboard.
Step 2. Connect Airtable
Authorize PowerImporter to access your Airtable base. Select the base and table you want to sync.
Step 3. Connect Webflow
Authorize your Webflow account. Pick the project and the CMS collection that will receive the Airtable data.
Step 4. Map Fields
Use PowerImporter’s mapping interface to align Airtable fields (e.g., Title, Description, Images) with Webflow CMS fields.
Step 5. Configure Sync Options
Choose how you want to sync:
- One-time bulk import to quickly populate CMS collections.
- Continuous sync to automatically push updates from Airtable into Webflow whenever data changes.
Step 6. Run the Sync
Start your first sync and check that content—including rich text, images, and multi-reference fields—appears correctly in Webflow.
Best Use Cases for PowerImporter:
- Populating large CMS collections in Webflow from Airtable.
- Managing directories, catalogs, or media-heavy sites.
- Teams that prefer Airtable as the single source of truth for content.
Limitations:
- One-way sync only (Airtable → Webflow).
- Paid plans are required for real-time syncing and higher record limits.
- Not suitable for workflows outside Webflow CMS.
To learn more about common problems that can arise with PowerImporter, go over their troubleshooting page.
If you would like to see how this is done visually, watch this video (keep in mind, PowerImportetr is not the most popular method and the video is slightly outdated):
How to Integrate Webflow and Airtable with Whalesync
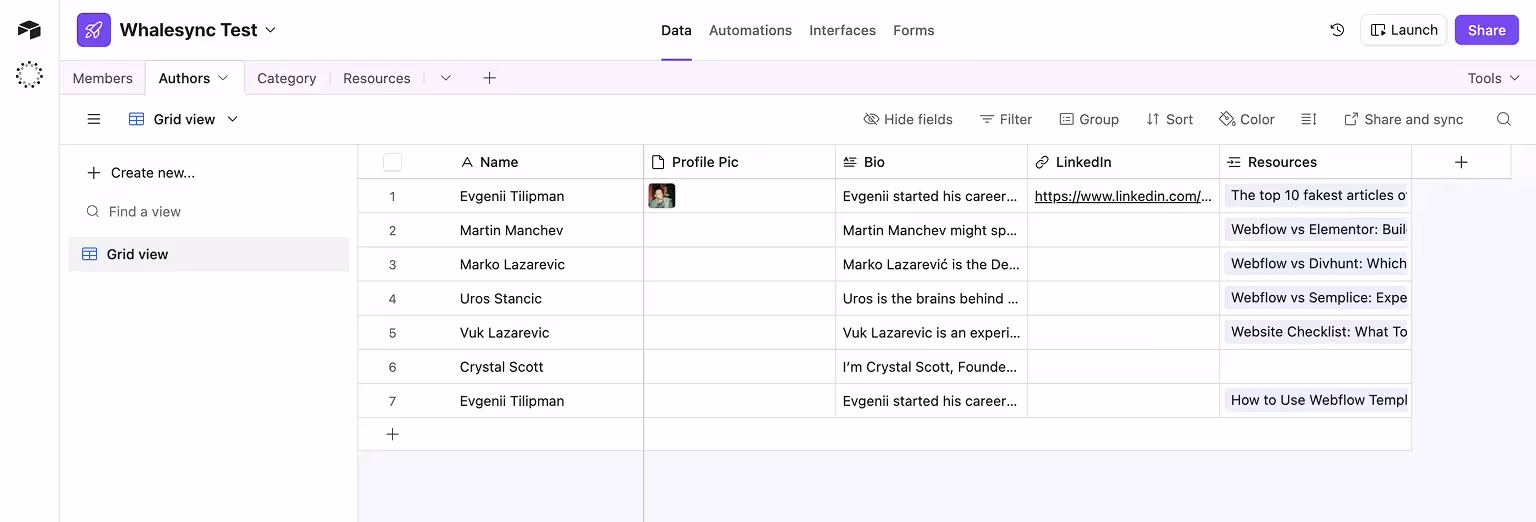
Whalesync is a platform built for real-time, two-way syncing between Airtable and Webflow. Unlike Zapier, Make, or PowerImporter, Whalesync ensures both databases stay aligned at all times. This is particularly useful when teams collaborate in Airtable while maintaining a live Webflow site.
Tilipman Digital is a Whalesync Certified Partner, which means we can help businesses implement and optimize Whalesync integrations with best practices in mind.
Step 1. Create a Whalesync Account
Sign up for Whalesync and access your dashboard.
Step 2. Connect Airtable
Authorize Whalesync to access your Airtable account. Choose the base and table you want to sync.
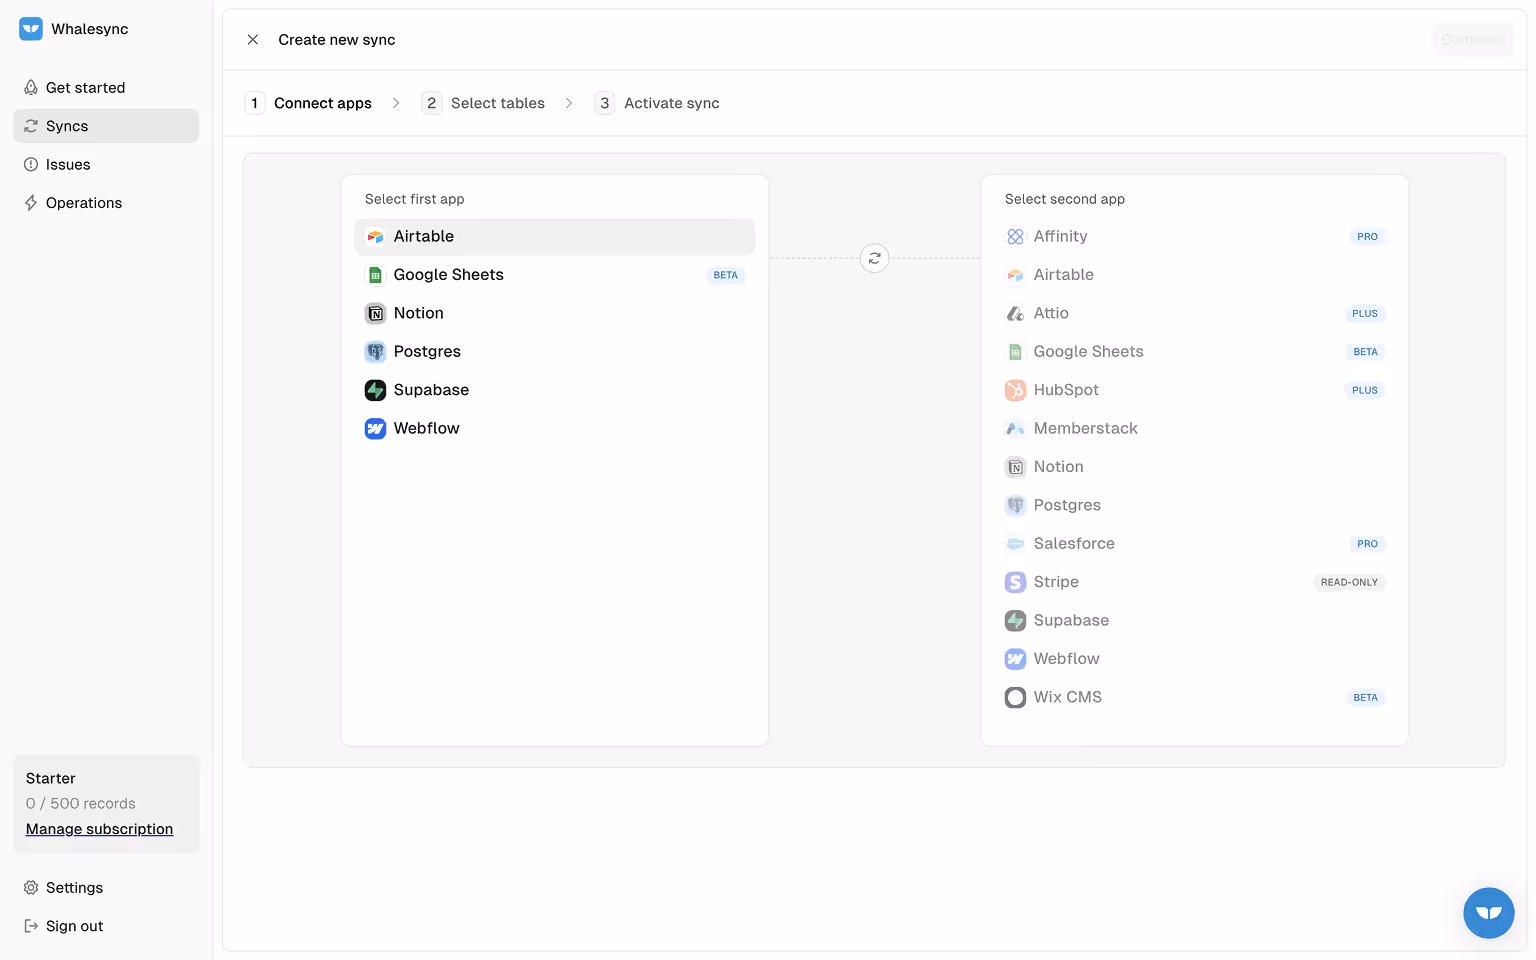
Step 3. Connect Webflow
Log into Webflow via Whalesync’s integration setup. Select the project and CMS collections that should stay in sync.
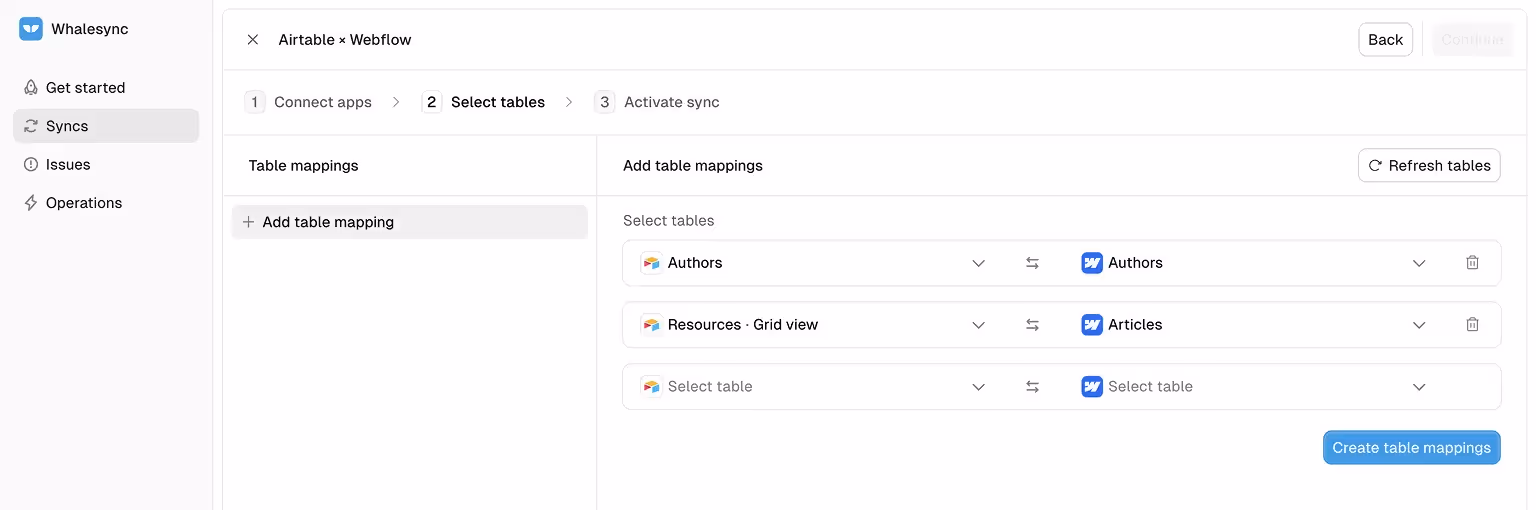
Step 4. Map Tables
Map Airtable tables (text, rich text, images, reference fields) to Webflow collection lists with Whalesync’s interface. You can find all the existing tables by clicking "Create table mappings"
Step 5. Map Fields
Map Airtable fields (text, rich text, images, reference fields) to Webflow CMS fields using Whalesync’s interface. You can find the important considerations in this Whalesync's Airtable documentation.

Step 6. Enable Two-Way Sync
Select whether you want one-way or two-way sync. In two-way mode, updates in Webflow are reflected in Airtable, and changes in Airtable are reflected in Webflow.
Step 7. Test the Setup
Update a record in Airtable and confirm it updates in Webflow. Then make a change in Webflow CMS and confirm it updates in Airtable.
Step 8. Launch and Monitor
Activate syncing and review logs for any sync errors or unsupported fields.
Best Use Cases for Whalesync:
- Teams needing Airtable and Webflow as interchangeable systems.
- Projects requiring real-time, two-way updates.
- Scaling projects with large datasets where manual syncing isn’t feasible.
Limitations:
- Paid subscription required for real-time sync.
- Setup complexity is higher than Zapier or PowerImporter.
- May be excessive for smaller projects that only require occasional one-way updates.
If you would prefer to see how this is done visually, watch this video:
Comparing Webflow Airtable Integration Tools
To help you choose the right solution, here’s a side-by-side comparison of the most popular integration tools. Once you’ve chosen your tool, our website launch checklist playbook can help ensure your integration works smoothly before going live.

Best Practices & Considerations
Integrating Webflow and Airtable effectively requires more than just connecting the tools. Paying attention to data structures, performance, and maintenance will ensure the integration is reliable and sustainable.
Data Structure Alignment
Design Airtable tables and Webflow CMS collections with matching field types. For example, dates in Airtable should connect to date fields in Webflow, and attachments should map to image or file fields.
Handling Complex Fields
Not all fields sync cleanly. Multi-select or reference fields require careful mapping, and images or attachments should be tested to confirm proper uploads.
API Limits and Performance
Both Webflow and Airtable have API request limits. If you manage large datasets, use batch updates or a tool that handles throttling automatically to avoid hitting restrictions. Read Airtable API Ddocumentation to learn more about the limitations.
Sync Frequency
Decide whether you need real-time syncing or periodic updates. Real-time syncing offers freshness but can be more resource-intensive, while scheduled updates may suffice for static content.
Error Handling
Set up alerts or logging within your integration tool to catch failures. Monitor for missing records or failed updates to prevent data inconsistencies.
Security Practices
Keep API keys and authentication details safe. Use environment variables or encrypted storage for custom setups, and provide limited access keys where possible.
Documentation and Version Control
Document your setup clearly. If using custom scripts, store them in a repository with version control. For no-code tools, record mapping rules and workflows so they can be maintained by different team members.
Webflow Hosting Considerations
Check your Webflow hosting plan. API access requires at least a CMS plan, and some advanced features like Logic are available only to higher-tier plans. For a breakdown of Webflow hosting tiers and how pricing impacts feature access, see our guide on Webflow pricing.
DIY vs. Hiring Experts
When planning a Webflow and Airtable integration, you’ll need to decide whether to handle the setup yourself or bring in external expertise. The right choice depends on the complexity of your needs and the resources available to your team.
When to DIY
If your requirements are straightforward, such as sending form submissions into Airtable or creating a one-way sync of simple CMS items, no-code tools like Zapier, Make, or PowerImporter can be managed by non-technical users. These solutions are accessible, affordable, and well-documented.
When to Seek Professional Help
Complex workflows, such as two-way syncing, large-scale datasets, or integrations that require custom logic, often benefit from expert implementation. Developers or agencies can ensure that the setup is stable, secure, and aligned with best practices. If this is your case, consider working with a Webflow development agency to ensure your Webflow–Airtable integration is stable, secure, and aligned with best practices.
Benefits of Working with Experts
- Time savings during setup and troubleshooting.
- Access to advanced solutions like custom API integrations.
- Ongoing support and optimization as your needs evolve.
Cost Considerations
DIY approaches typically cost less upfront but may require more ongoing attention. Professional services carry higher initial investment but reduce the risk of errors, downtime, and maintenance issues. To explore our service tiers and find the right package for your project, check our pricing page.
Looking to combine Airtable with something else, but not sure if we can integrate Webflow with your tech stack, browse the Webflow integrations we work with.
FAQs about Webflow Airtable Integration
Can I connect Webflow to Airtable?
Yes, you can connect Webflow and Airtable using no-code tools like Zapier, Make, or PowerImporter. More advanced needs, such as two-way syncing, can be handled by dedicated platforms like Whalesync or through custom API work.
Do I need coding skills for this integration?
Not necessarily. Most integrations can be set up using no-code tools. However, if you want custom workflows or advanced logic, developer skills will be needed.
Which tool is best for Webflow-Airtable integration?
It depends on your use case. Zapier and Make work for simple one-way automations. For more details comparing automation tools, see our Make vs Zapier guide. PowerImporter is ideal for CMS syncing. Whalesync is best for two-way real-time syncs. For full control, use custom APIs.
Can I embed an Airtable form in Webflow?
Yes. Airtable forms can be embedded in Webflow using the Embed element. This allows form submissions to go directly into Airtable.
Is it possible to send Webflow form submissions to Airtable?
Absolutely. Tools like Zapier or Webflow Logic can be used to route Webflow form data into Airtable automatically.
How long does it take to set up?
For simple integrations, setup can be completed in under an hour. More advanced setups with two-way syncing or custom API scripts may take several days, especially with testing and debugging.

