


Lottie animations are a fantastic way to bring your Webflow website to life with lightweight, interactive motion graphics. The best part is that you don’t need any coding skills to add Lottie animations in Webflow — making it accessible even for marketers and non-developers.
In this guide, we’ll walk you through how to integrate Lottie in Webflow step by step. You’ll learn:
- What Lottie files are
- Why they’re beneficial
- How to easily embed them on your site
- Tips for interactions like scroll or click
- Advanced use-cases including CMS integration
- How we implemented Lotties for one of our clients, Blockpeer
Whether you’re a designer looking to spice up a page or a marketer aiming to increase engagement, this tutorial will show you exactly how to add Lottie animation to your Webflow project. By the end, you’ll be confidently using Lottie in Webflow to enhance your site’s user experience and wow your audience.
What is a Lottie Animation?
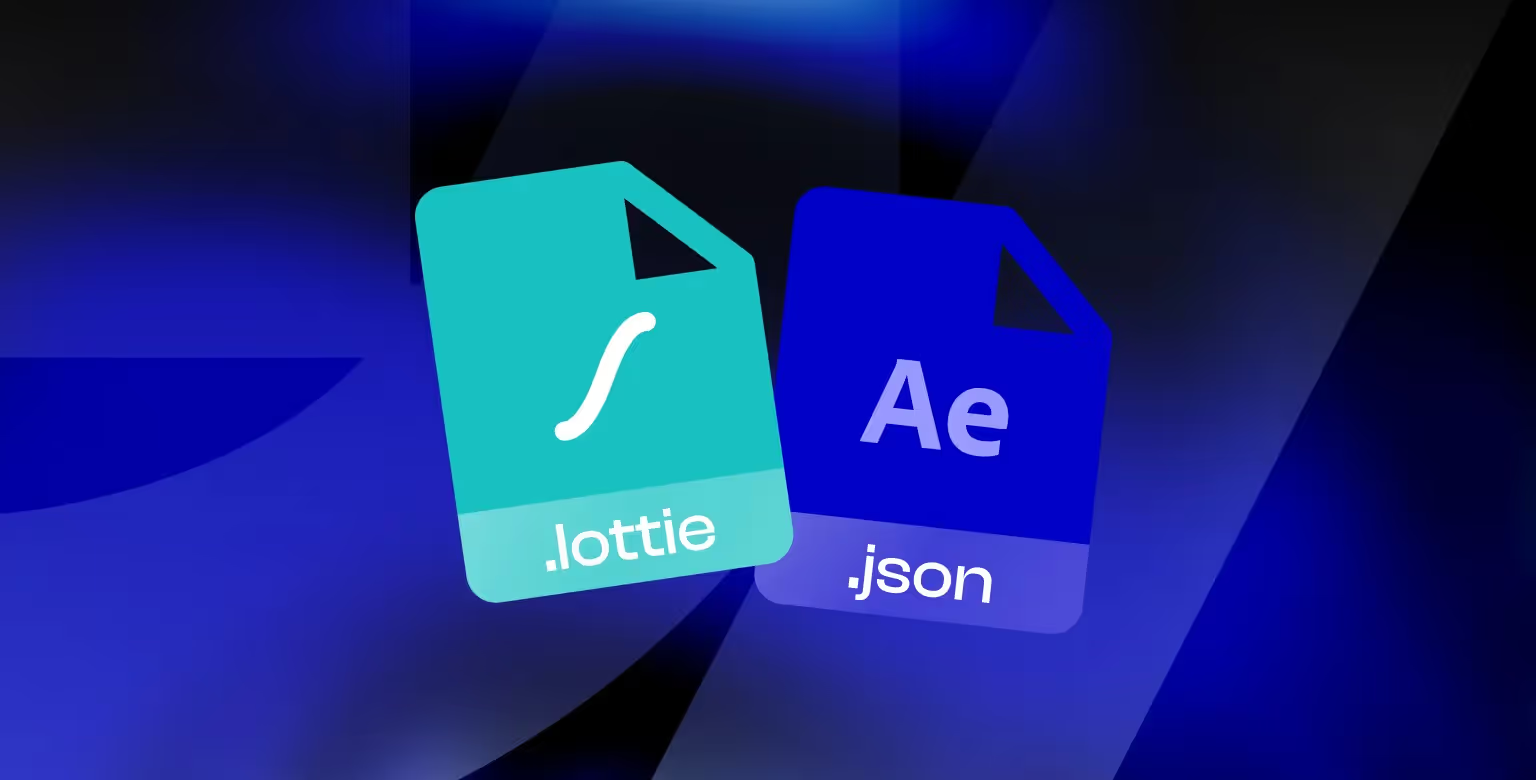
A Lottie animation is a special kind of web animation file — typically exported in JSON format (or the newer .lottie format) — that can be rendered directly by the browser.
In simple terms, Lottie is a code-based animation originating from Adobe After Effects design tool. With the help of the Bodymovin plugin, animations are converted into compact JSON files that contain all the shapes, colors, timing, and motion data.
Fun fact, Lottie format was originally developed by Airbnb and since then it has become an industry-standard solution for designers and developers who want elegant animations without sacrificing performance or accessibility.
Why Use Lottie Animations in Webflow?
Using Lottie animations in Webflow can significantly enhance your site’s appeal without sacrificing performance. Here are a few key benefits of Lottie Webflow integration:
- Lightweight and Fast-loading: Lottie files are very small compared to GIFs or video. This means you can add movement to your page without slowing down load times. A smoother, faster site keeps visitors around longer and is better for SEO.
- High Quality at Any Size: Because Lotties use vectors and shapes, they scale without losing quality. Whether you display a Lottie animation as a small icon or a full-screen graphic, it will remain sharp on high-DPI (Retina) displays.
- Interactive and Engaging: Webflow’s Lottie element can be tied to interactions (e.g., start animation on scroll, hover, click, etc.). This interactivity grabs user attention. For example, a Lottie animation can play when a user clicks a button, adding a delightful touch.
- No Coding Required: Webflow natively supports Lottie animations with a dedicated element, so you can add animations with simple drag-and-drop. It’s a completely no-code process – perfect for marketers or content creators who aren’t developers.
- Cross-Platform Consistency: A Lottie animation will render the same across modern browsers and devices using the Lottie library, ensuring a consistent experience for all users.
In short, Lottie animations let you integrate sophisticated animations in Webflow easily. They make your site feel modern and dynamic, helping communicate ideas in a visual way — especially useful on B2B sites to illustrate concepts — all without the bloat of large media files.
How to Get a Lottie Animation File
Before adding a Lottie animation to Webflow, you need to have the animation file itself (with a .json or .lottie extension). There are a couple of ways to obtain Lottie files:
Option 1: Create Your Own Lottie
If you want a completely custom animation, you can design it in Adobe After Effects and export it as a Lottie JSON using the Bodymovin plugin. This requires some motion design skill – you’ll animate in After Effects, then use the free Bodymovin extension to generate a Lottie file.
This method gives you full creative control, but it’s more involved and may require a designer’s help. (If you’re not a designer, you might skip this and use the next option.)

Option 2: Download Pre-made Lotties
The easiest route is to use ready-made animations from libraries like LottieFiles.com. LottieFiles offers thousands of free (and premium) Lottie animations created by a community of designers. Simply search for an animation that fits your needs — for example, a loading spinner, an icon animation, or an infographic element — then download the JSON file.
To make things simpler, Webflow's app marketplace has introduced Lottie app for Webflow which you can use to download Lottie files directly from LottieFiles.com to your Webflow website.
Other great sources include marketplace libraries and open-source animation resources.
Using pre-made Lotties is a quick way to get started without any design work.
Tip: When downloading a Lottie, make sure it’s in the.jsonformat (or.lottieif available). Some sites also offer the animation in a.lottiecontainer — which is a compressed version of the JSON and its assets. Webflow supports both file types.
Once you have your Lottie file saved to your computer, you’re ready to add it to your Webflow project.
Prerequisites: Getting Ready to Add Lottie in Webflow
Before we dive into the step-by-step tutorial, make sure you have the following ready:
A Webflow Project: You should have a Webflow website (new or existing) open in the Webflow Designer where you want to add the animation. Make sure you’re in the Designer interface (not just the Editor) because we’ll be adding elements and assets directly.
A Lottie Animation File: Have your .json or .lottie animation file ready. If you haven’t downloaded or created one yet, visit a resource like LottieFiles to grab a free animation that you can practice with.
Basic Familiarity with Webflow UI
This guide is beginner-friendly, but it helps to know the basics of the Webflow interface:
- The left toolbar (for the Assets panel and Add panel)
- The right sidebar (for element settings and styling)
Don’t worry if you’re new — we’ll walk you through everything clearly.
That’s it! You don’t need any code or third-party plugins — Webflow has built-in support for Lottie. Now let’s get that animation onto your webpage.
How to Add a Lottie Animation in Webflow (Step-by-Step)
Adding a Lottie animation to Webflow is straightforward. We'll upload the file, place a Lottie element on the page, and configure it. Follow these steps:
Step 1: Upload Your Lottie File to Webflow
Before placing the animation, upload the Lottie file into your Webflow project’s assets library:
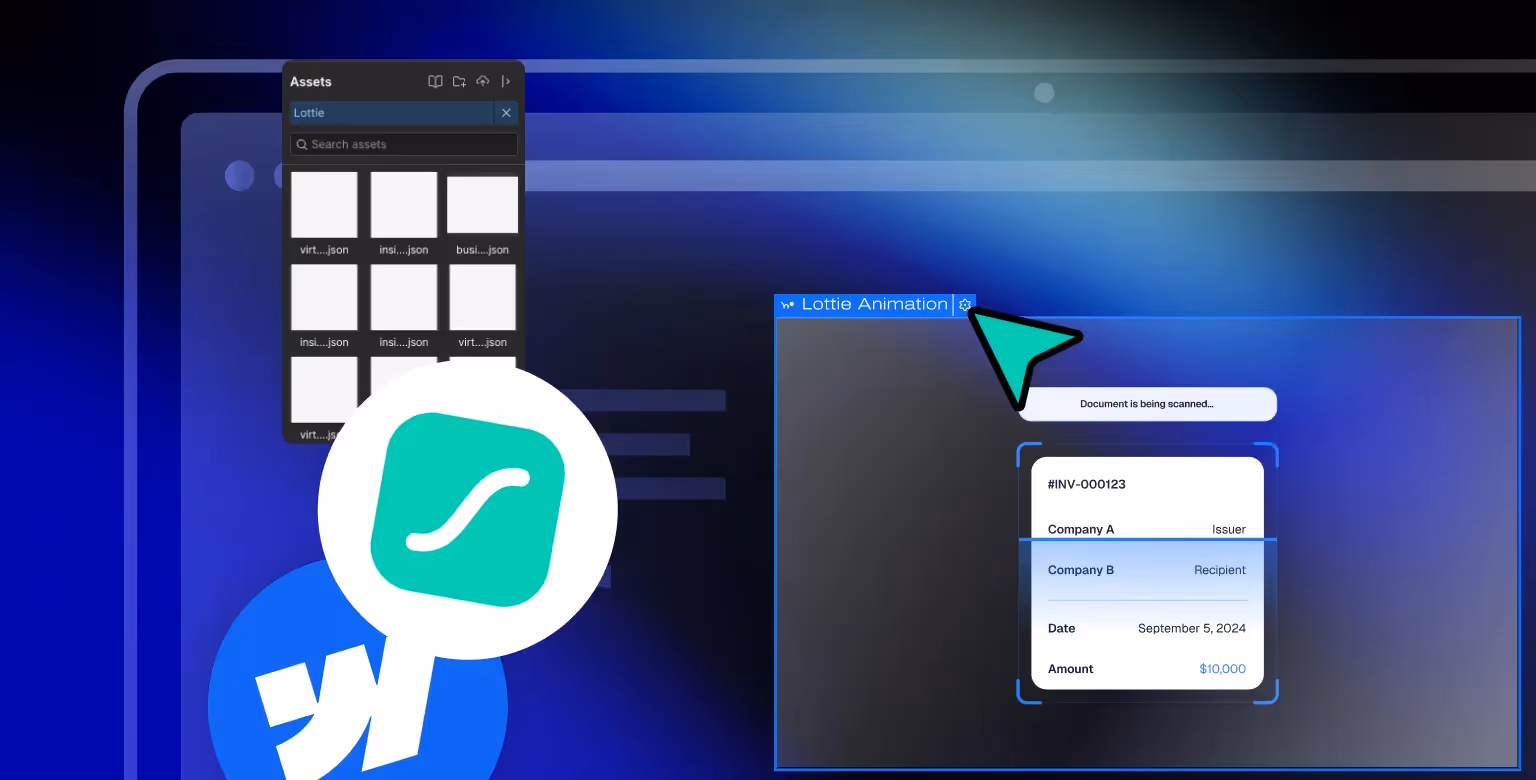
- In the Webflow Designer, click on the Assets icon in the left toolbar (it looks like a folder or stack of photos). This opens the Assets panel.
- Click the cloud upload icon at the top of the Assets panel. A file browser dialog will open.
- Select your Lottie JSON file (or .lottie file) from your computer and upload it. You can upload multiple Lottie files if you have several animations. The file will appear in your Assets list once uploaded, usually with a thumbnail preview.
Pro tip: Rename your Lottie file to something descriptive after uploading (e.g., hero-animation.json instead of a random string). This helps with file organization and can slightly improve SEO by generating a meaningful asset URL.Step 2: Add the Lottie Animation Element to the Canvas
Now that the file is in your assets, place a Lottie element on the page where you want the animation to appear:
- Go to the Add panel (the big “+” icon in the left toolbar). Scroll down to the Media section.
- Drag the Lottie animation element onto your desired spot on the page — like into a section or div block.
Alternative: Use Quick Find by pressing Ctrl+E (Cmd+E on Mac), typing “Lottie,” and hitting Enter to quickly insert the element. If you'd like to improve your workflow, we released an article on Webflow shortcuts that will help you speed up your Webflow builds.
Once added, you'll see a placeholder box labeled “Lottie Animation.” It won’t show your actual animation yet — we still need to connect the file.
Step 3: Bind the Lottie Element to Your Animation
With the Lottie element selected:
- Open the Settings panel (gear icon in the right sidebar).
- Click “Replace Lottie” or “Upload Lottie,” then select your uploaded file from the Assets panel.
- Once selected, the animation should play automatically in the Designer.
You can use the spacebar to toggle the animation preview on/off.
Note: the animation will also autoplay on the live site if it's in the initial viewport.
Step 4: Adjust Animation Settings
Within the Lottie Animation Settings, you can configure:
- Loop: Toggle to repeat the animation endlessly.
- Playback Direction: Play normally or in reverse.
- Speed: Adjust playback speed (e.g., 50% for half-speed).
- Render Mode: Choose SVG (sharper, more targetable) or Canvas (better for complex animations).
Note: If your animation is below the fold, it won’t play on page load unless it’s set to loop or triggered by an interaction. We’ll cover that in the next section. Pro tip: Remember that animations by default only play on page load if they are visible on screen. If your Lottie element starts further down the page (below the initial viewport), a user won’t see it play unless it’s looping or you trigger it with an interaction. So for any animations that start out off-screen, you’ll likely want to either enable loop or set up a scroll interaction (we’ll discuss interactions soon) so the user sees it when they scroll down.
Step 5: Resize and Position the Lottie Animation (Design as Needed)
At this point, your Lottie animation is functioning on the page. Now you can treat it like any other design element in Webflow to position and style it:
Resizing: Use the Style panel (paintbrush icon) to set specific width/height values or use percentage-based sizing for responsiveness. Because Lotties are vector-based, resizing doesn’t affect quality. For full-width applications, you might set width to 100%.
Positioning: Place the Lottie within your layout wherever needed. You can center it with Flexbox or margin auto, or absolutely position it for background effects. For example:
- In a two-column layout beside text
- Floating over a section for added flair
Spacing: Apply padding or margin using the Style panel to control spacing around the element. By default, Lottie elements have no spacing, so it’s up to you to provide appropriate breathing room.
💡 Design Tip: Treat a Lottie like a smart GIF or image. Avoid letting it obscure key content and ensure it flows well with the rest of your layout. You can add multiple Lottie elements across a page, but be mindful of performance if many are looping at once.
Step 6: Preview and Publish
Now that you’ve added and configured your Lottie animation, it’s time to preview your site and ensure everything works as expected:
- Click the Preview eye icon in the top-left corner of the Designer (or press
Shift+P). This enables Preview Mode and simulates the live site experience. - Scroll through your page and verify that the animation appears and plays. If it’s set to loop, confirm that it repeats. If it’s set to play once, ensure that happens as intended.
- If you’ve configured interactions (e.g., click, scroll), test those as well to confirm responsiveness.
Once everything looks good:
- Click the Publish button in the top-right corner to push your changes live.
- Open the published site in a browser to make sure everything loads and displays as expected on the frontend.
✅ Success! You’ve successfully added a Lottie animation to your Webflow site. Time to celebrate — and maybe try more!
Adding Interactions to Your Lottie Animation (Optional)
One of the most powerful features of using Lottie in Webflow is the ability to tie animations to Webflow Interactions. This lets you control when and how the animation plays based on user actions — like clicking, scrolling, hovering, etc. It’s a no-code process made possible through Webflow’s visual Interactions panel.
Here are a few common ways to add interactivity:
Play on Click (Toggle Animation)
You can configure your Lottie to play — or reverse — on a click. For example, clicking a button can trigger the animation, or clicking the animation itself can toggle it.
Steps:
- Select the Lottie element.
- Go to the Interactions panel (lightning bolt icon).
- Add an Element Trigger → Mouse Click.
- Under On 1st Click, set Lottie Playback to play from
0% to 100%. - Under On 2nd Click, add another playback action to reverse (from
100% to 0%) or reset to the start.
This is great for interactive icons — like a thumbs-up button that animates when clicked.
Play Webflow's Lottie Animation on Scroll
Use scroll progress to animate your Lottie file — ideal for storytelling or infographics that come to life as a user scrolls down.
Steps:
- Wrap your Lottie in a
div(can be section, main, or any other parent element) - Select that wrapper element.
- Choose While Scrolling in View as the trigger.
- Add a Lottie Playback action.
- Map
0% scroll = 0% animationand100% scroll = 100% animation.
This provides a highly engaging, fluid storytelling effect. We filmed a video to showcase the process of creating a Lottie animation on scroll in Webflow.
These scroll animations are great to increase your website's engagement. In case you'd like to explore other animations, we have written a guide on how to change background color on scroll as well as a guide on creating parallax effect in Webflow using Ukiyo.js.
Hover or Page Load Effects
You can also play Lottie animations when users hover over elements or when the page loads.
Steps:
- Choose the trigger: Hover or Page Load.
- Apply a Lottie Playback action to control animation start, speed, direction, or looping.
Webflow Lottie Interaction Types
Webflow supports two types of Lottie-related actions:
- Lottie Playback: Ties the animation to a timeline or continuous trigger (scroll, progress bar, etc.).
- Lottie Action: Triggers discrete playback actions (click-to-play, reverse, reset).
💡 Pro Tip: Always select the Lottie option when configuring the interaction to ensure Webflow targets the animation frames properly.
These interactions make your site feel alive. For instance, a B2B tech website might use scroll-based Lottie animations to walk users through complex features in a dynamic, visual way. Just be mindful of performance — use motion to enhance the experience, not distract from it.
Advanced: Using Lottie Animations in Webflow CMS
What if you want to use Lottie animations inside a Collection (CMS) item, so that different pages or blog posts display unique animations dynamically? Webflow’s native Lottie element currently doesn’t bind to CMS fields (there’s no “Lottie” field type), but there’s a simple workaround using an embed and a CMS field for the animation URL.
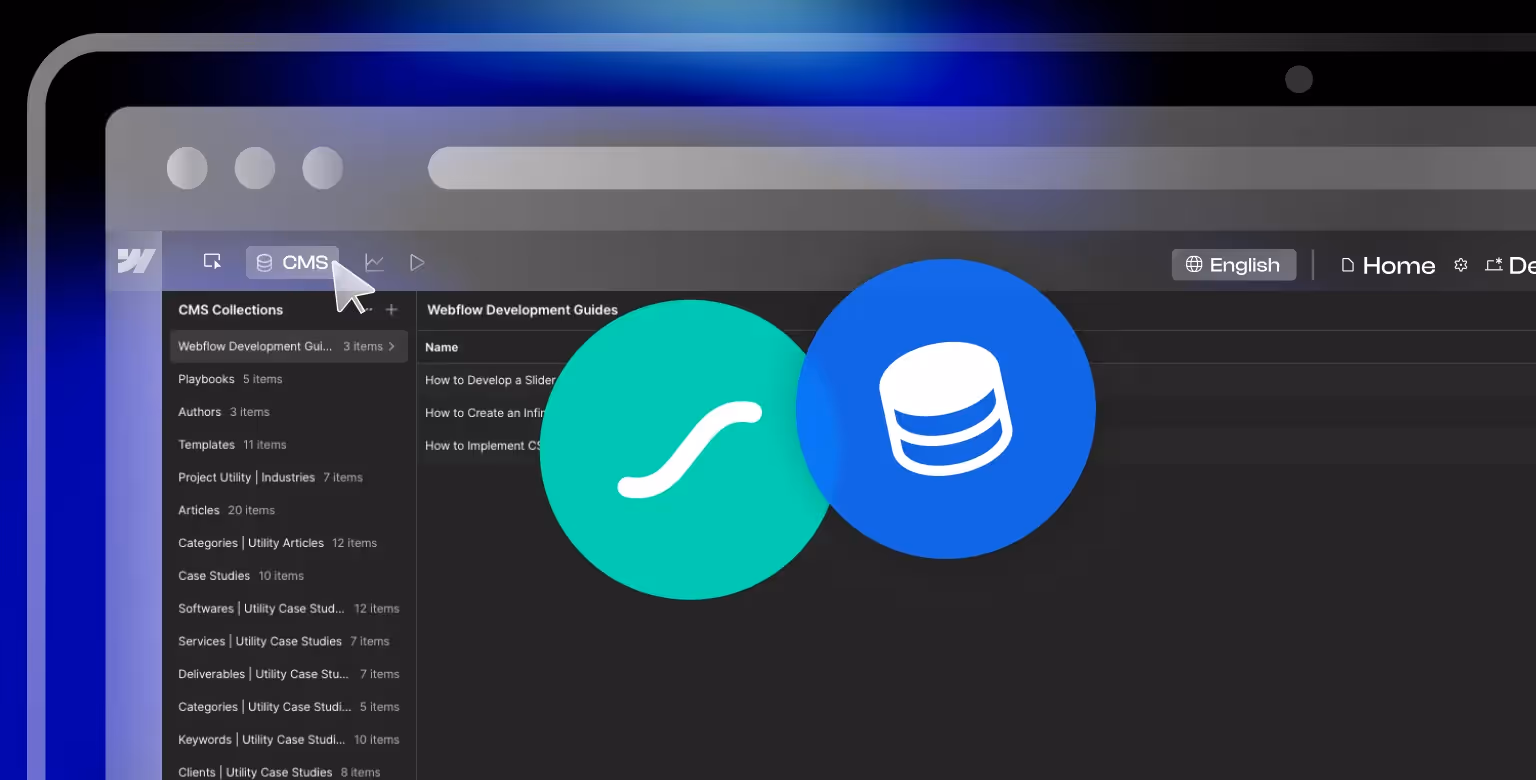
How It Works
The core idea is to:
- Store the Lottie file URL in a CMS field.
- Use an Embed component to dynamically load that file using the Lottie Player web component.
Step-by-Step Process
- Upload Your Lottie Files
- Go to your Webflow Assets panel.
- Upload the
.jsonor.lottiefile. - After uploading, hover over the file and copy its published URL.
- Add a CMS Field
- In your CMS Collection, add a URL field (e.g., "Lottie Link").
- Paste the Lottie animation URL into this field for each item that needs an animation.
- Insert Embed in the CMS Template or Collection List
- Drag an Embed element into your Collection Page or Collection List.
- Add the following code:
1<script src="https://unpkg.com/@lottiefiles/lottie-player@latest/dist/lottie-player.js"></script>
2<lottie-player
3  src="ADD LOTTIE LINK HERE"
4  background="transparent"
5  speed="1"
6  style="width: 100%; height: 100%;"
7  loop
8  autoplay>
9</lottie-player>- </lottie-player>
Replacelottie-linkwith the actual name of your CMS field.
When to Use This Approach
This method is useful for dynamic, visual storytelling — such as:
- Showcasing unique Lottie animations for each portfolio project
- Displaying animated icons on blog posts
- Highlighting product features visually within CMS-driven content
Although this requires a small code embed, it’s still a low-code solution and works well for most teams. If you’re not comfortable editing embeds, static pages or Symbol overrides can serve as alternatives.
⚙️ Note: Be sure to test your CMS templates after publishing to confirm that each animation loads and plays correctly.
To showcase how this CMS based animation would work, we're embedding a Lottie we made for one of ourclient projects, Vision Studio.
Best Practices for Using Lottie in Webflow
To ensure your Lottie animations enhance your site (and don’t unintentionally cause issues), follow these best practices:
Optimize Animation File Size
While Lottie files are typically lightweight, complex animations can still weigh several hundred KB. Try to minimize animation length and avoid excessive embedded images. If available, use the optimized .lottie format instead of JSON to help your site load faster.
Use Animations Purposefully
Every Lottie animation should serve a clear purpose:
- Draw attention to key CTAs
- Visually support written content
- Add subtle delight without distracting users
On B2B or professional sites, animations should complement — not overpower — the message.
Test on Devices and Browsers
Lotties work well in modern browsers, but always:
- Test on mobile and tablet devices
- Check for layout shifts or lag
- Consider hiding intensive animations on small screens if they’re not essential
Mind the Initial Load
Avoid overwhelming users by auto-playing too many animations at the top of the page. Instead:
- Loop only necessary animations
- Use scroll-based interactions to trigger animations when they come into view
This balances engagement with performance.
Accessibility Considerations
Lottie animations are canvas or SVG elements and not inherently readable by screen readers. For accessibility:
- Don’t rely on animations alone to convey critical information
- Use descriptive text or labels nearby
- Add
aria-hidden="true"to decorative animations via custom embed code
Keep SEO in Mind
Animations won’t directly impact your SEO rankings, but they do affect:
- Engagement metrics (like time on site and bounce rate)
- Load times (which impact core web vitals)
Be sure to name Lottie files descriptively and pair them with meaningful written content for context.
Troubleshoot When Necessary
If your Lottie isn’t playing as expected:
- Check that loop and trigger settings are configured correctly
- Make sure the animation is in the visible viewport (or triggered by scroll)
🛠️ Pro Tip: A common issue is off-screen Lotties playing and finishing before users scroll to them. Loop or trigger playback on scroll to solve this.
And if you're stuck or working with high-stakes animations, consult a Webflow expert or developer. Sometimes a second pair of eyes can save hours of debugging.
Behind the Scenes: How We Built Custom Lottie Animations for Blockpeer Finance
To show how this works in a real-world project, here’s a behind-the-scenes look at how we created one of the custom Lottie animations for one of our clients, Blockpeer Finance — from idea to Webflow implementation.
Step 1: Strategy Session
We started the project with a strategy session that included a product walkthrough and live demo from Blockpeer’s team. This gave us access to the platform and a better understanding of the product’s functionality and user flows.
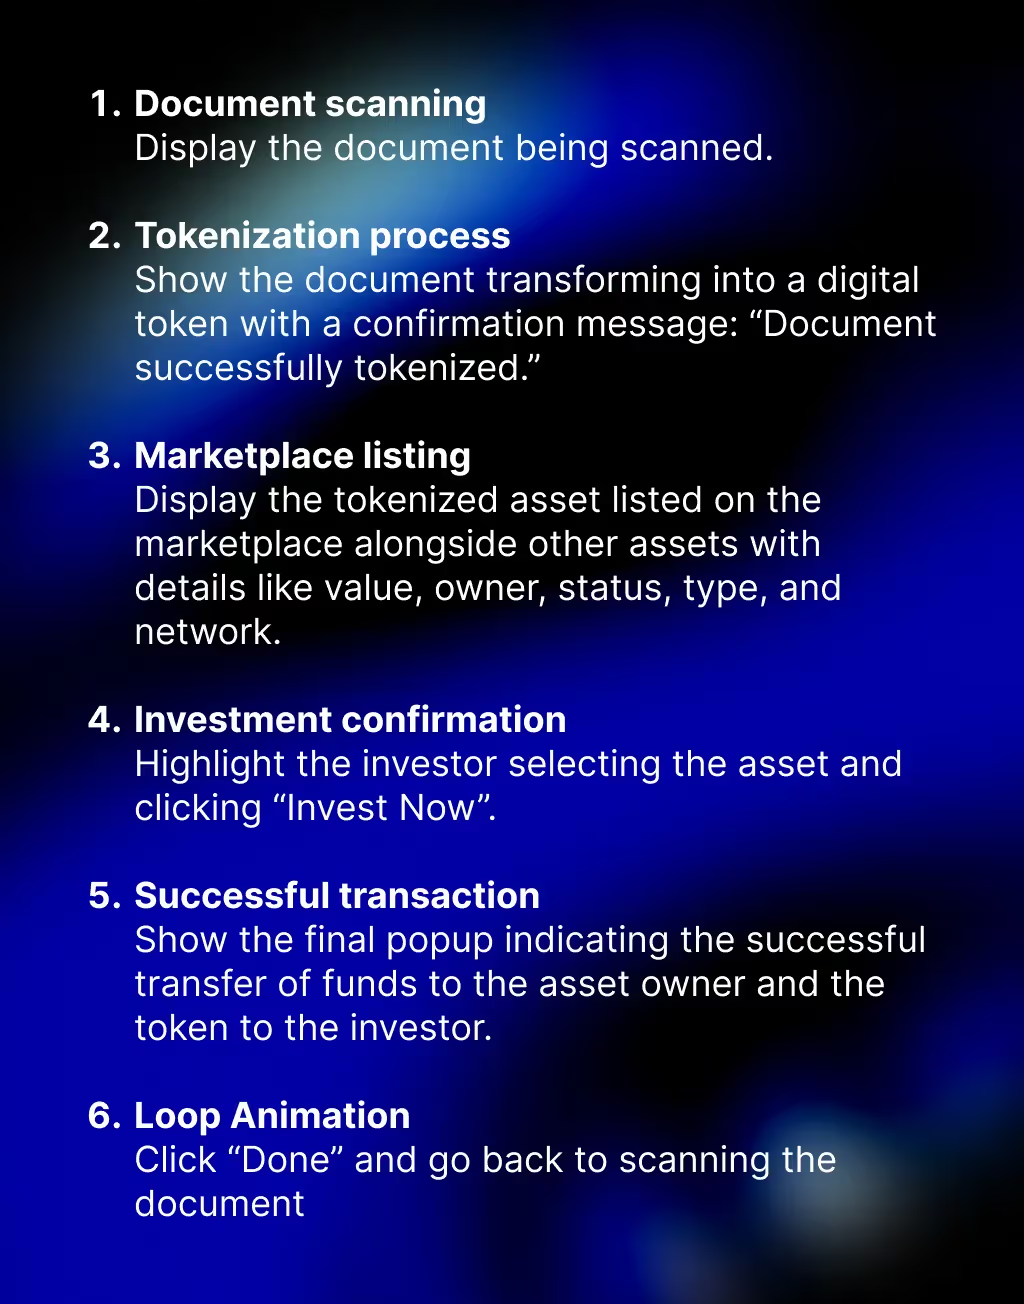
Step 2: Storyboard Planning
From the notes gathered during the session, we developed a rough storyboard outlining what the animation needed to communicate visually — key transitions, narrative logic, and UI references.
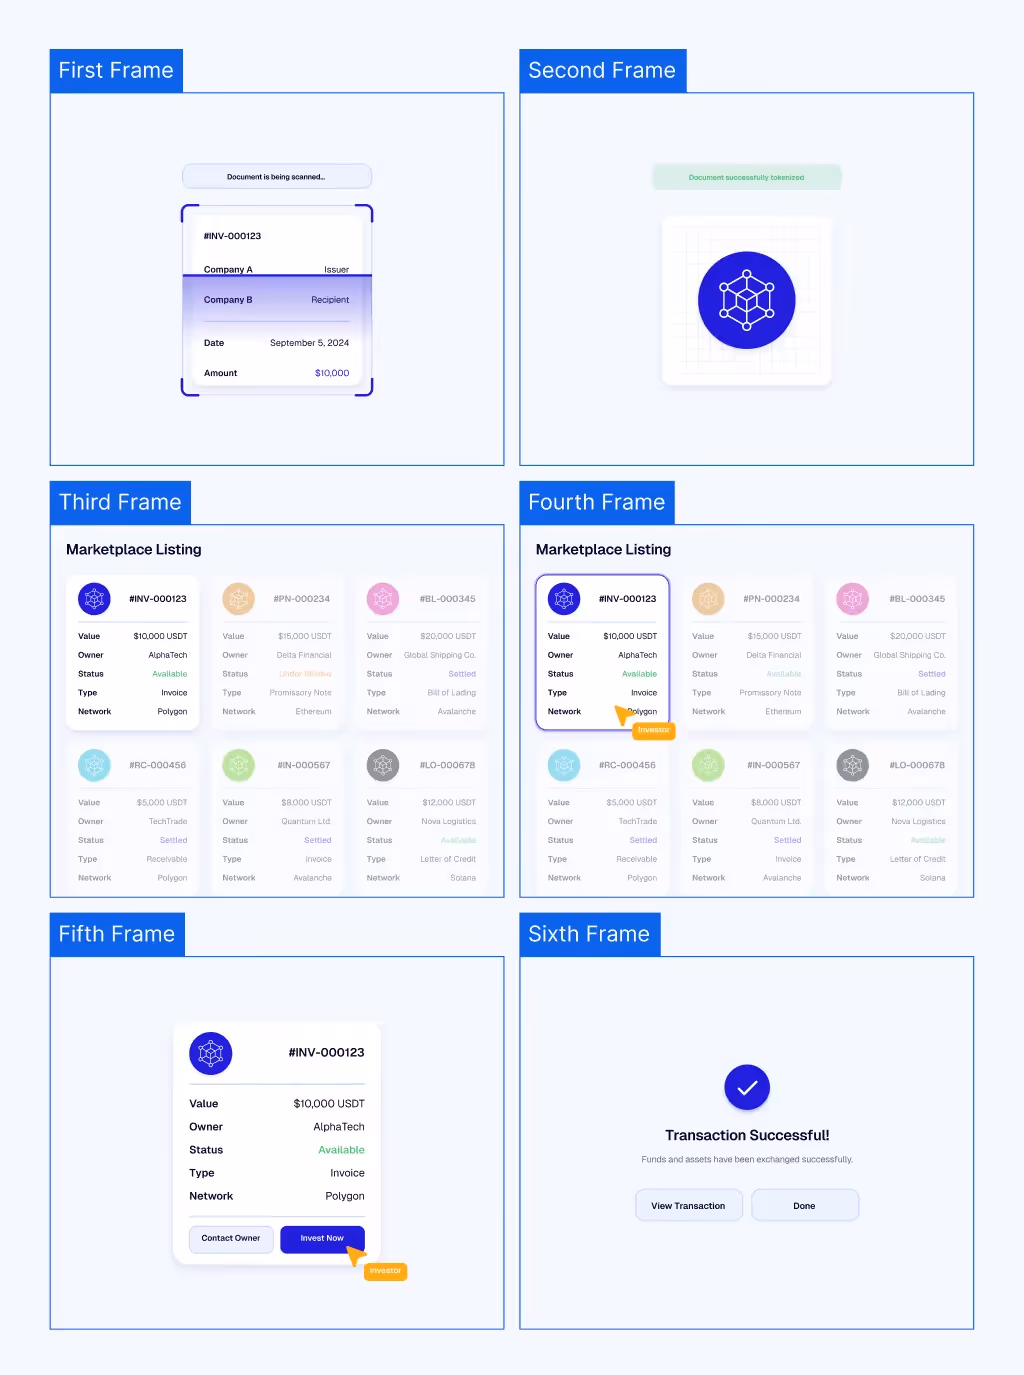
Step 3: First and Last Frame Design
Before committing to the full animation, we designed the first and last frames to establish direction, style, and tone. These static visuals were shared with the client for quick feedback and approval.
Step 4: Frame Design
Once the client approved the visual direction, we designed the rest of the intermediate frames required for the animation. These illustrated each key step of the motion narrative.
Step 5: Animate in After Effects
Using Adobe After Effects, we animated the frame sequence — ensuring smooth timing, clear transitions, and a rhythm that matched the client’s brand tone.
Step 6: Export as Lottie
We exported the animation using the Bodymovin plugin to generate a .json Lottie file. We optimized the export settings to reduce file size while maintaining visual fidelity.
Step 7: Lottie Webflow Integration
The .json file was uploaded into Blockpeer’s Webflow project, and added using the Lottie element within the Designer view.
Step 8: Playback Settings
In the element settings panel, we configured the animation to use its original timing and to loop indefinitely, ensuring smooth visual reinforcement without being intrusive.
🎬 The result: A lightweight, dynamic animation that plays seamlessly within Blockpeer’s hero section, adding polish and personality without slowing down performance.
Conclusion
Lottie animations open up a world of creative possibilities on your Webflow site — engaging visitors with movement and interactivity while keeping your pages lightweight and fast.
In this guide, we covered everything a beginner needs to know to successfully add Lottie animations in Webflow:
- What Lotties are and where to find them
- How to add and configure Lotties in Webflow
- How to control them using interactions
- Advanced usage via CMS integration
You’ve also seen how even marketers and non-developers can confidently implement animations that rival custom-coded sites.
As you experiment, you’ll uncover new ways to use Lottie animations to:
- Make landing pages more dynamic
- Explain product features visually
- Reinforce your brand personality
🎯 Remember: The key is to use Lottie animations intentionally — to guide attention, create delight, and support your message.
And with Webflow’s no-code flexibility, it’s easier than ever to pull this off without writing a single line of code.
Our Webflow Development Agency specializes in building interactive experiences for modern brands. Likewise, our B2B Web Design Agency knows how to use motion to convert in business environments.
Now it’s your turn: start small with a loader or icon animation, and gradually level up. With a bit of practice, your Webflow site will feel more alive, modern, and memorable.
Happy animating!